A while back my partner wanted a new piece of furniture: a vanity so that she could have a dedicated spot for beauty labor. As a clueless guy, I just nodded and said ‘yes, this makes sense, as I have dedicated spots for all kinds of random types of labor’. We generally prefer purchasing antiques of heirloom quality if possible. Our house was built in the 60s, and so we go with a vague southwestern mid-century modern motif. Sites like Chairish are good sources for these items, among some great local places such as Adobe House and AZ Modern.
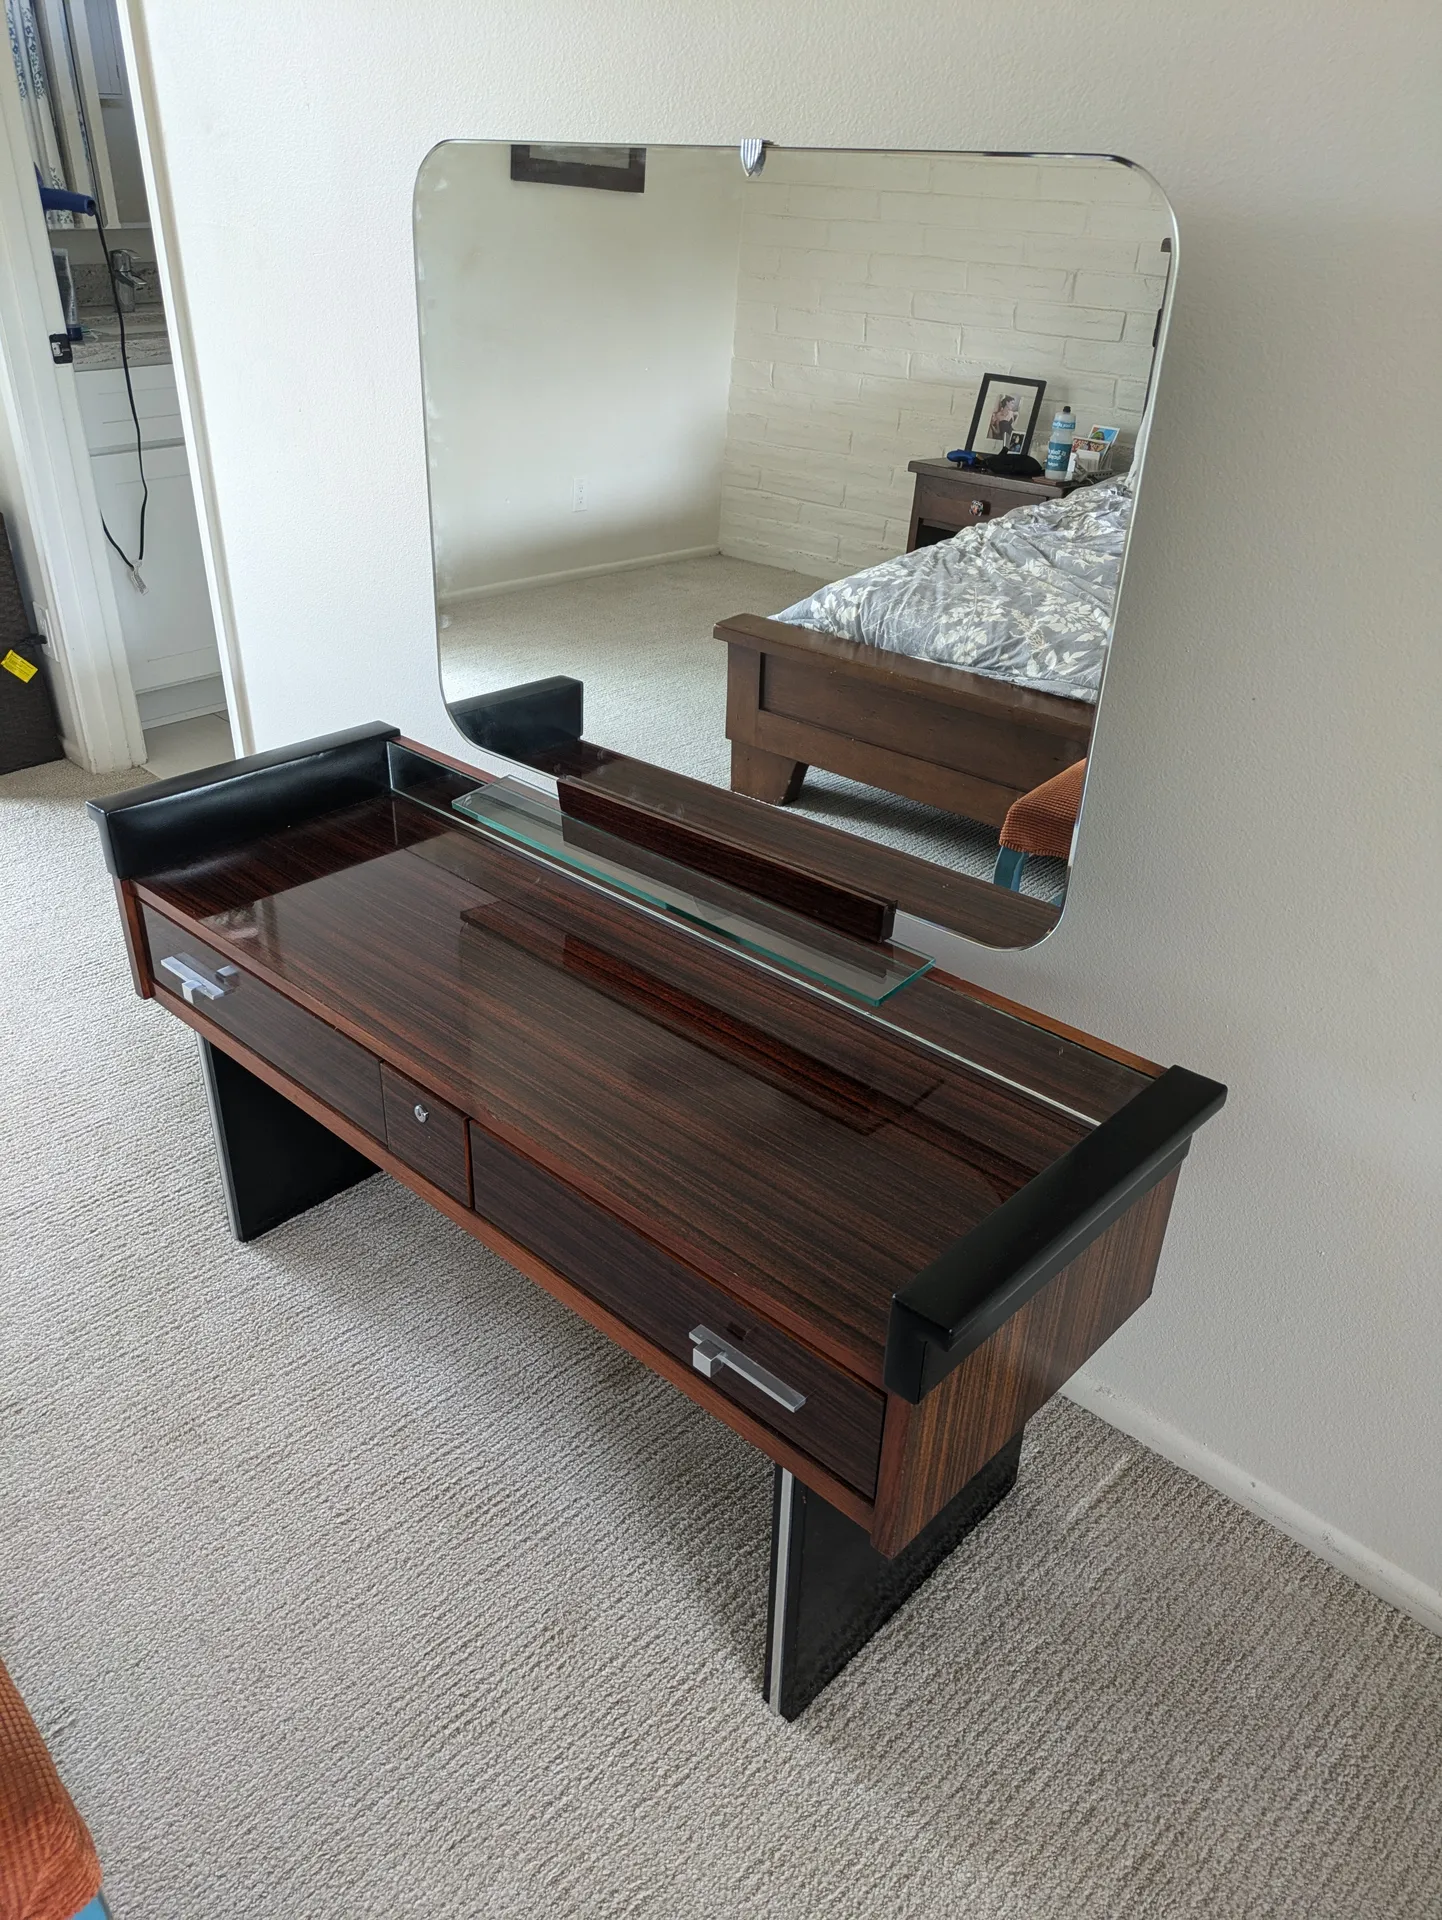
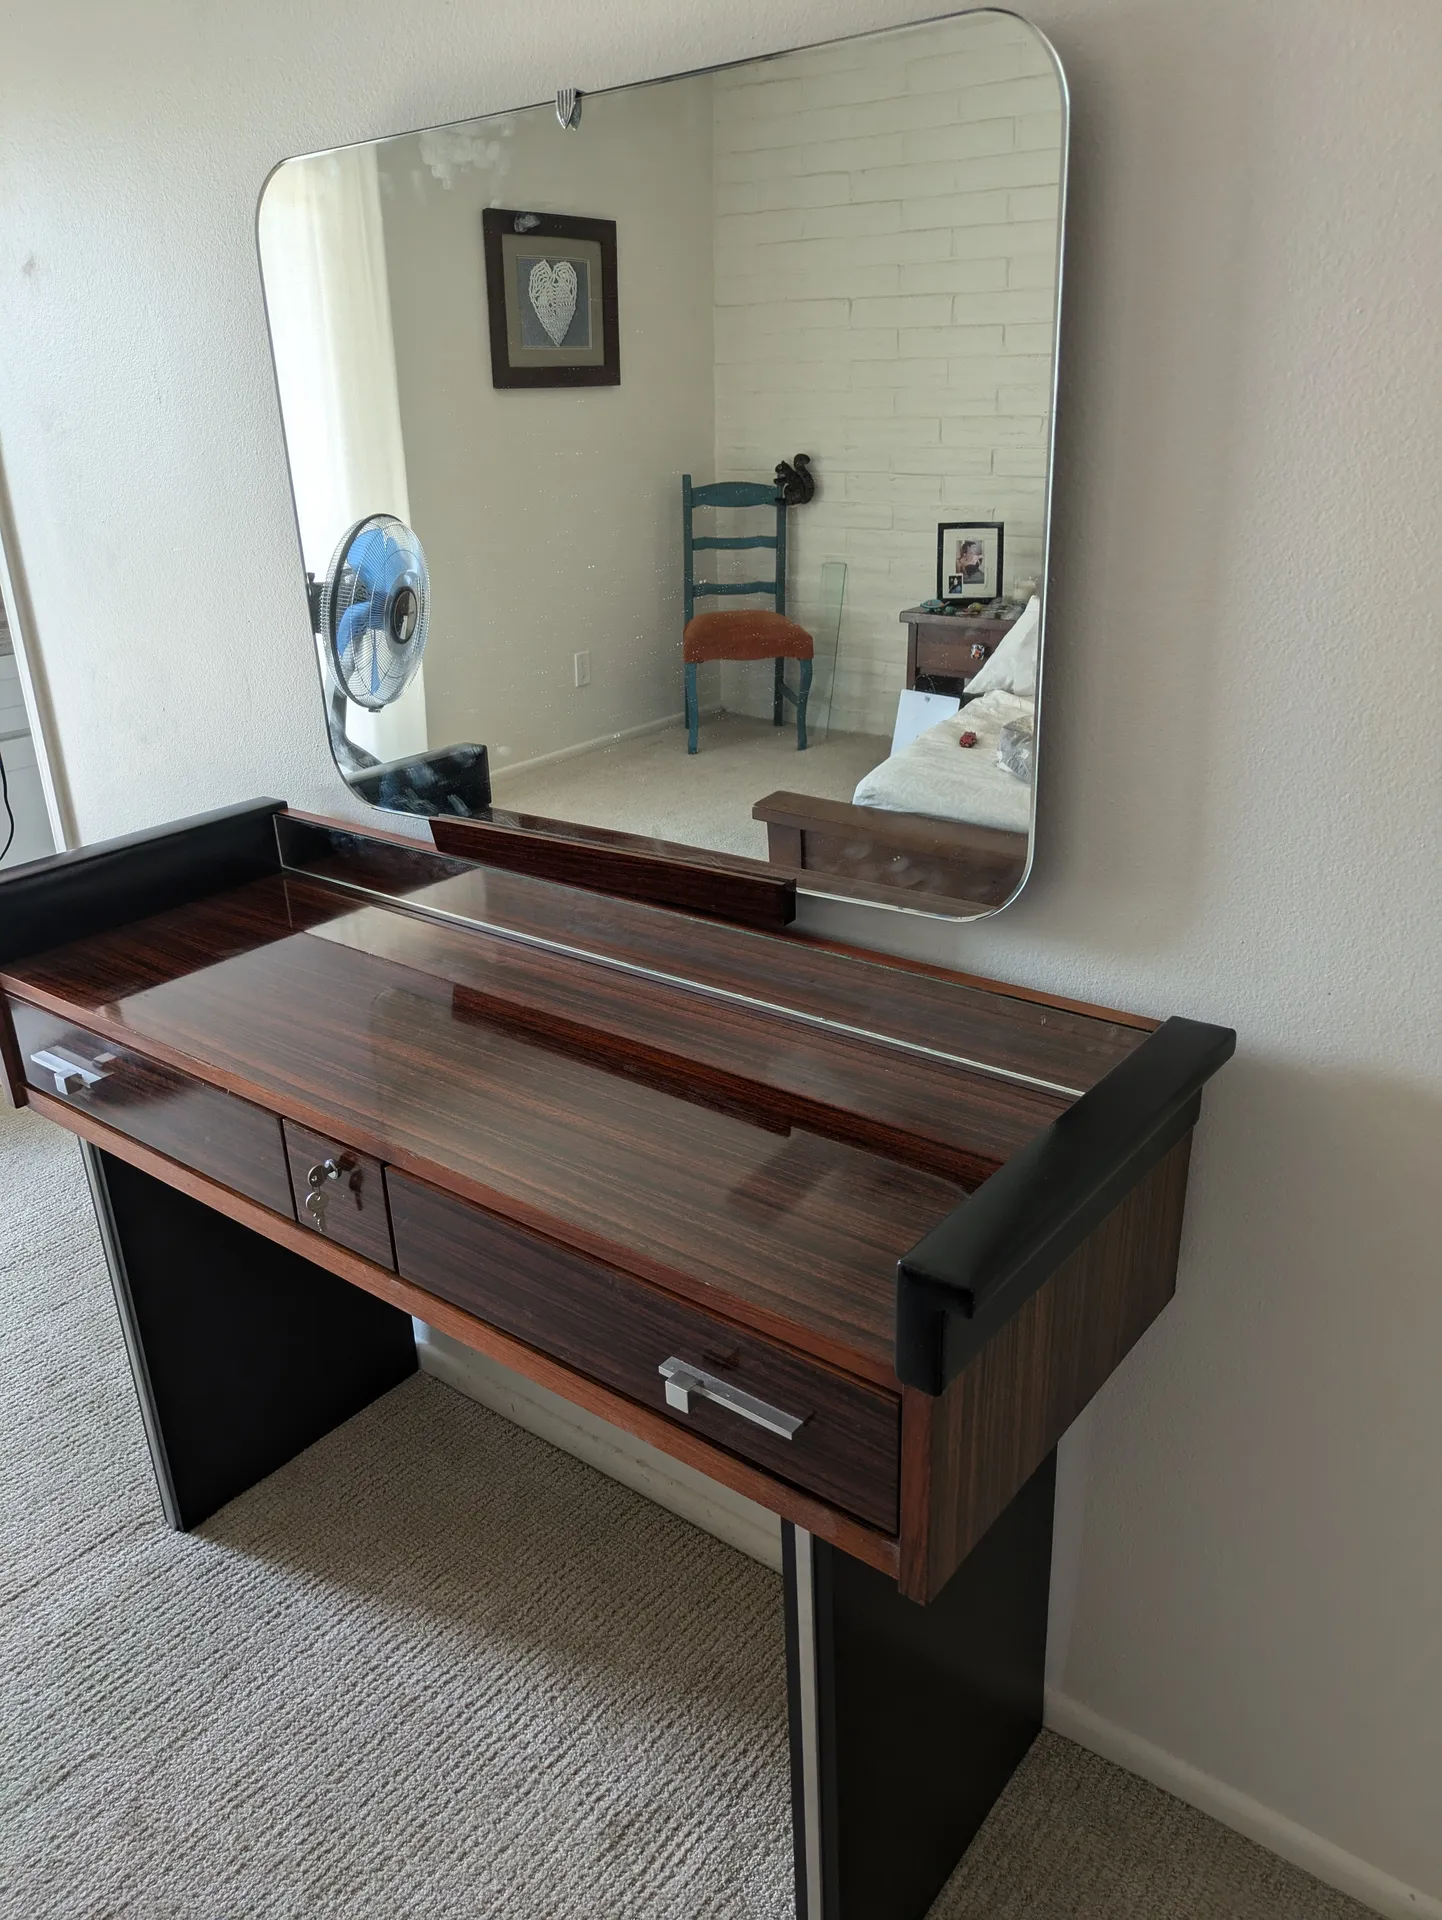
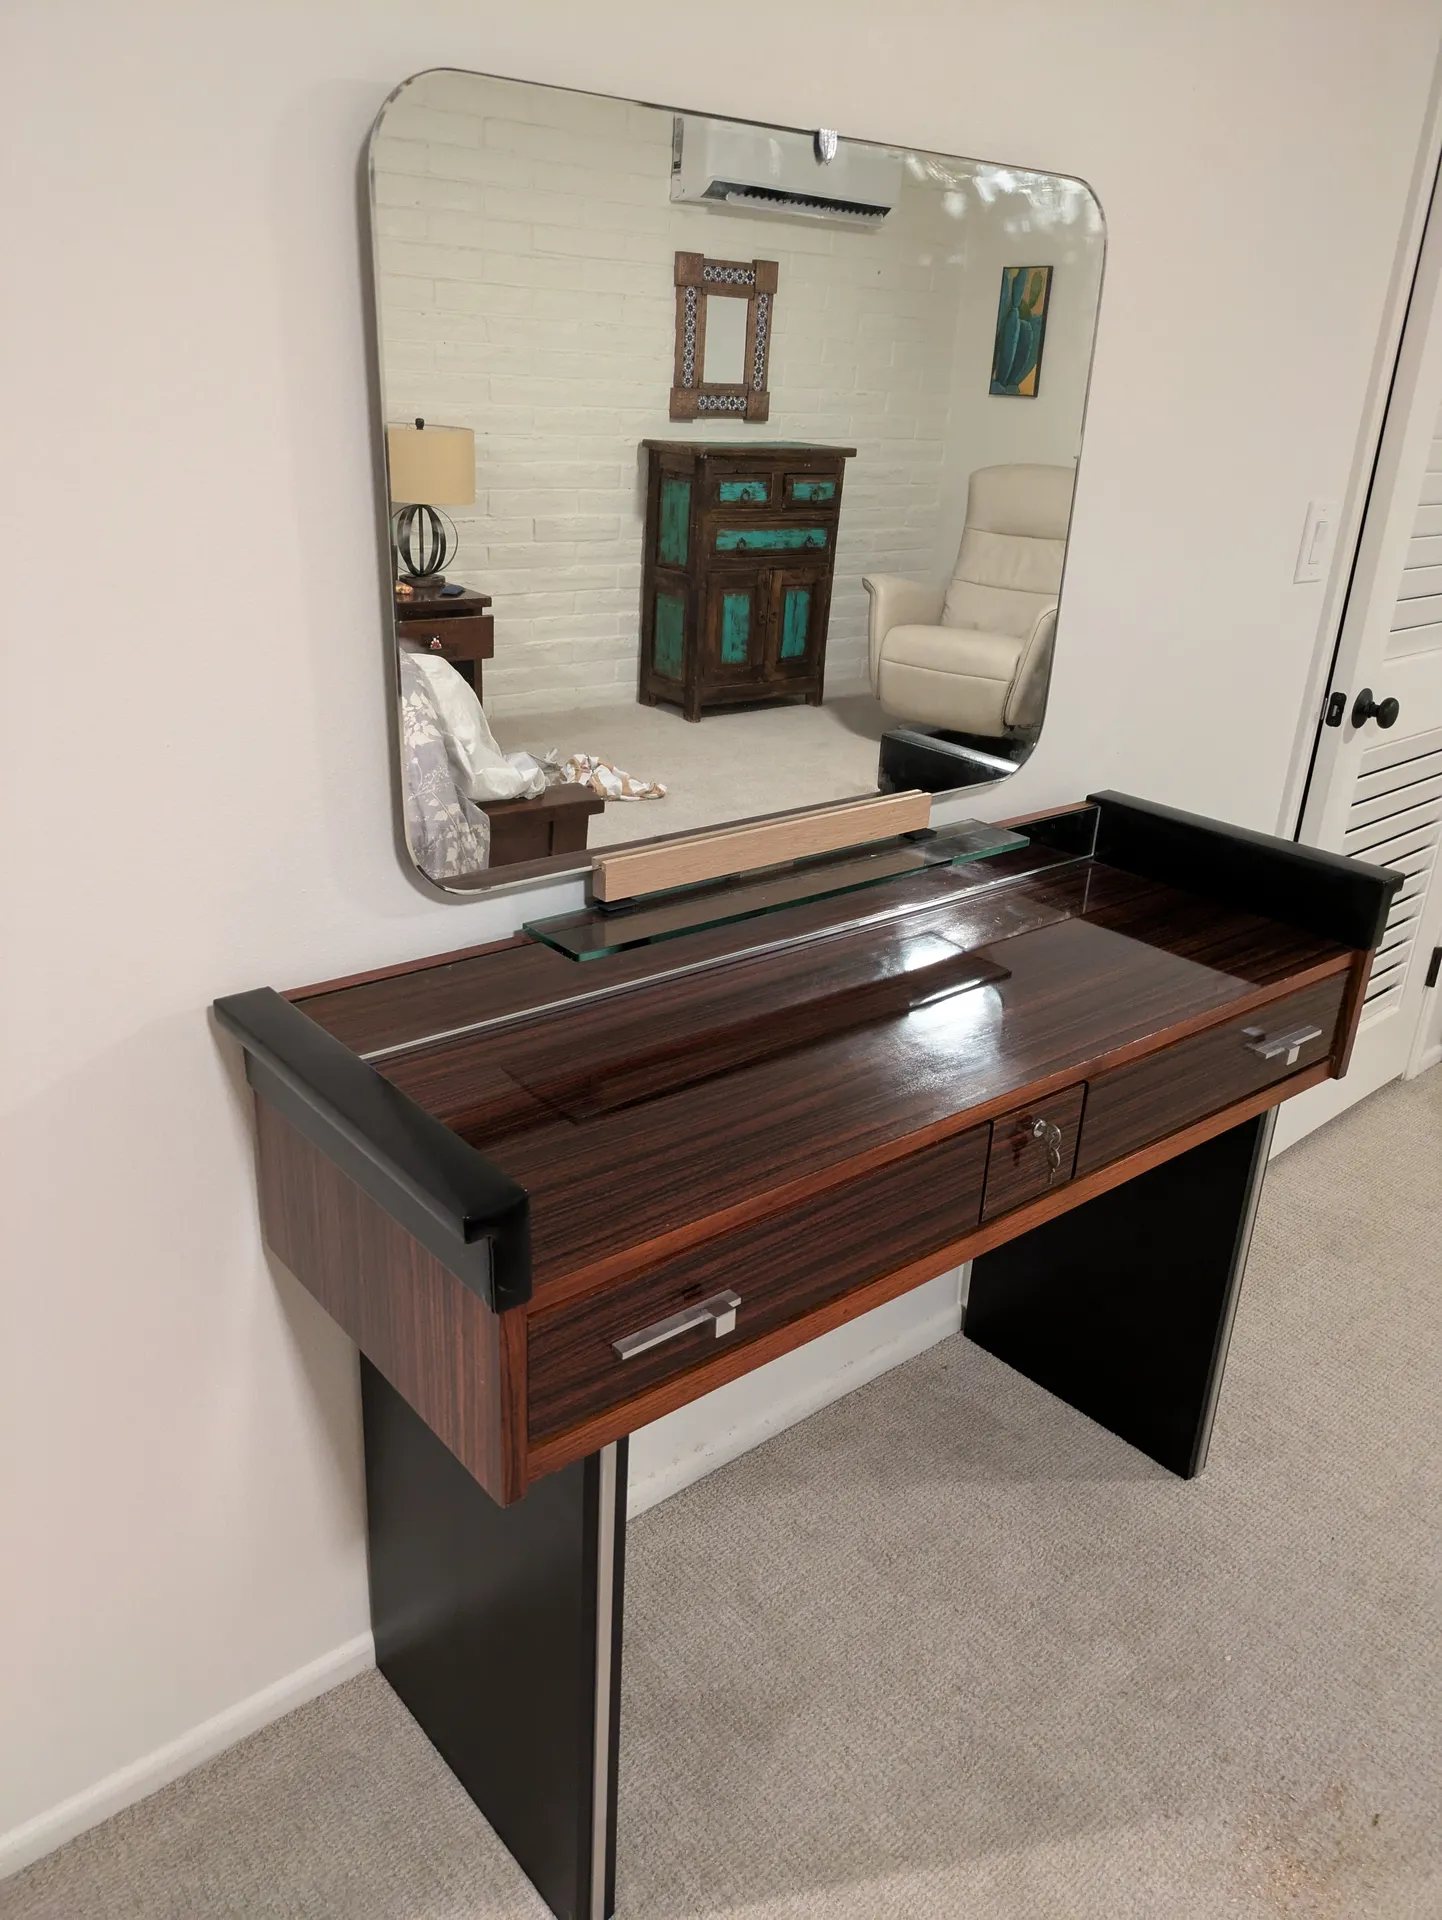
We ultimately found what seemed like a great unique piece. It was a beautiful rosewood piece with a unique mirror. It might be less MCM and more 80s, but that’s ok, we’re not purists.
It was located in an antique shop in Austin, and we decided to pay to have it shipped to us. This was the first, and ultimately last, time we bought a piece of used furniture online.
Here is the before:
And the after:
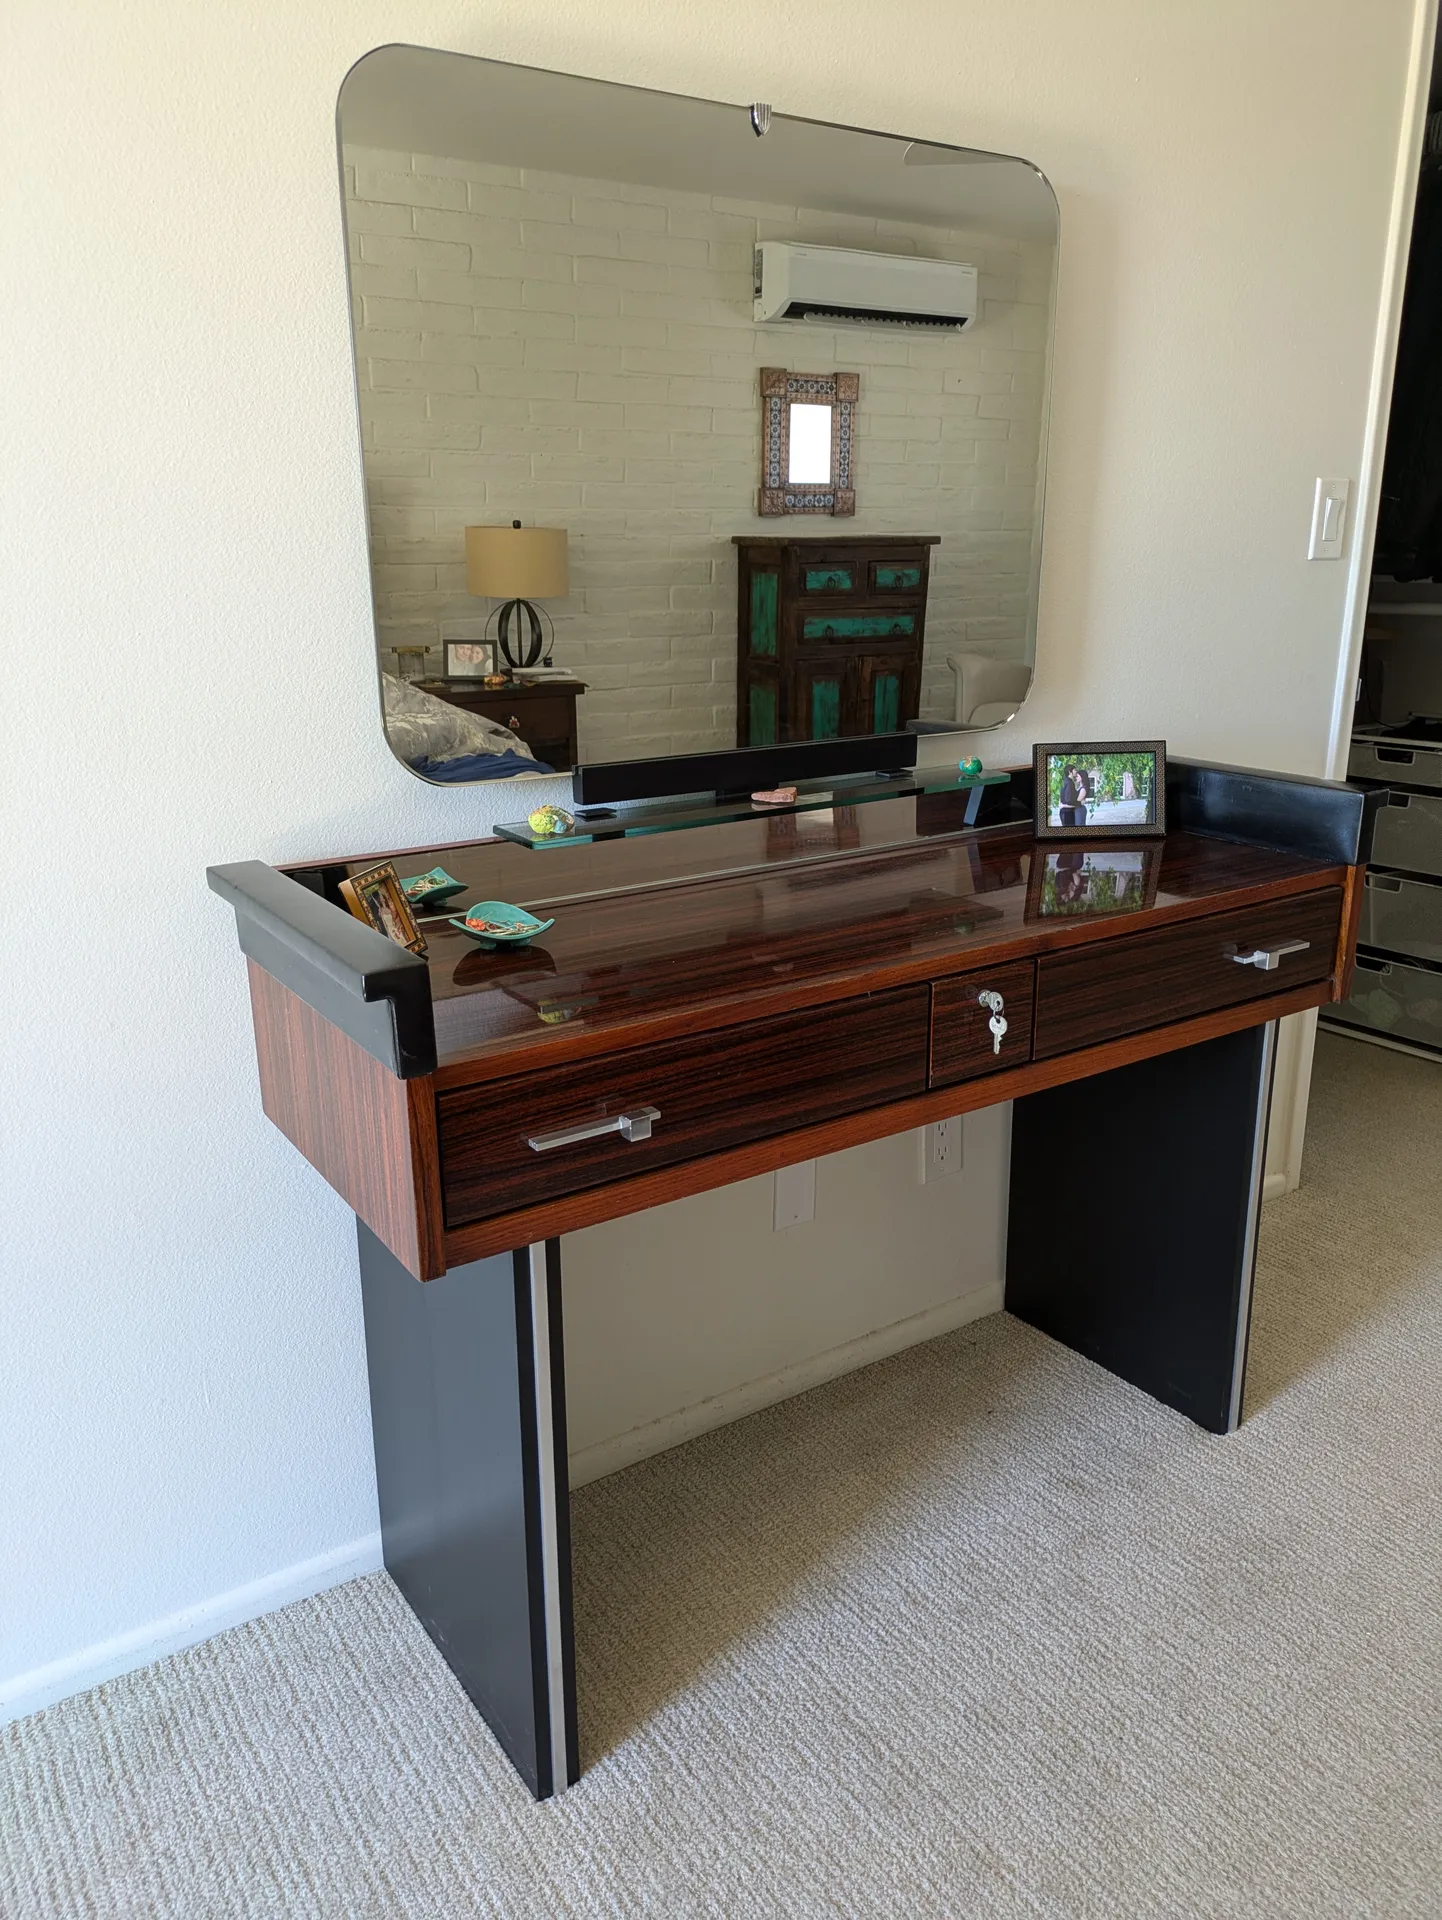
Thankfully it all worked out in the end. Even if this thing is a mutt, my partner loves it after I fixed all the problems.
The Problems
It was damaged during shipping, and there were a number of red flags on the piece itself, and honestly looking back I should have sent it back. I was crazy for keeping it. The problems?
- It wasn’t rosewood, but rosewood veneer.
- The horizontal slat holding the mirror was extremely warped.
- A glass ‘shelf’ which was literally just wedged under the mirror.
- The mirror was attached into the mdf with what looked like a literal fencepost.
- The mirror wasn’t even centered, vertically or horizontally.
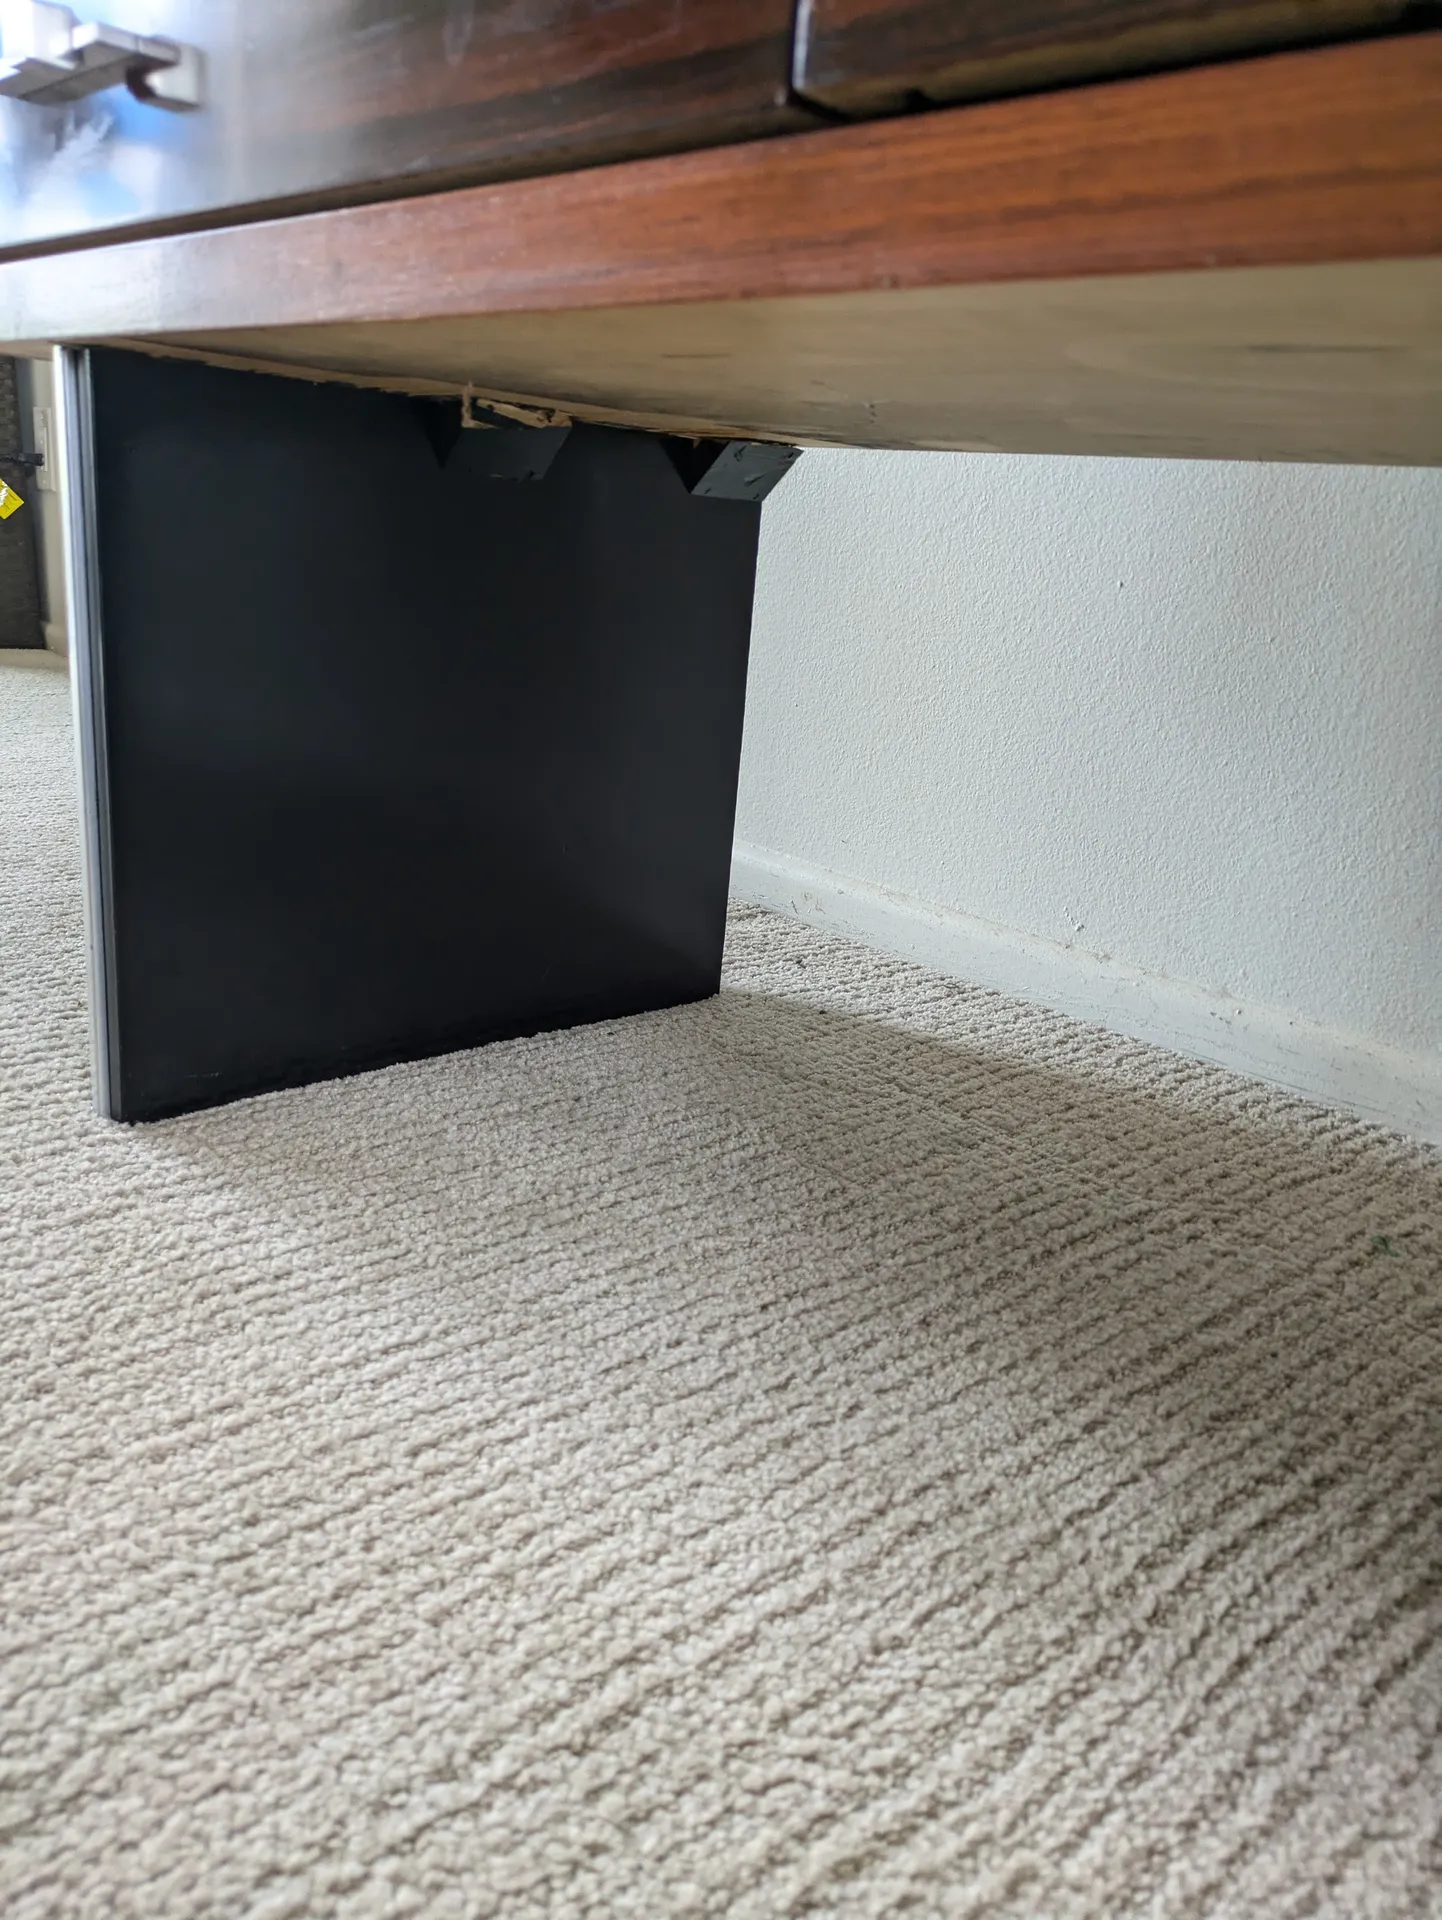
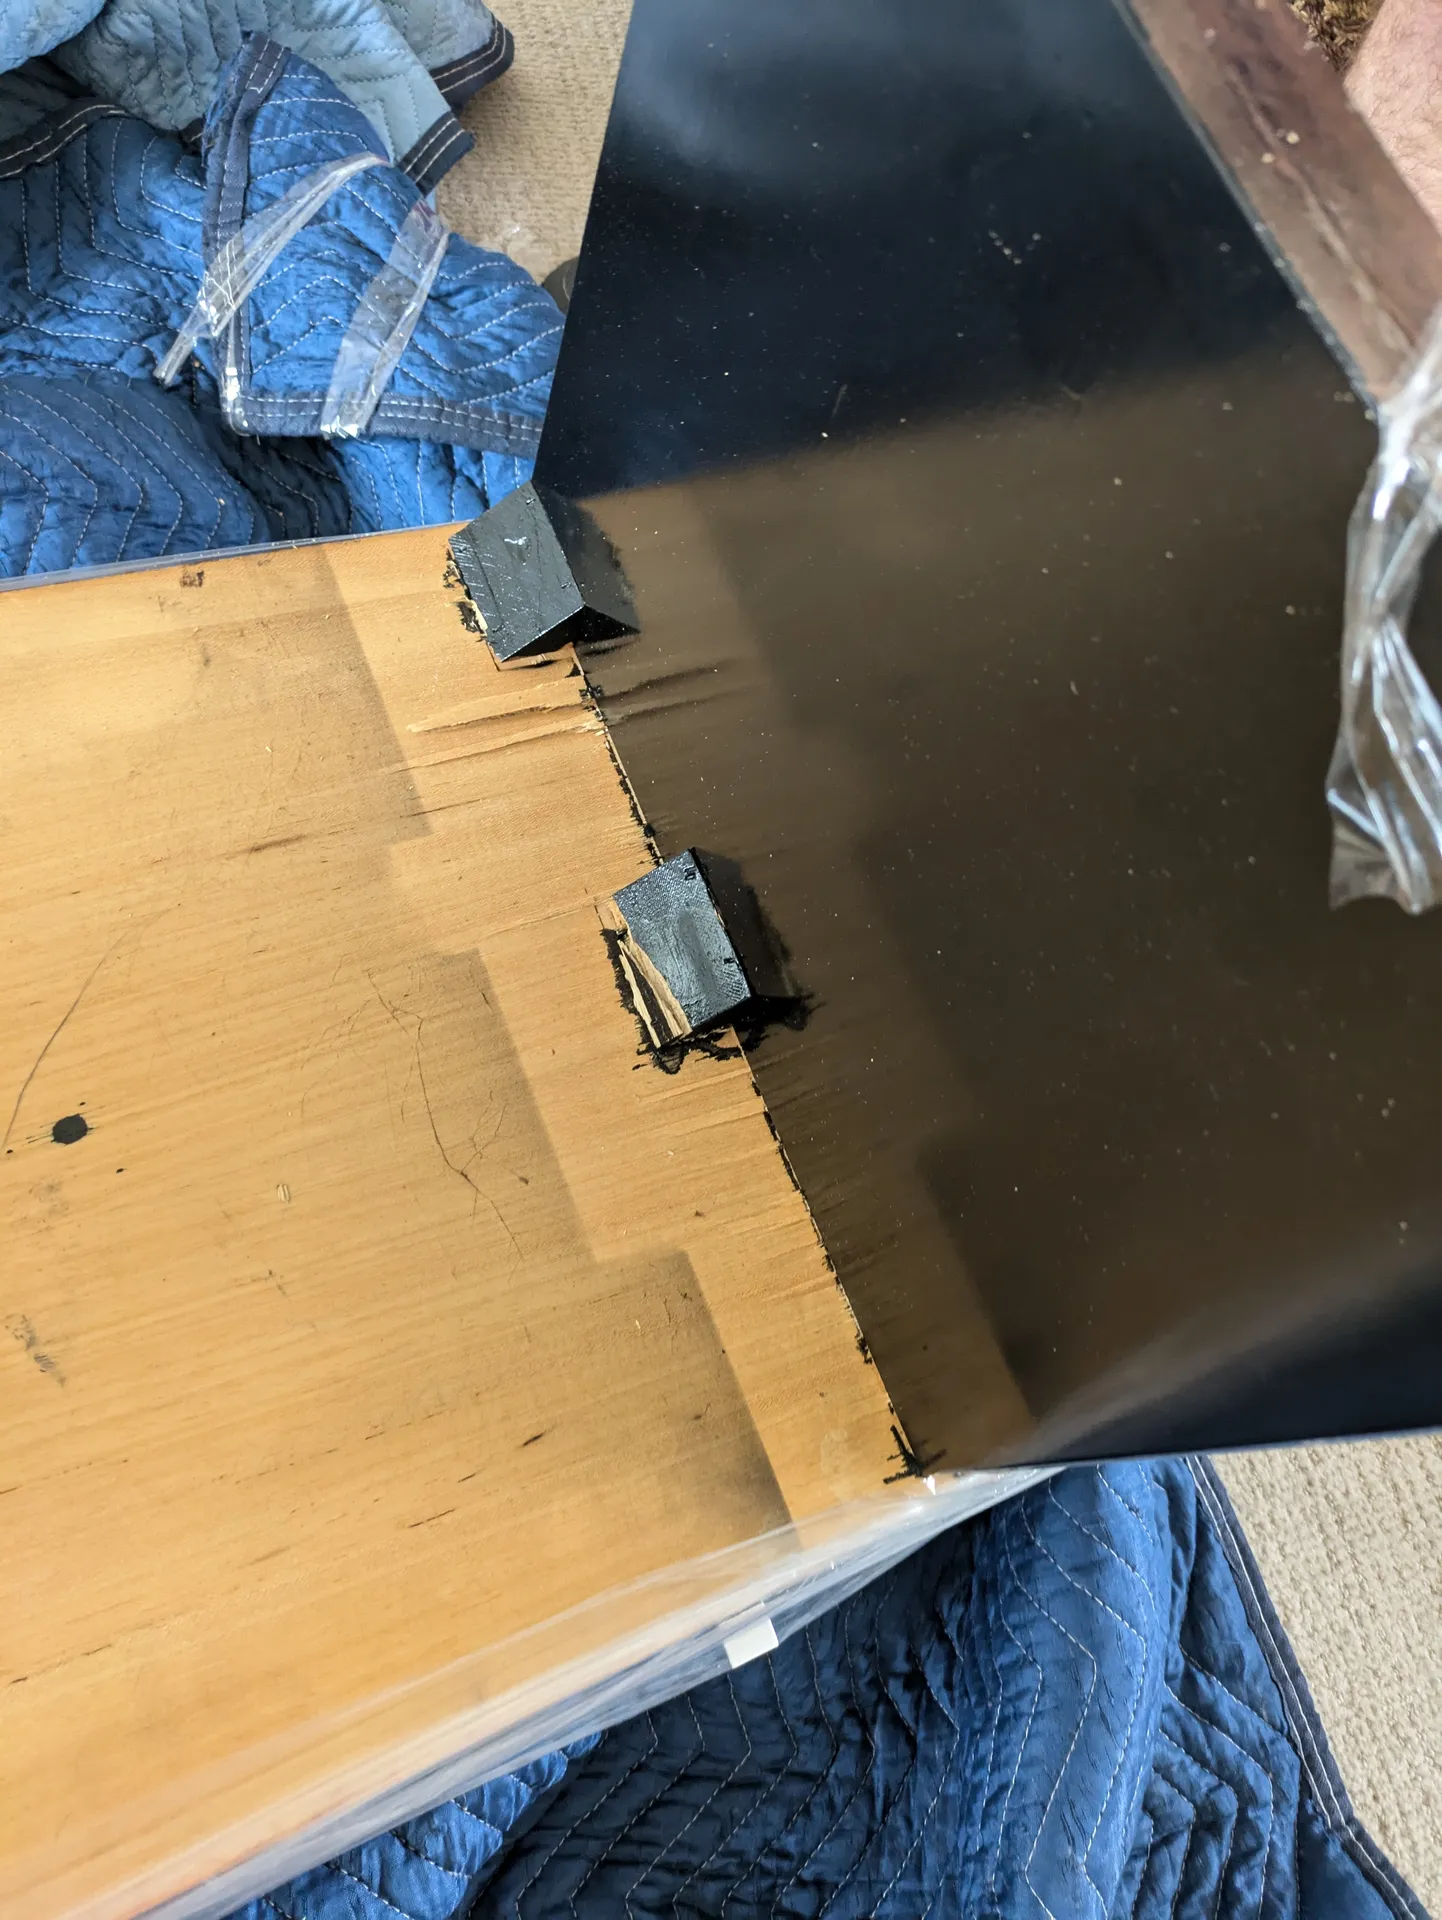
- The legs had no stretcher between them. While I watched the delivery man unload the vanity, the leg bent in a direction it shouldn’t, which damaged the small wooden brackets that ‘held’ it in place.
- We thought it was desk height, it was obviously not.
I’ve bought some real stinkers in my time, but this is very possibly one of the worst purchases I’ve ever made. It was $2000 plus $800 to ship it from Austin. Almost $3000 for a piece of MDF furniture that was essentially a mutt of different parts hobbled together.
Mental Problems
At this point you might be asking why I didn’t just return it, ask for my money back, or set it on fire. These would probably have been more logical courses of action, but the reality is that I’m a problem-solving-aholic. I see a problem and I want to find a solution. I know I’m not alone. In the face of very obvious reasons not to, we still invest way too much time and effort into something that’s not worth it.
Building the Base
The first thing was I talked with a couple woodworking friends to try to figure out the best way to build this. Should I try to use engineered lumber? Or build panels out of solid wood? I initially thought that engineered lumber would be better, as it would be lighter, and possibly cheaper. But then I realized that the amount of work required to build it out of plywood/mdf and veneer wouldn’t be much easier than making some thick panels. So panels it is!
The next choice was wood. I was recommended poplar or maple. I went with maple, and grabbed a couple thick pieces from Hood Distribution.
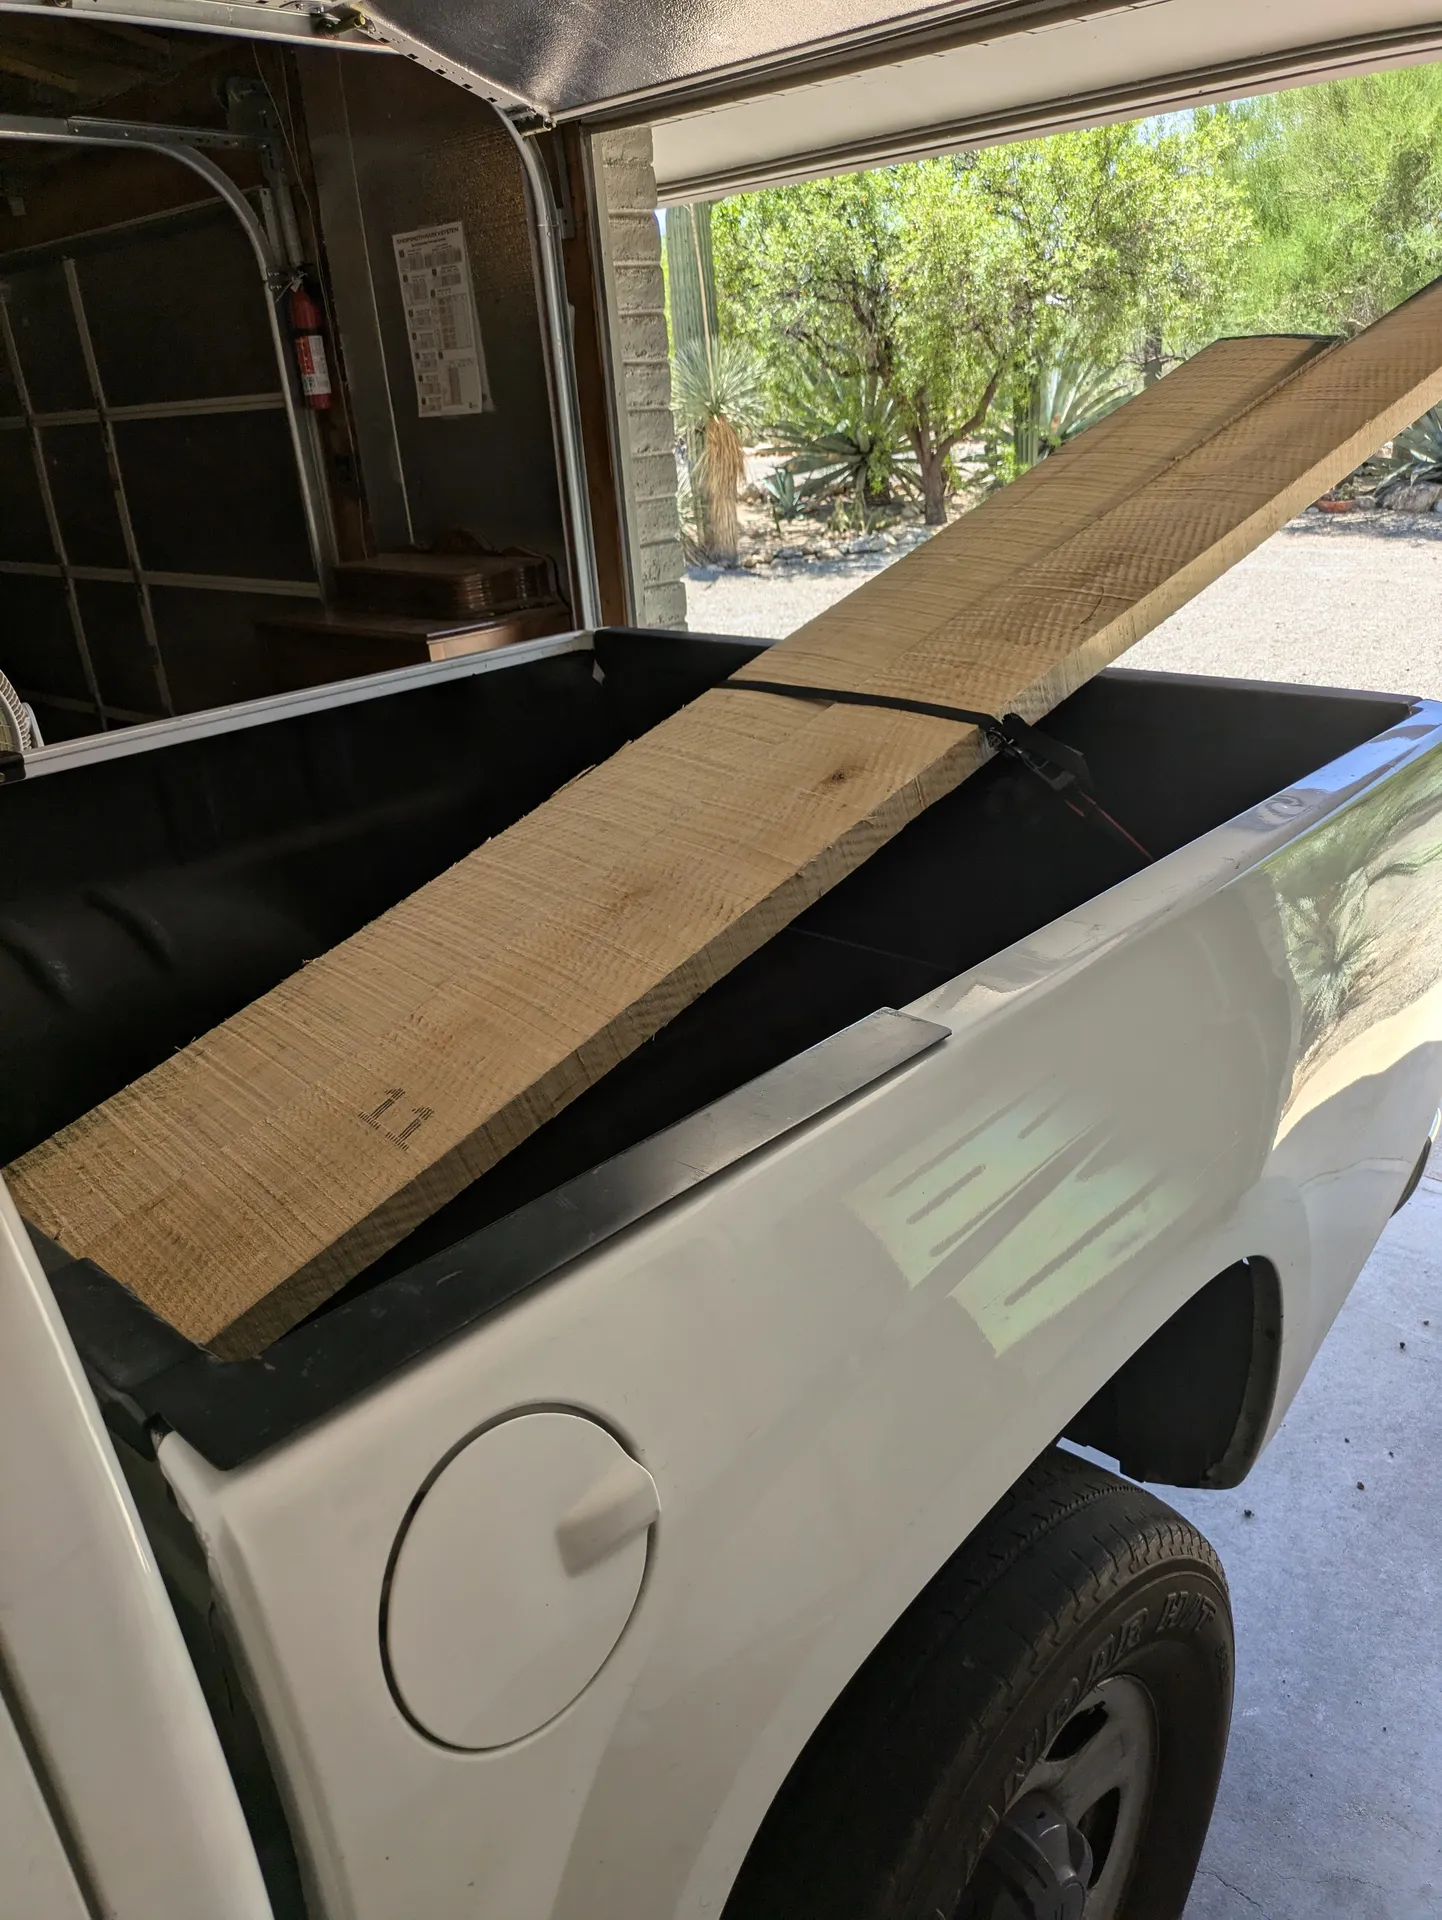
I then dimensioned these to size and made a couple panels:
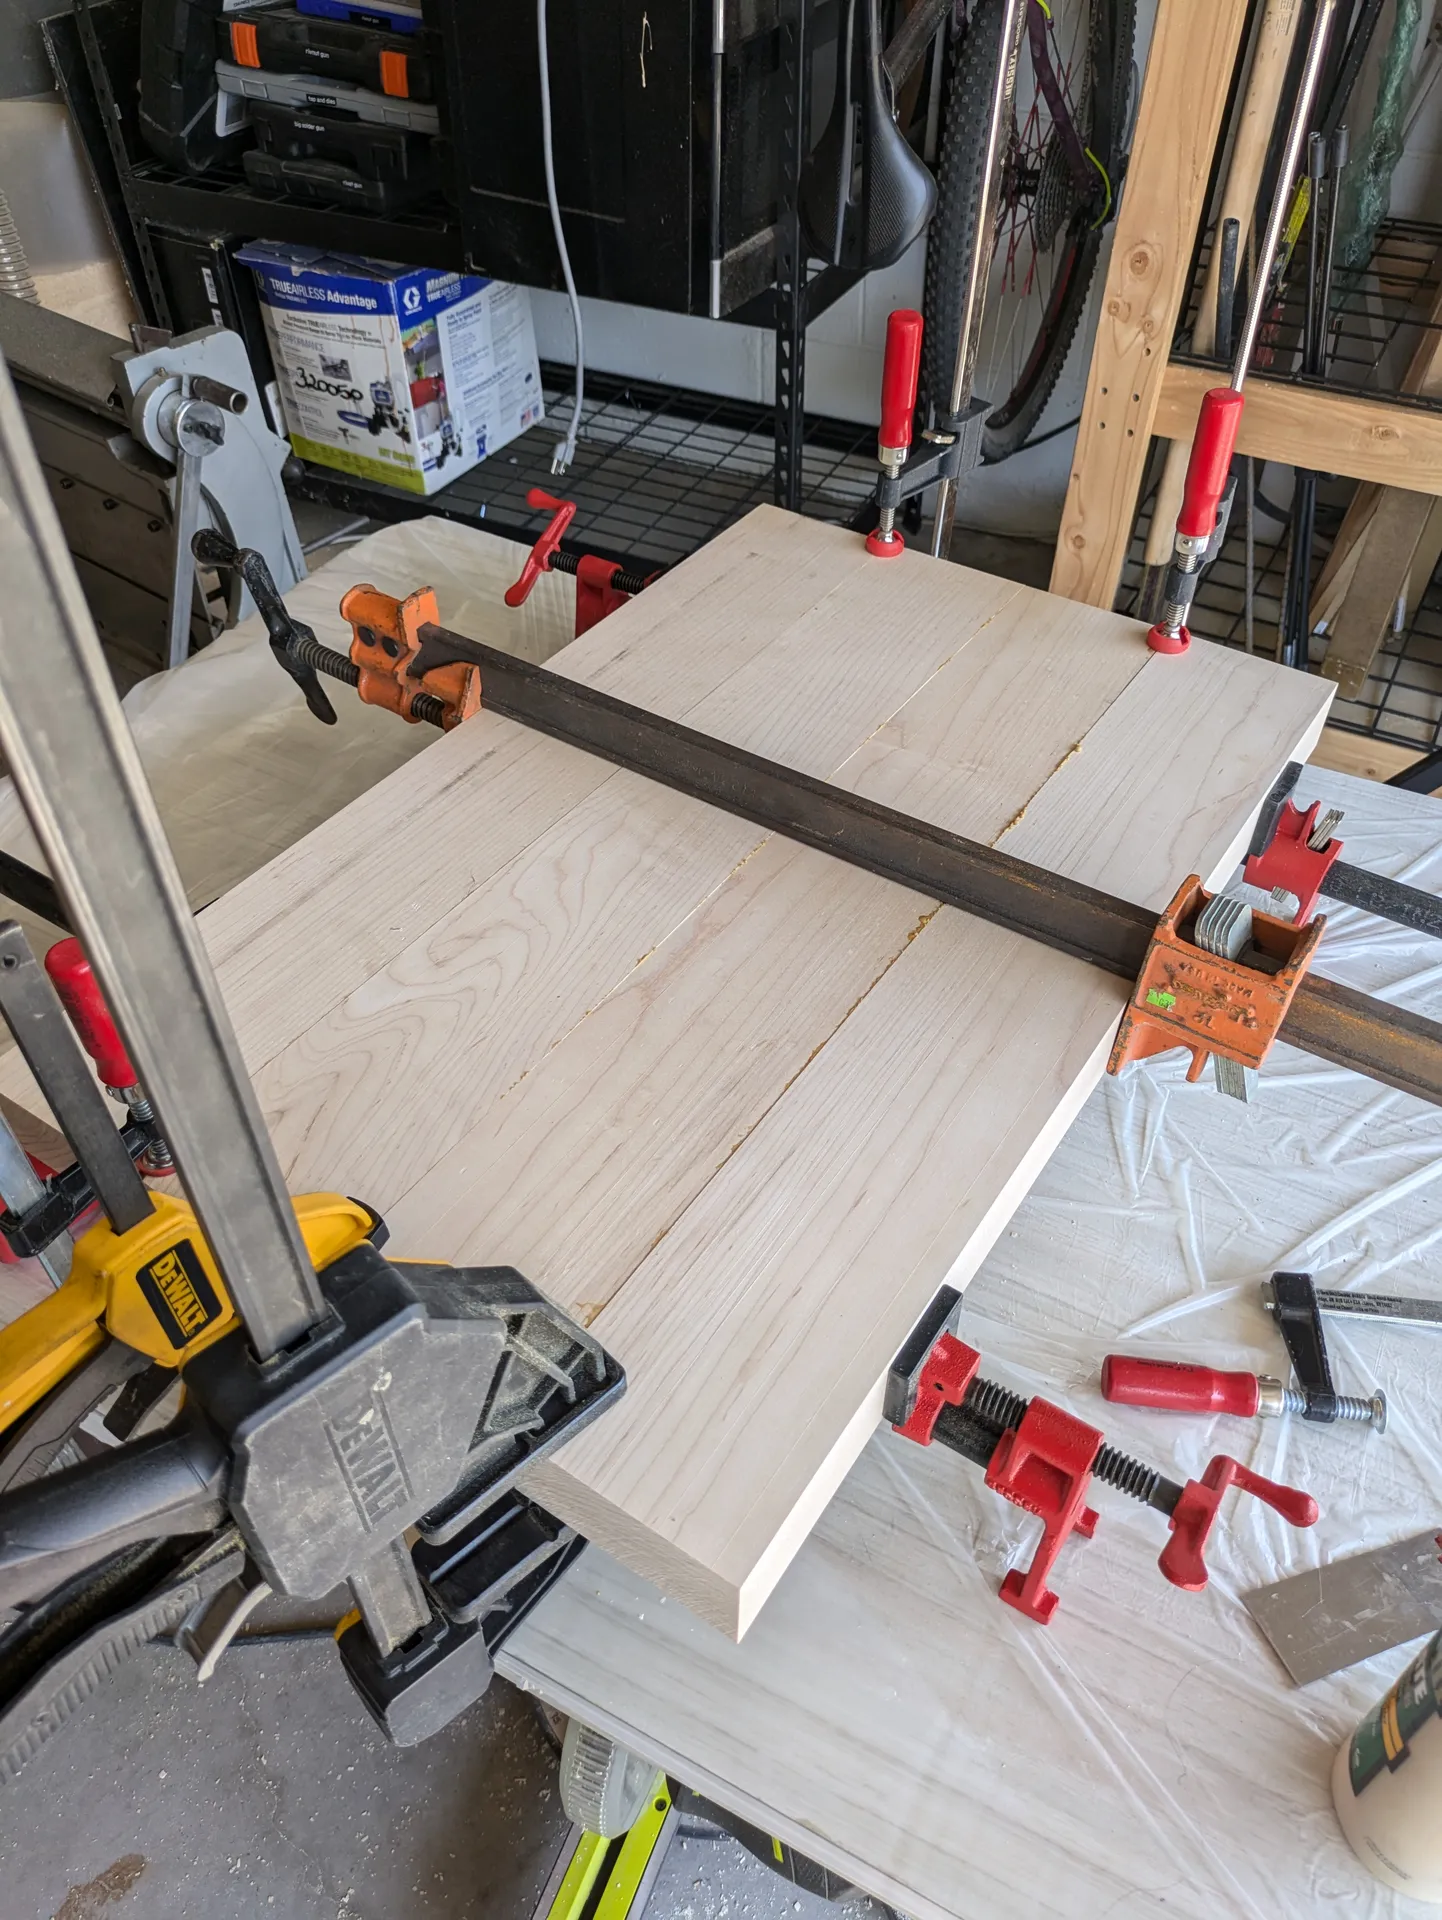
I honestly forgot to do the ‘in/out’ technique on the jointer, so my edge joints weren’t perfect. This meant I ended up trying to sand down the misalignment more which made it slightly imperfect. Not pictured here: hours of sanding, attempts at using a hand planer, then using some bondo wood filler to fix the damage from the planer. 😭
Once I got the panels created, it was time to domino joint the stretcher together:
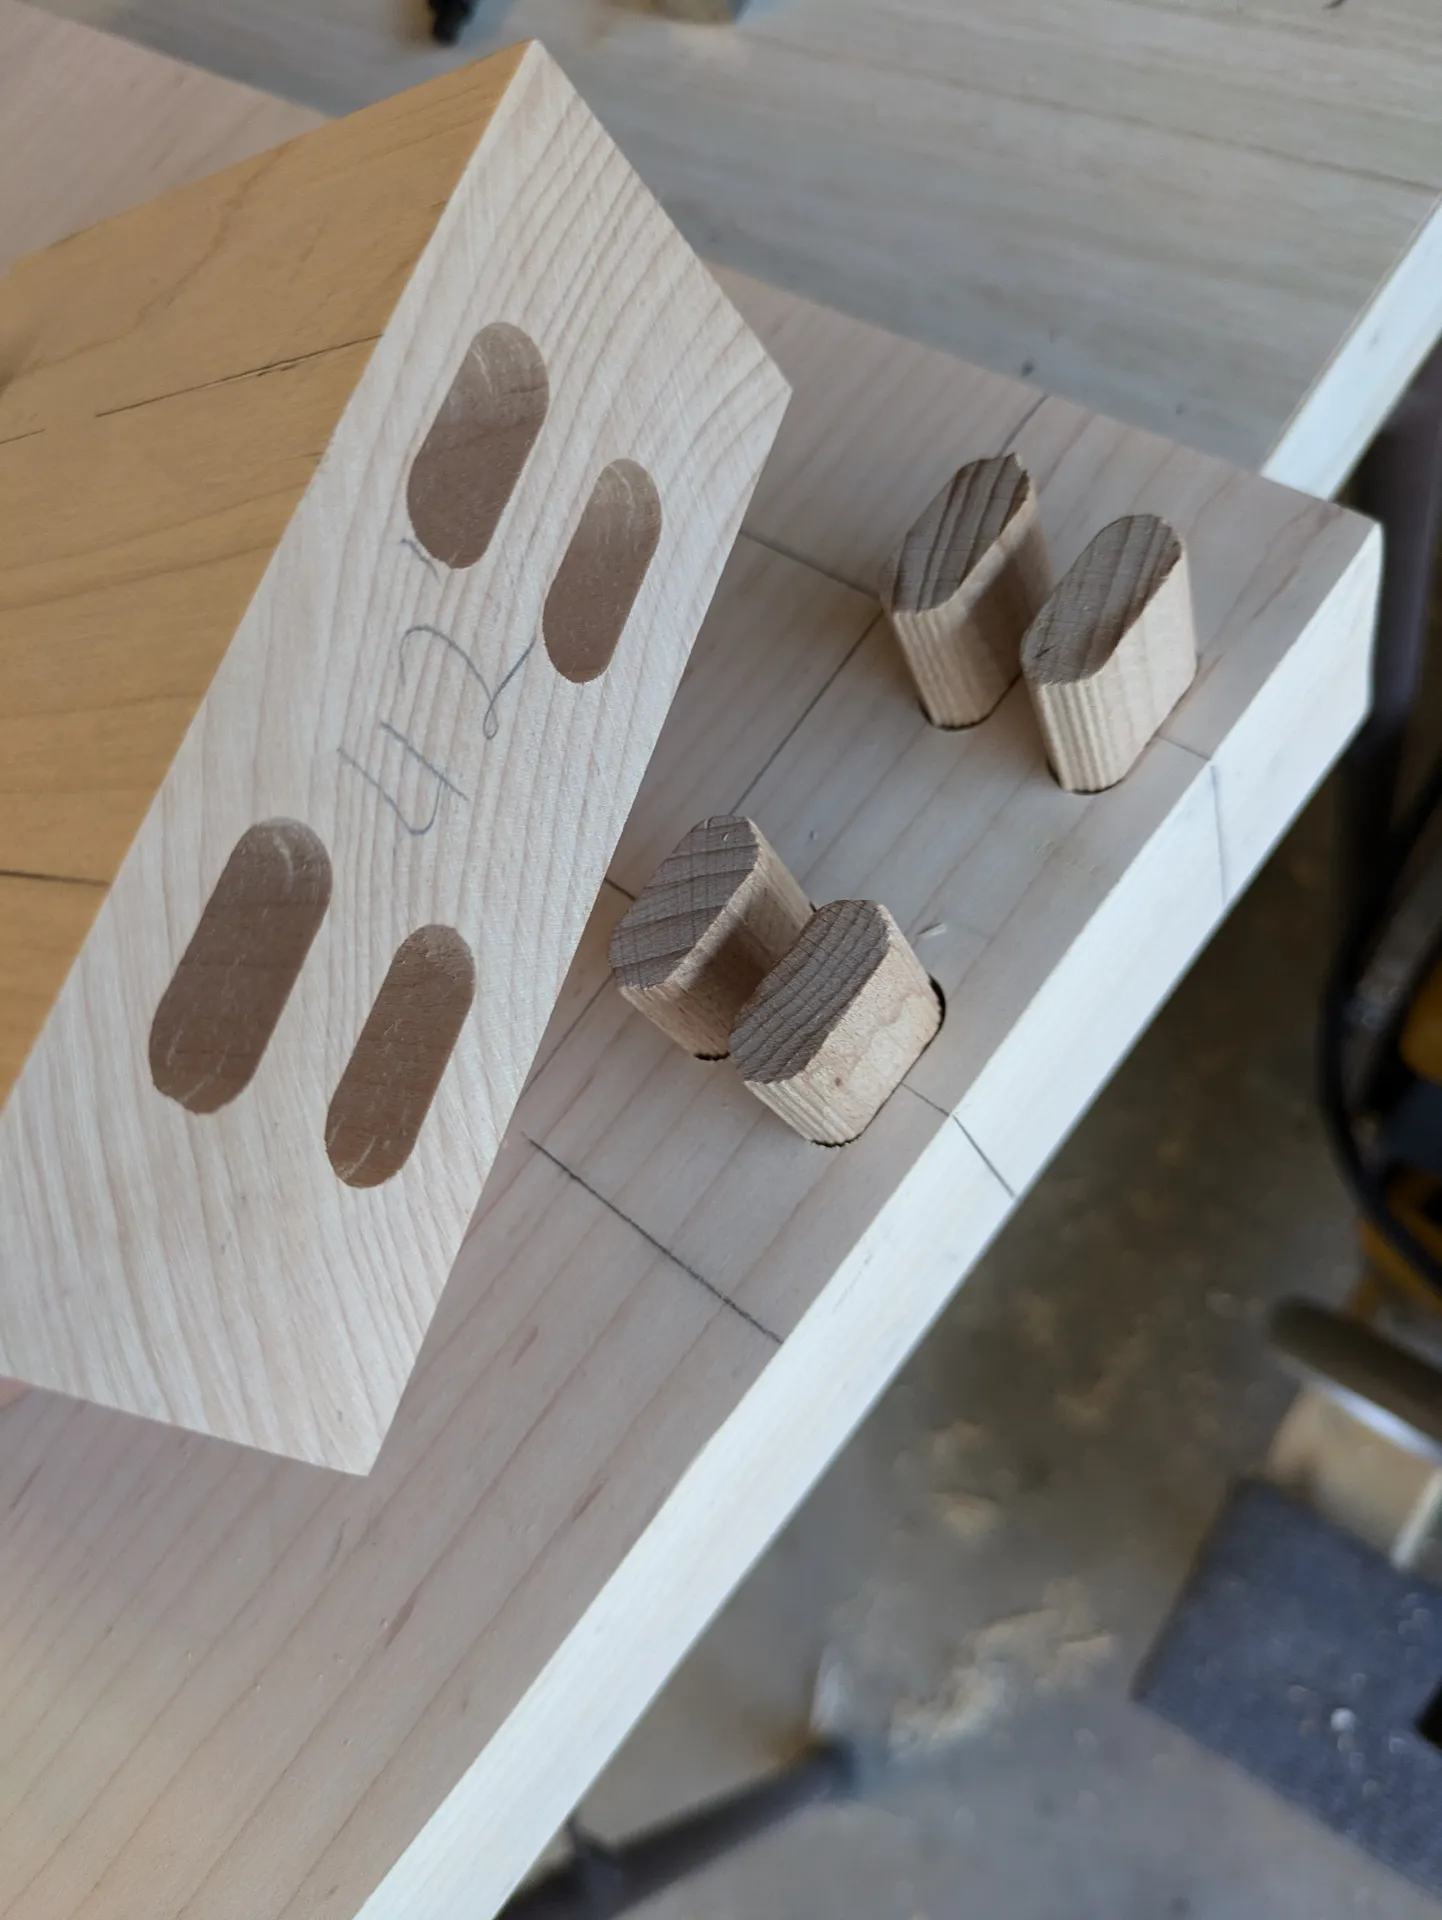
While its probably overkill to use four dominos, I didn’t want any kind of movement here. When I did the glueup it was solid without any play.
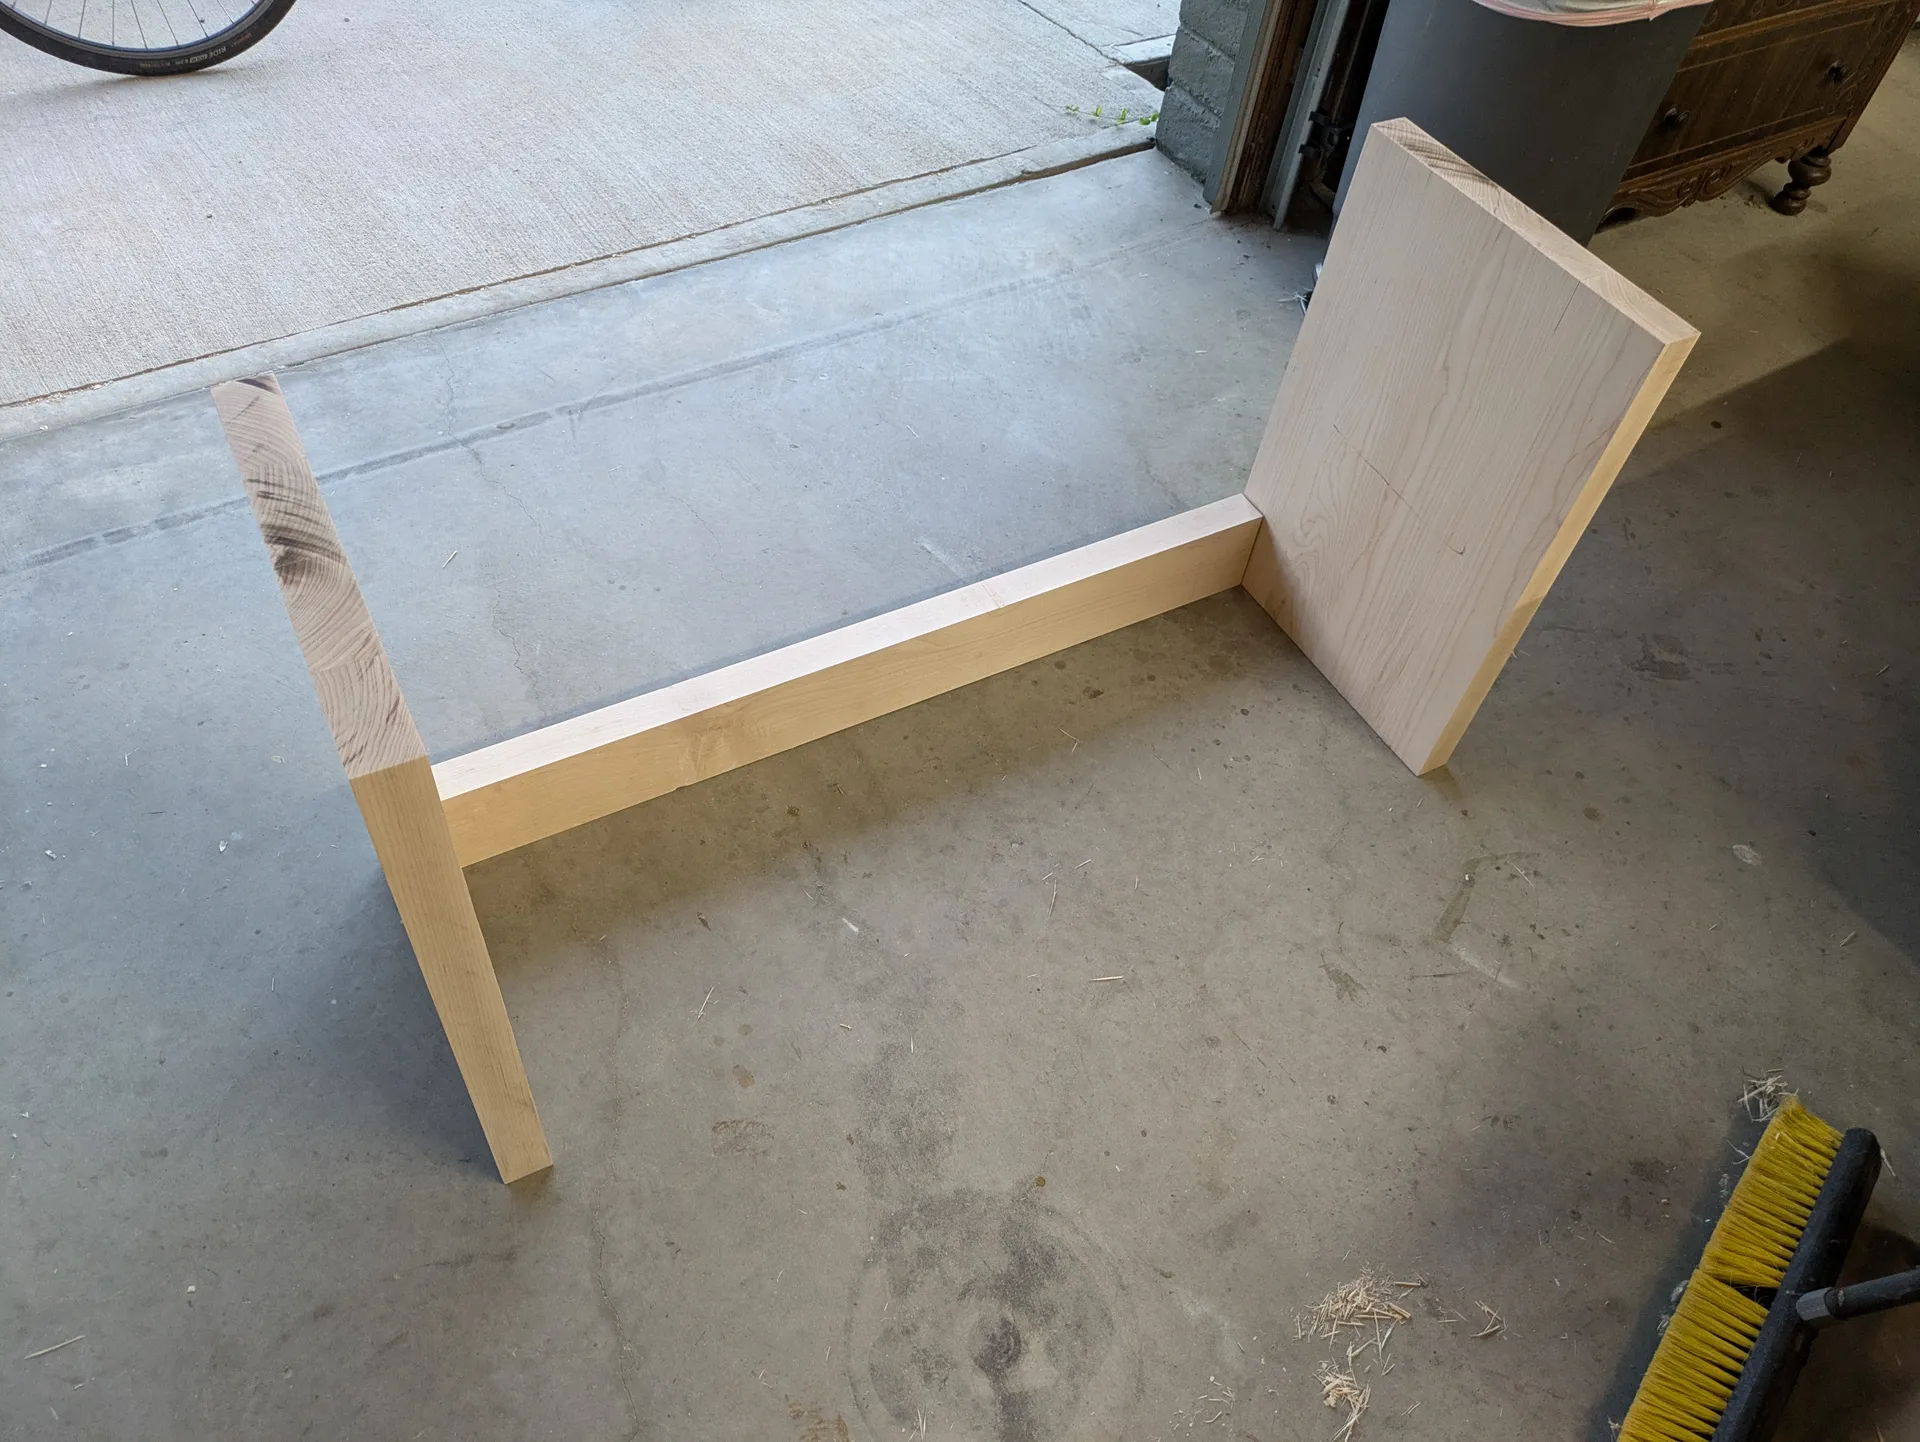
Ignore those burn marks, trying to cut 2″ hardwood on my saw was a challenge. 😊 Next up was to remove the old base. I am still not sure where or what this piece is, or where it came from. Why are there 18″ table legs without a stretcher? Were these meant to go on top of something else? Was it for a kid (i highly doubt it)?
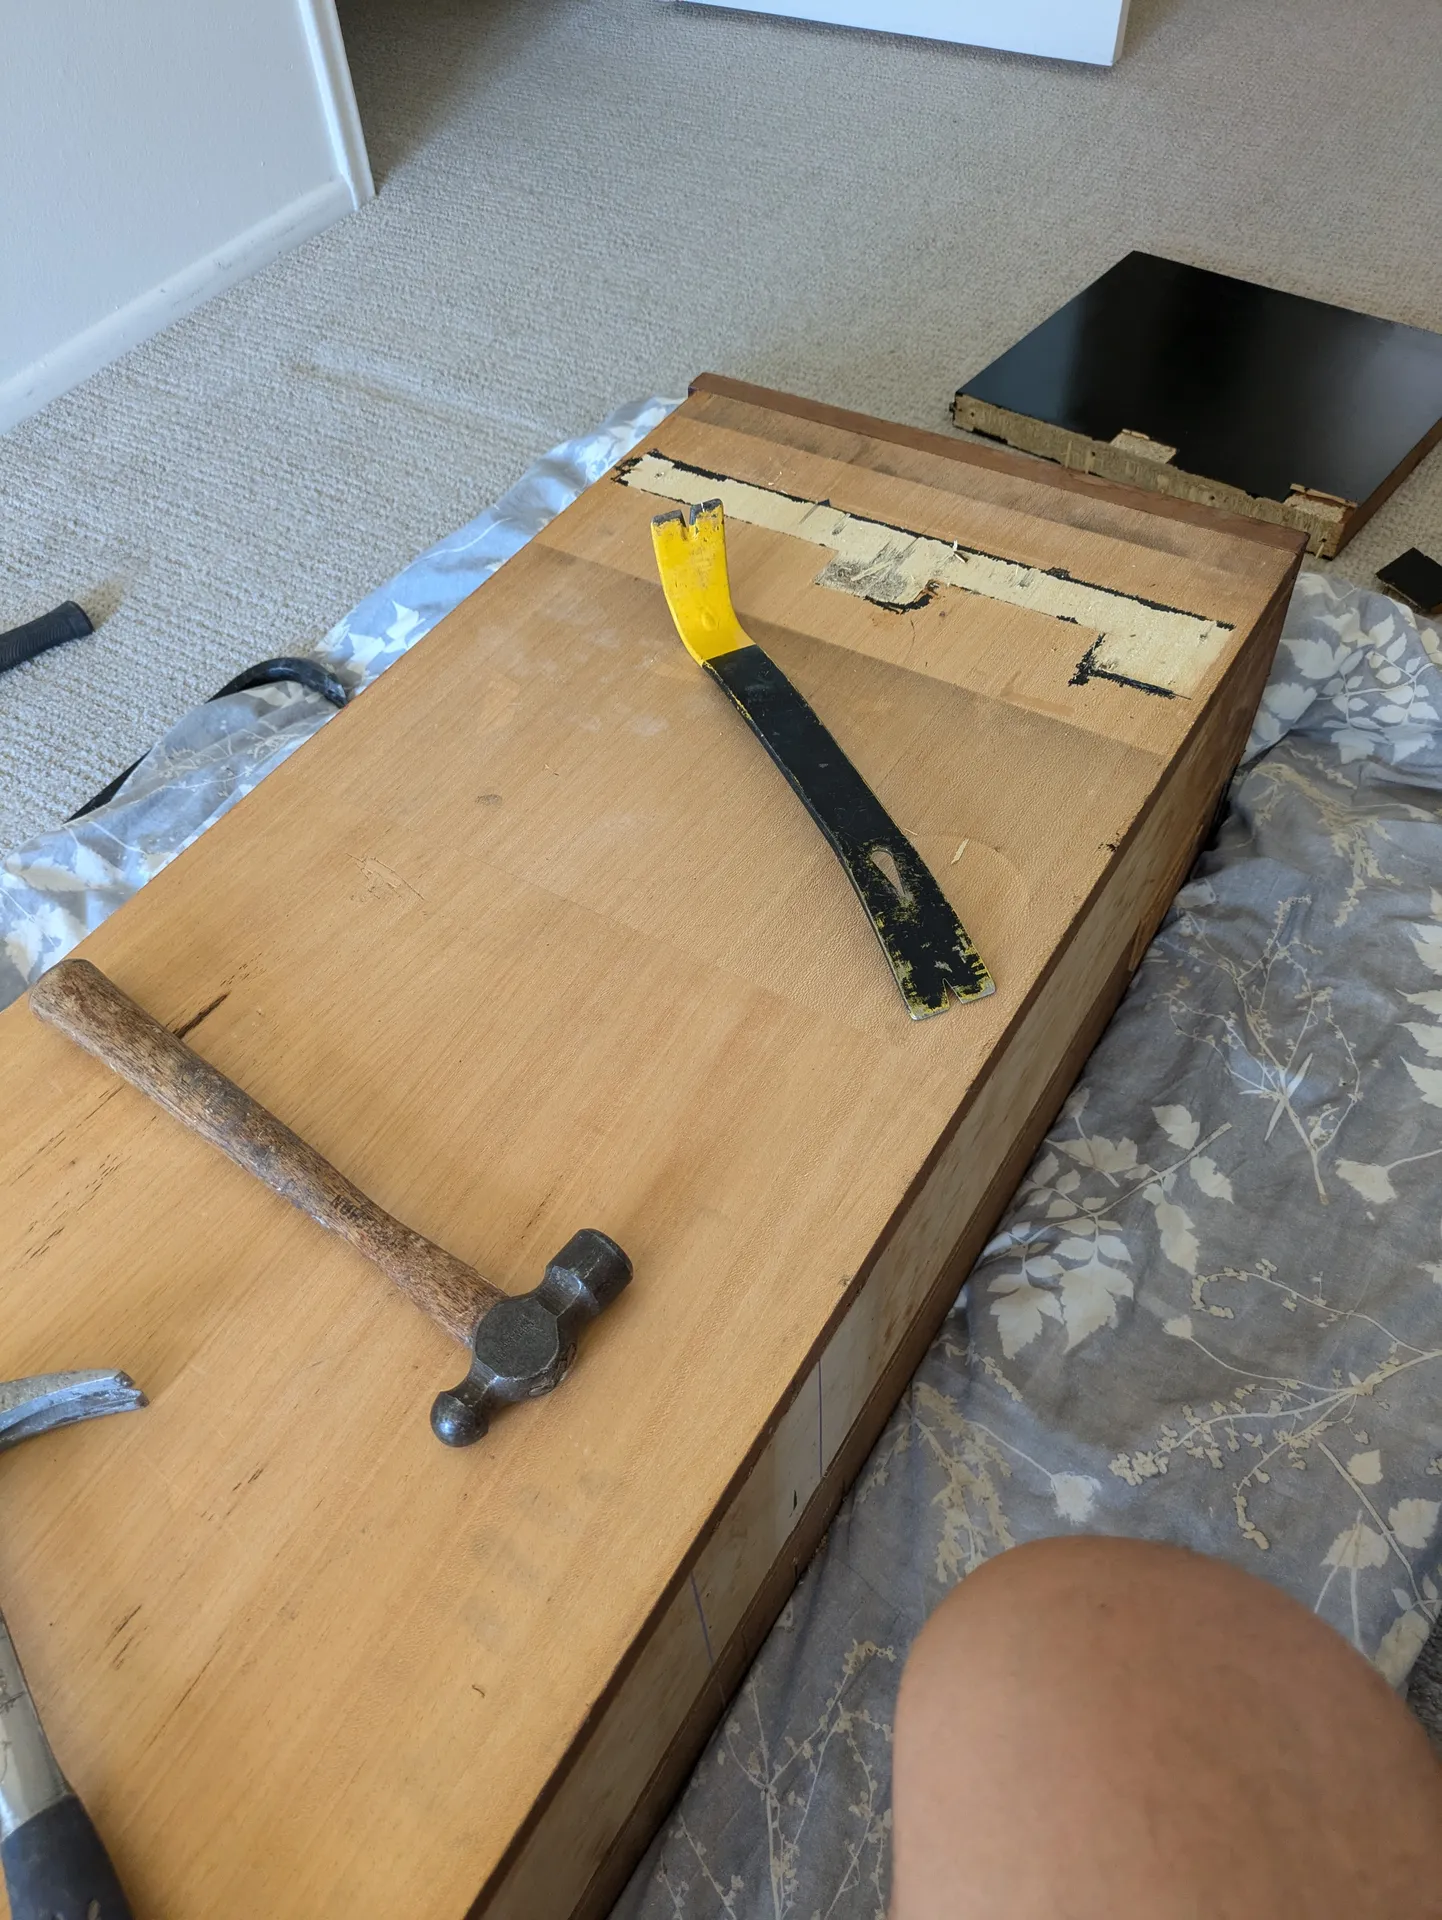
After removing the original legs, I took some time to fill in the damage to the veneer with some wood filler, so that there wouldn’t be any splintering, and the legs would have a nice level surface to attach to.
Adding Hardware
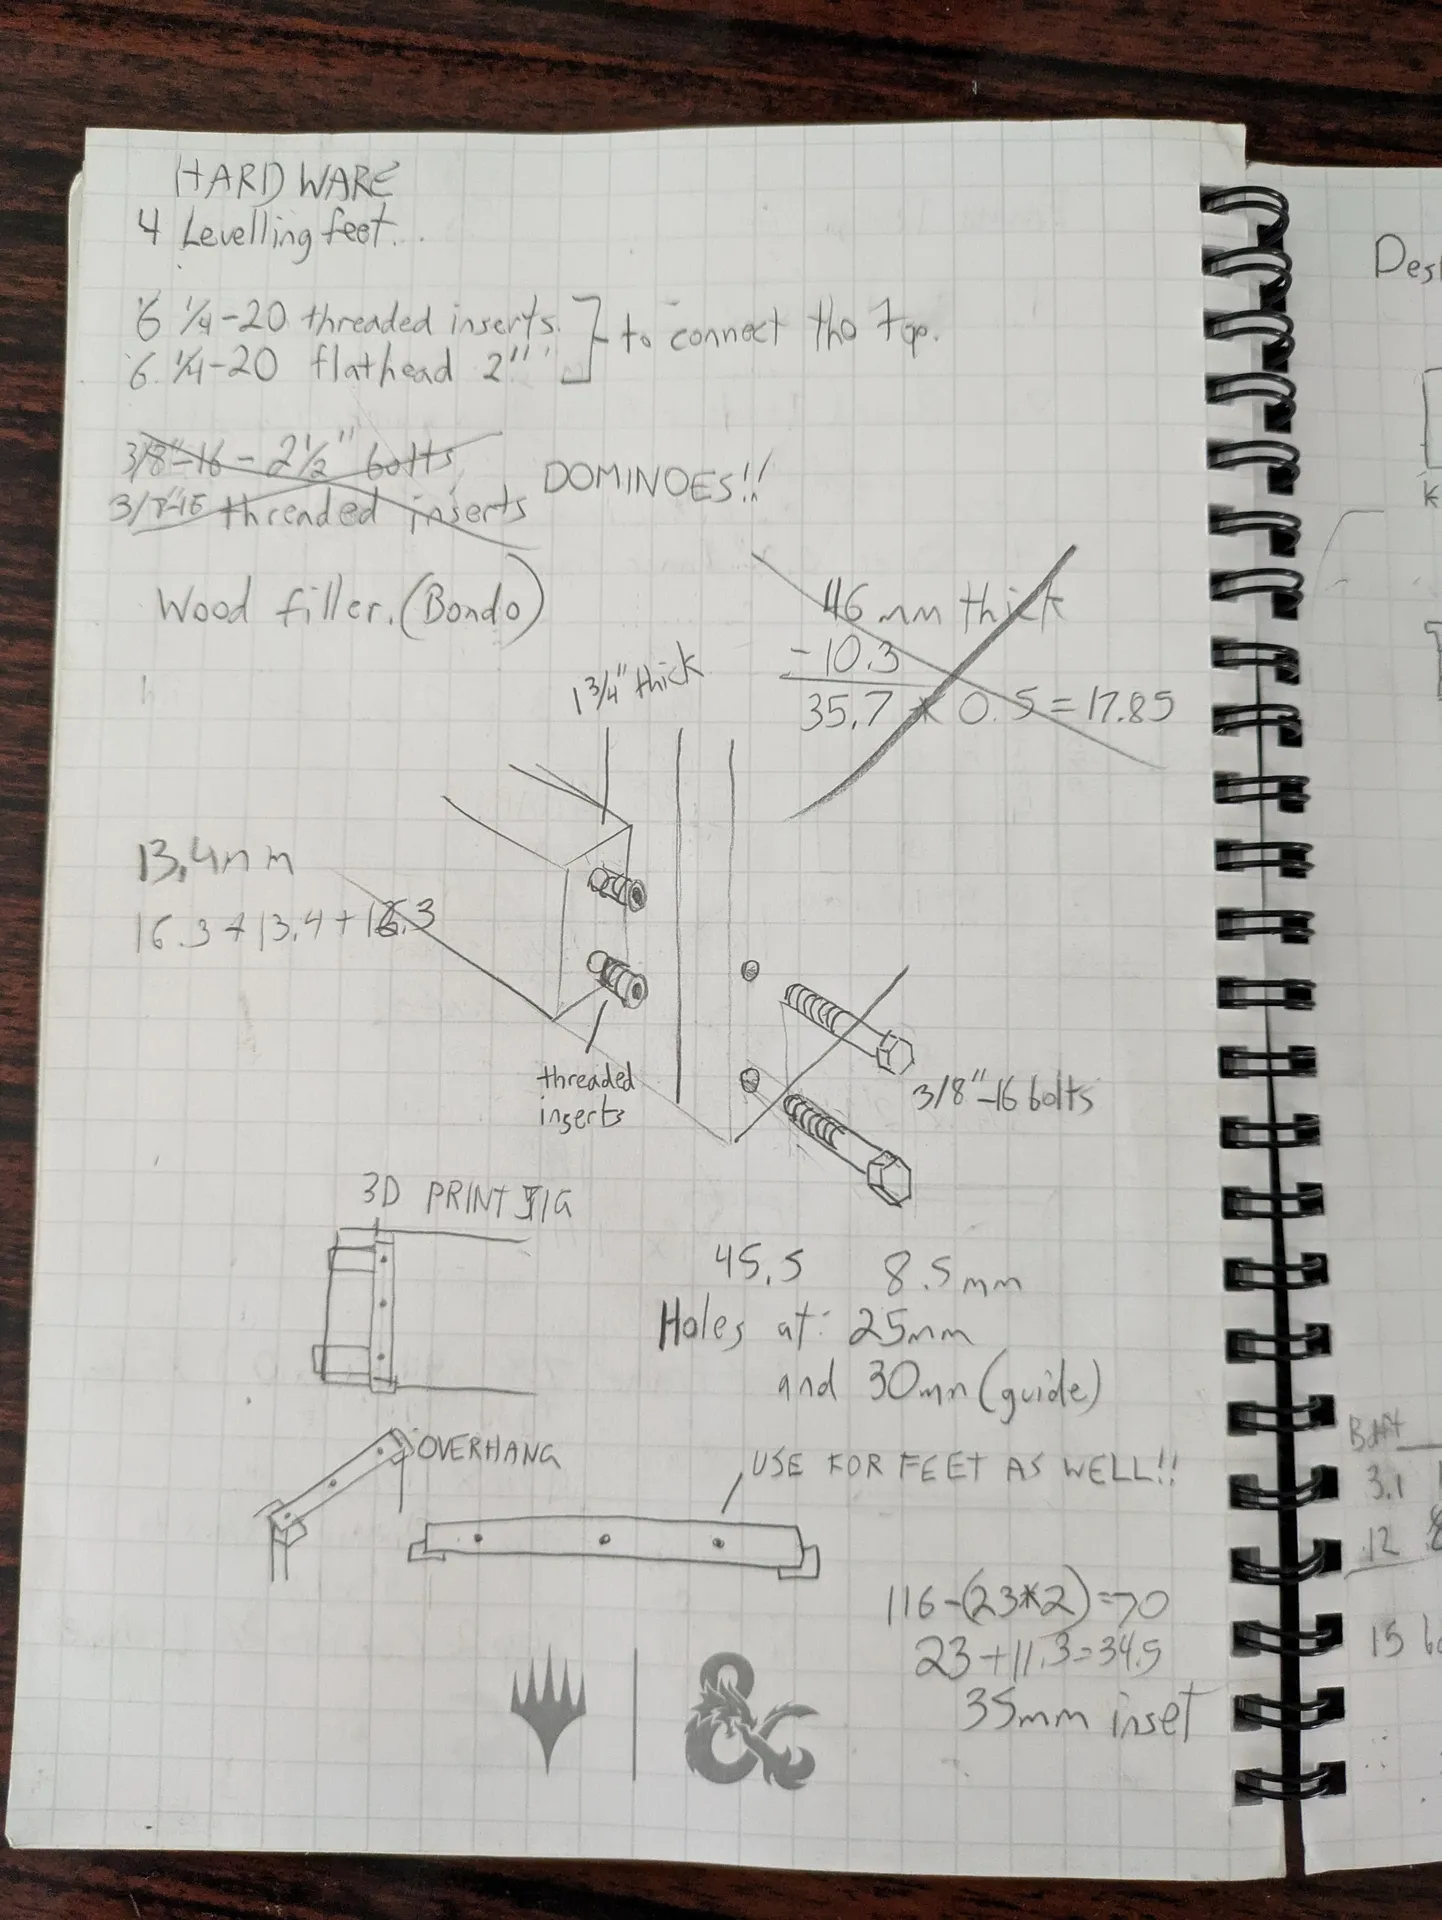
Now it was time to add hardware. One of the problems with this seemed to be that whoever ‘mutt-ed’ this decided that screwing/nailing directly into MDF was a good idea. I instead decided to use 1/4-20 hardware with threaded inserts:
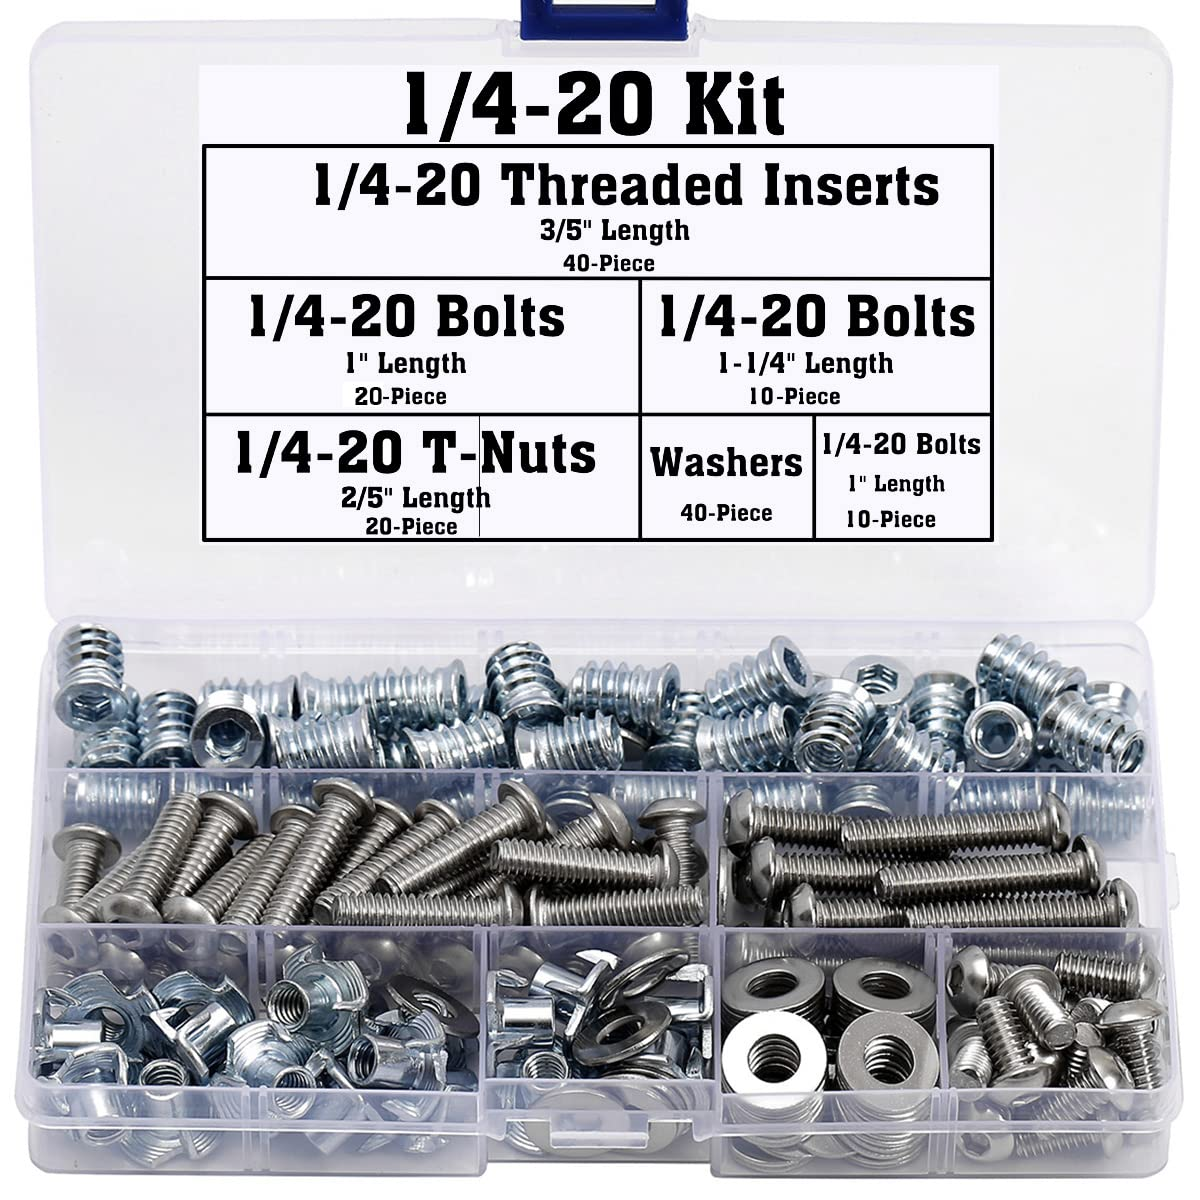
I have some leg levellers that are 1/4-20. I also purchased some flathead stainless steel hardware so that I could drill through inside the bottom so that the bolts would go from top-to-bottom. Being able to take apart and put together the base without introducing wear really helps keep the connections from becoming loose and adding play over time.
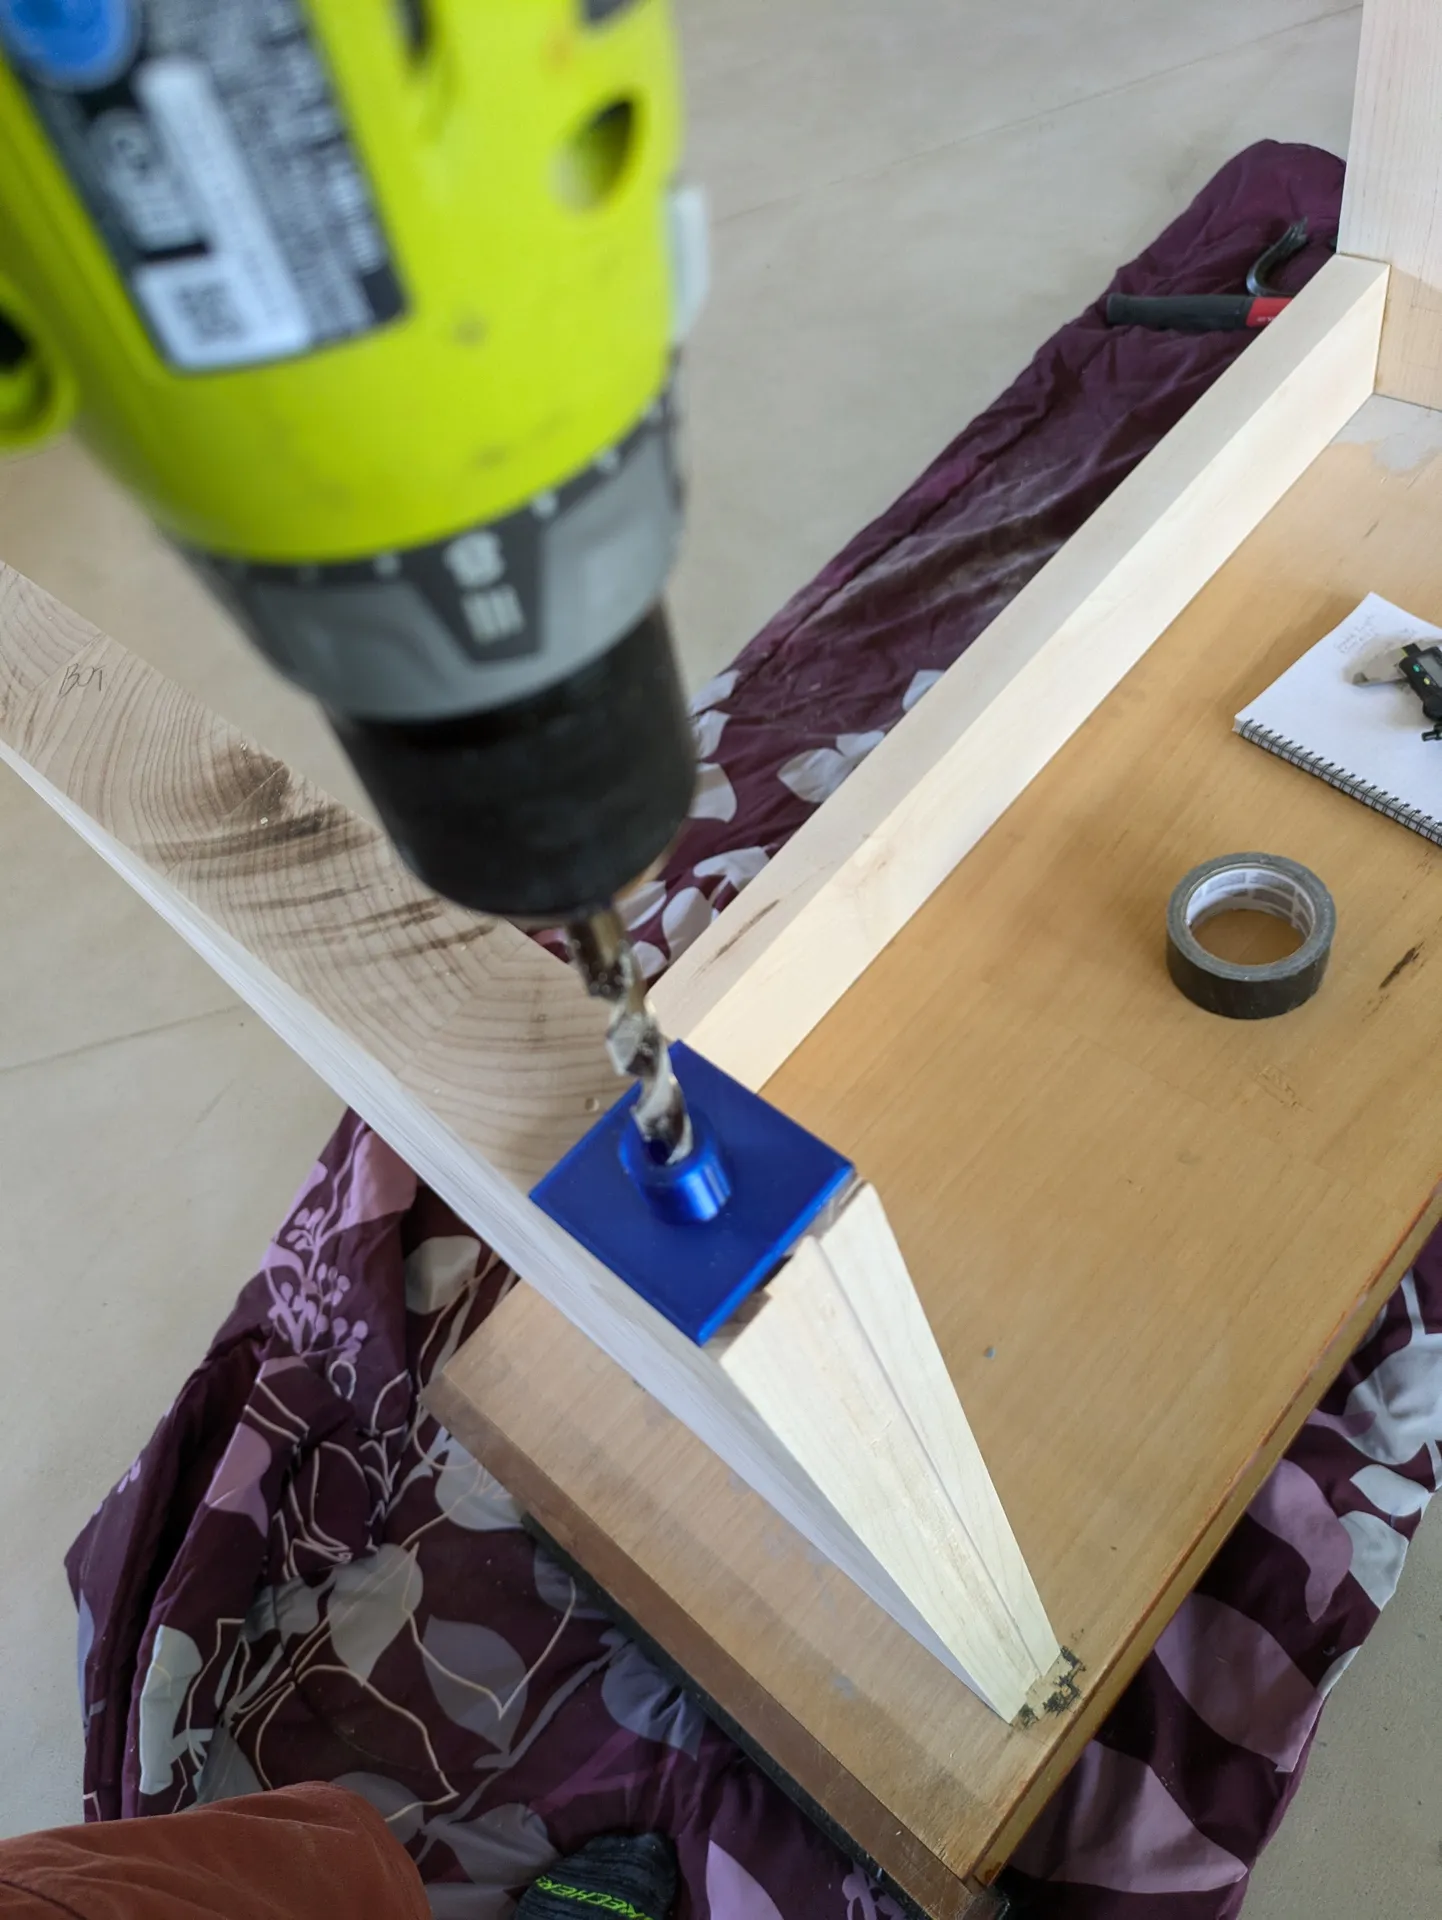
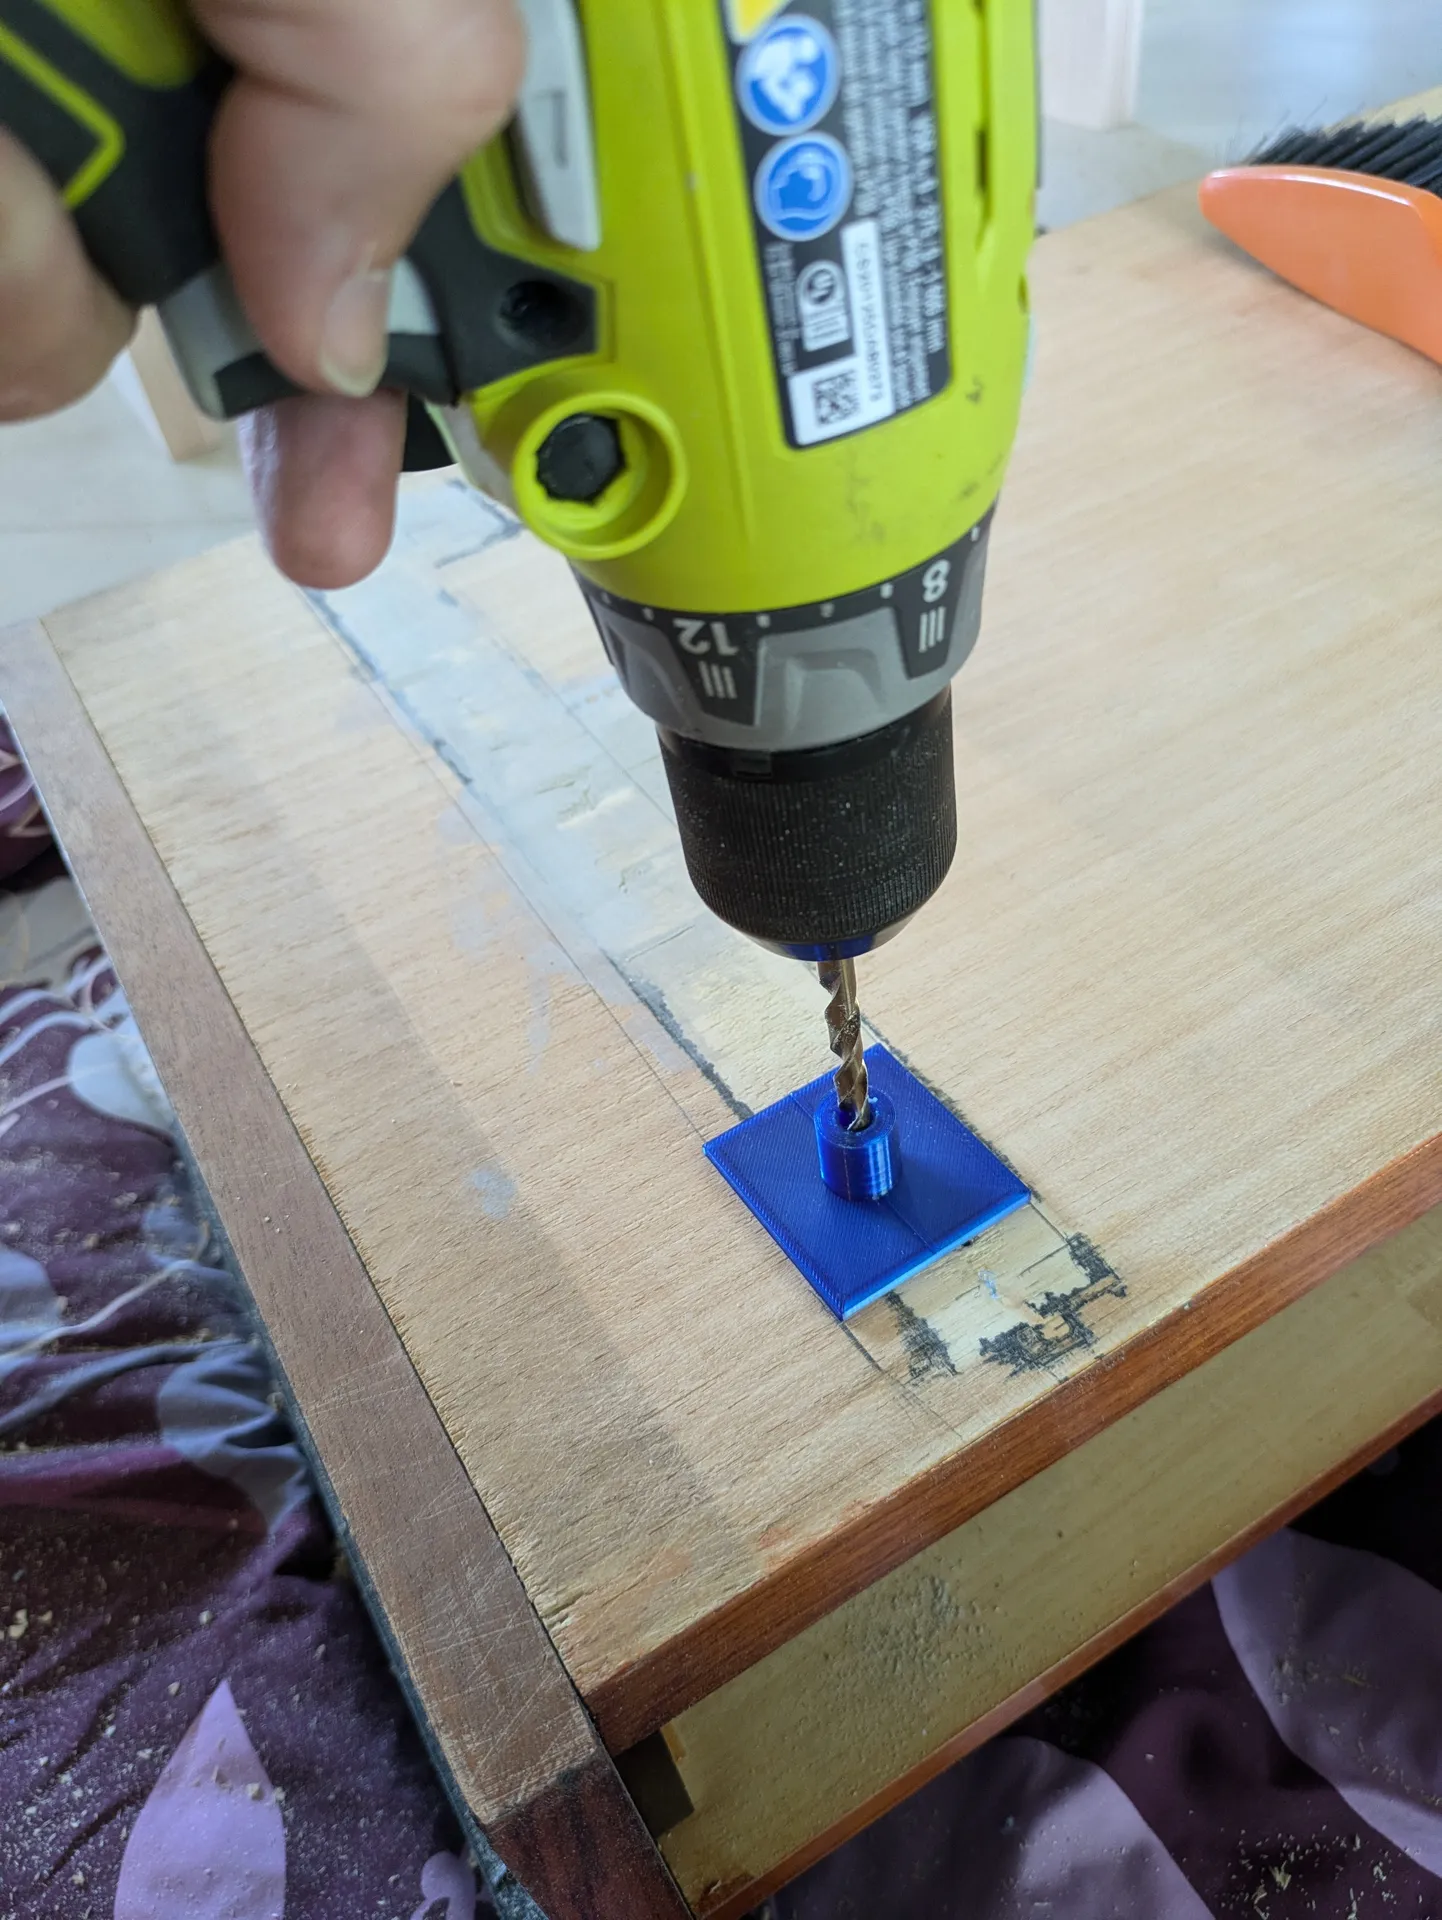
After I selected this hardware, I 3d-printed a couple drill jigs that were centered for the size of wood, and offset from the edge the depth I wanted:
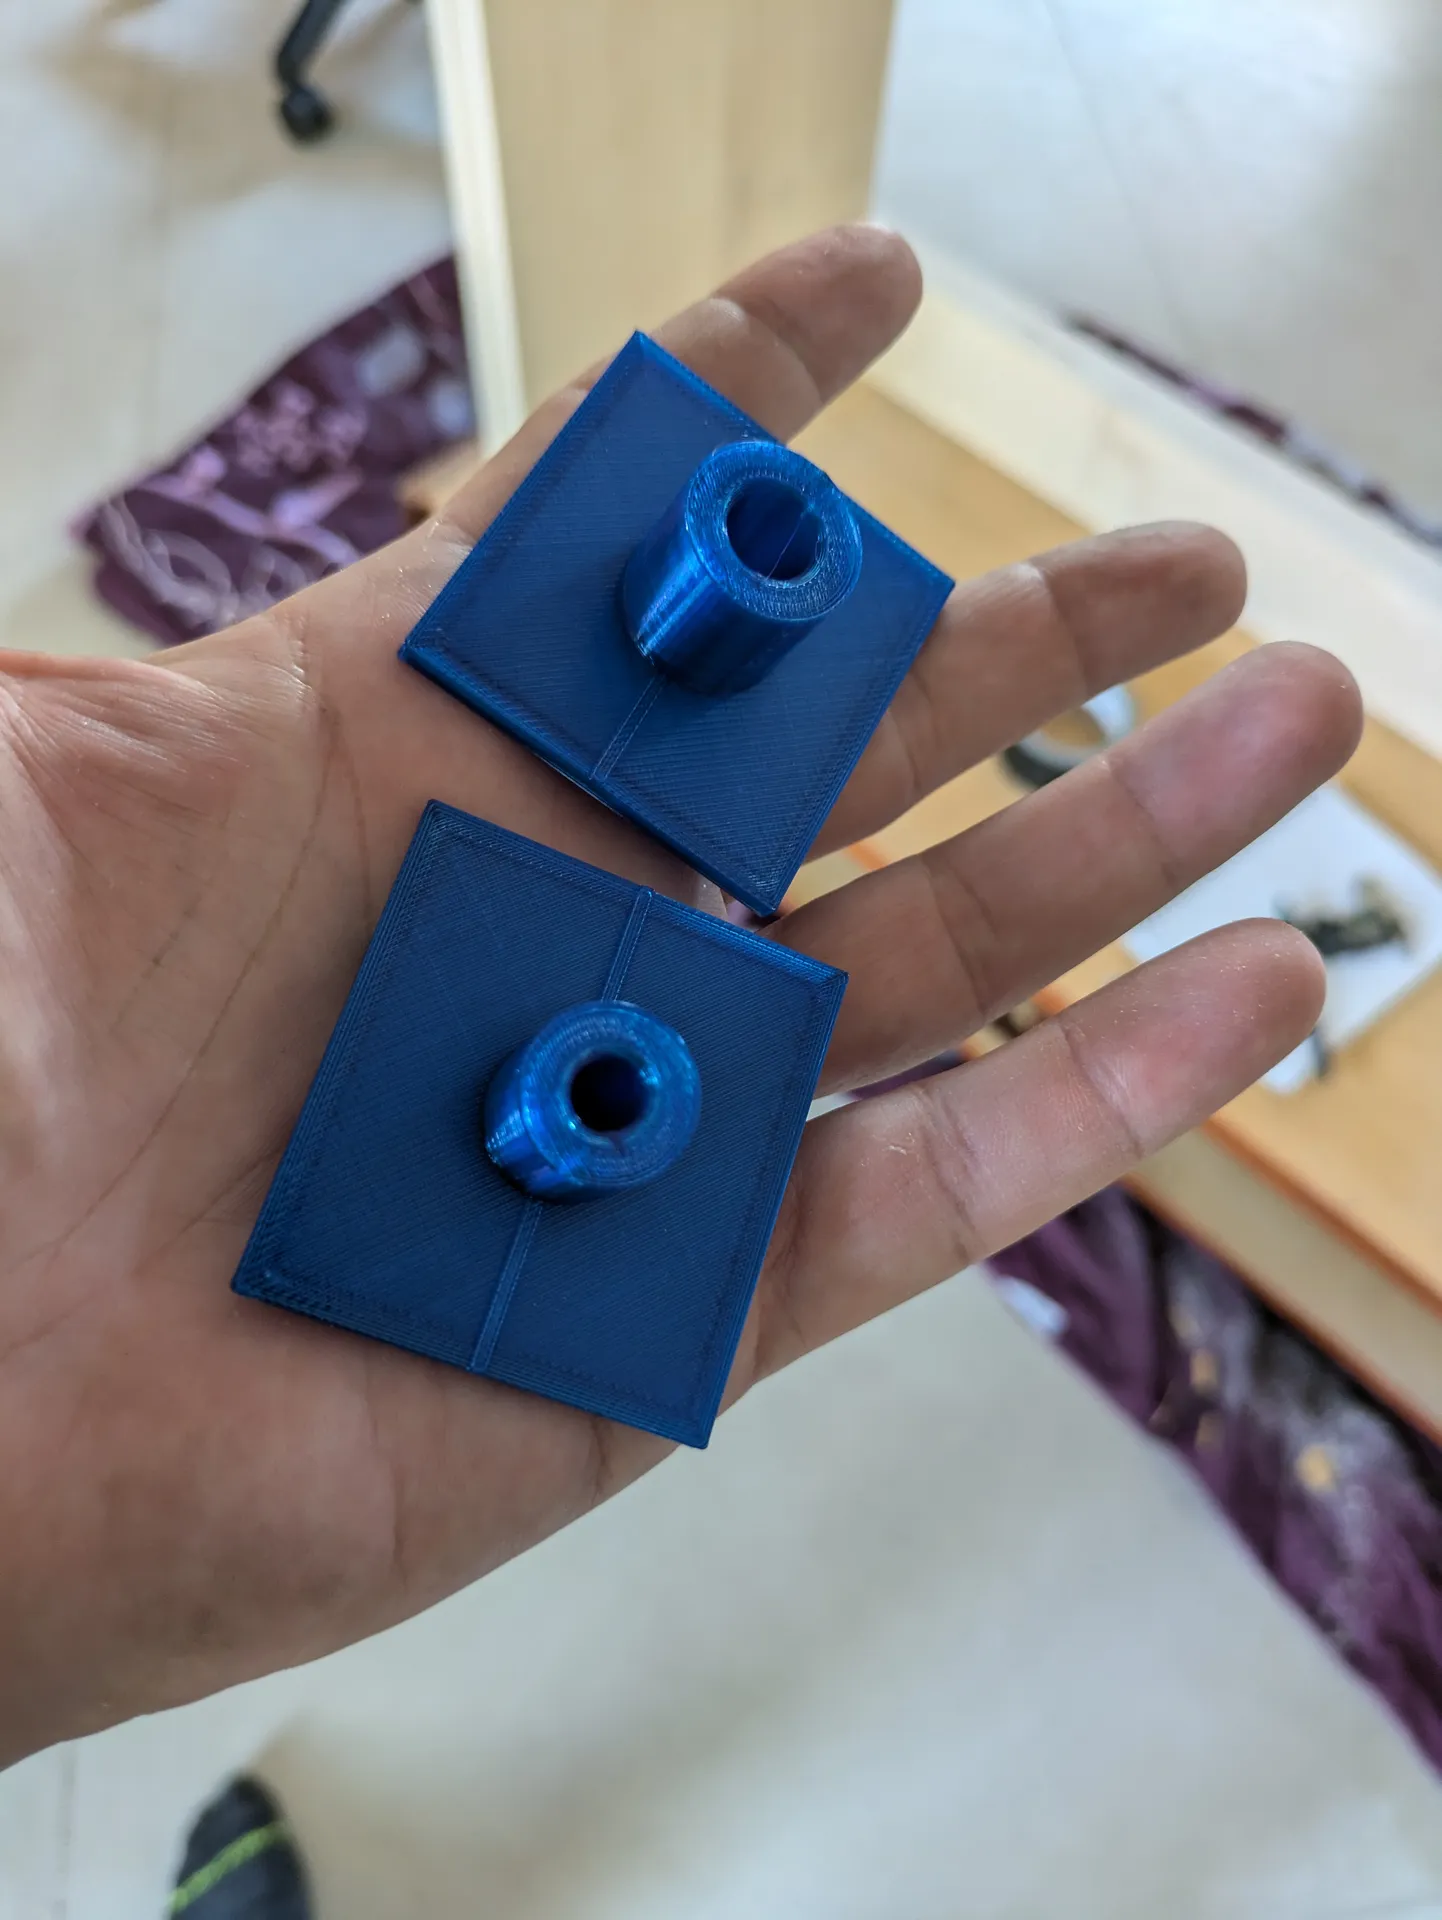
This allowed me to drill straight holes quickly for the leg levellers and the attachment to the base:
I then added the threaded inserts:
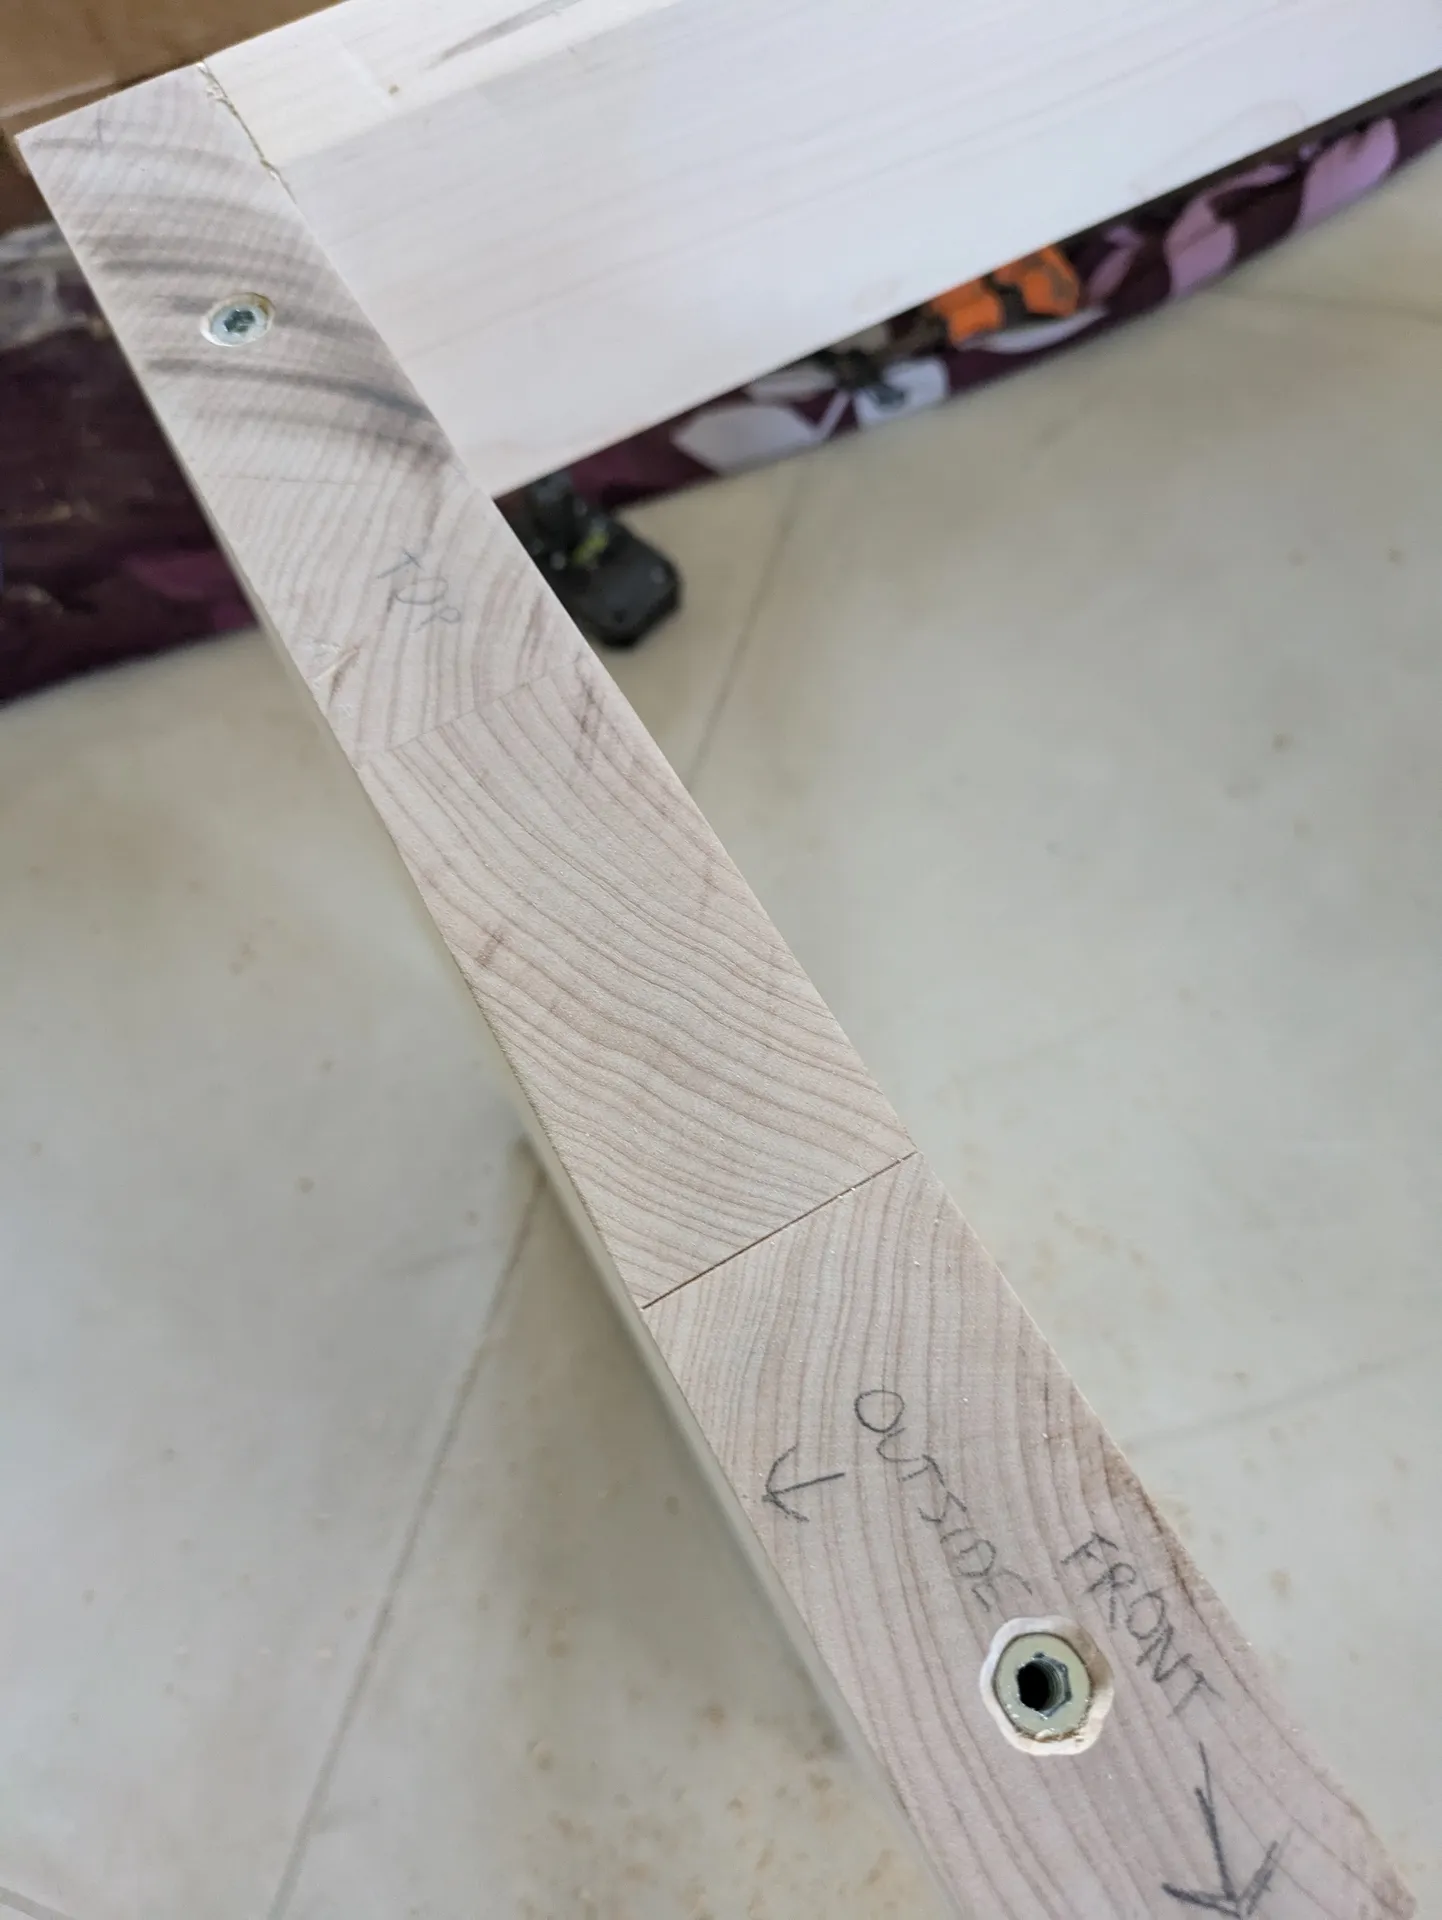
I then installed the leg levellers directly into the inserts:
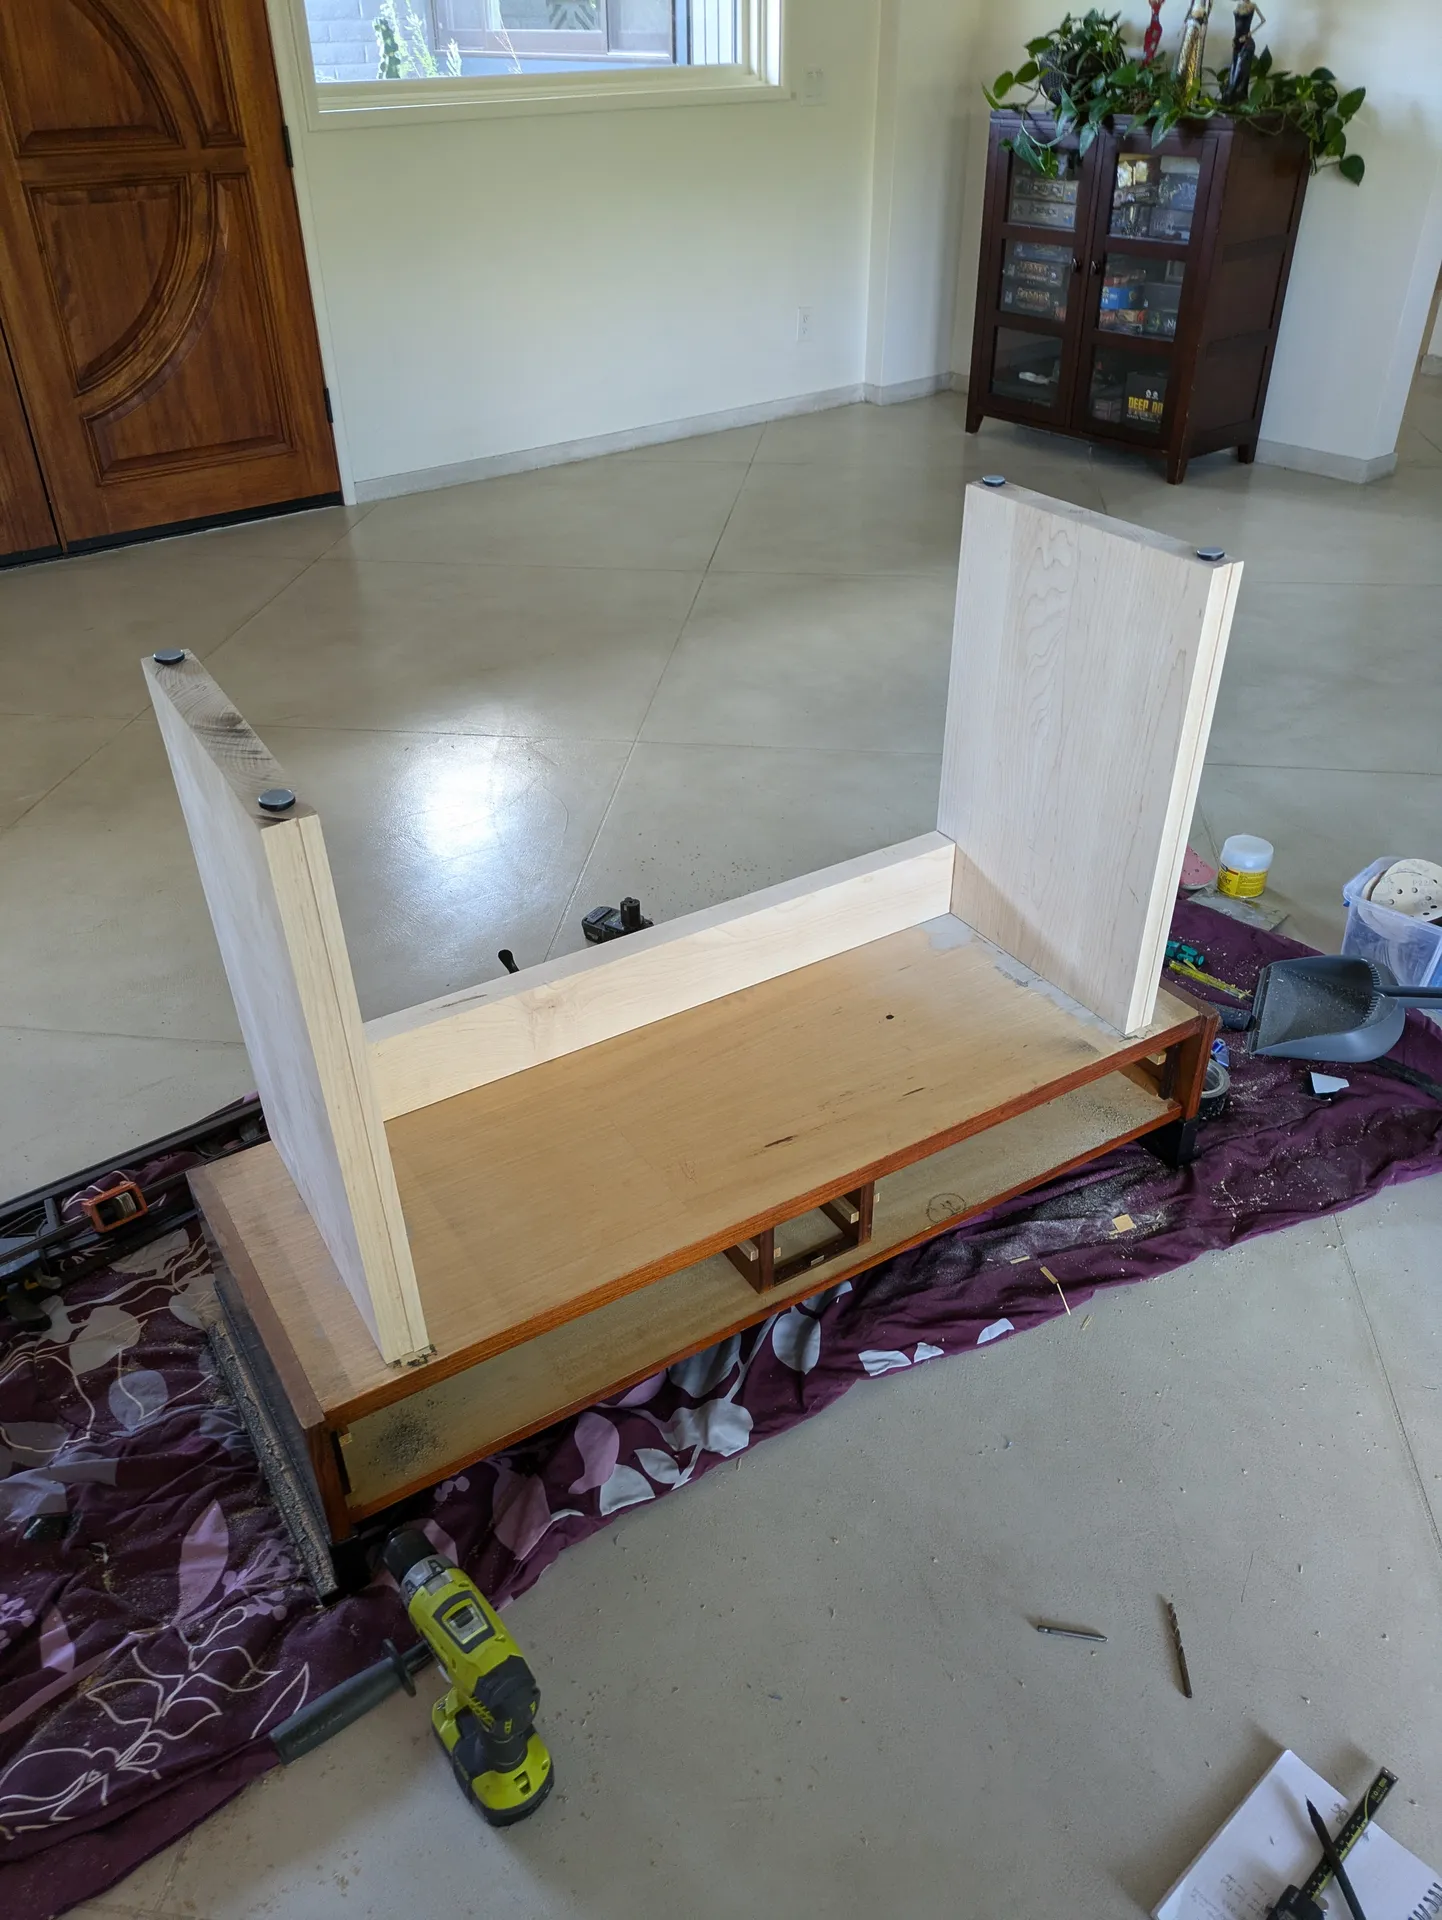
And then the base connects from the inside:
Looking good! Time to paint and add the aluminum and the base is complete.
Paint & Aluminum Bars
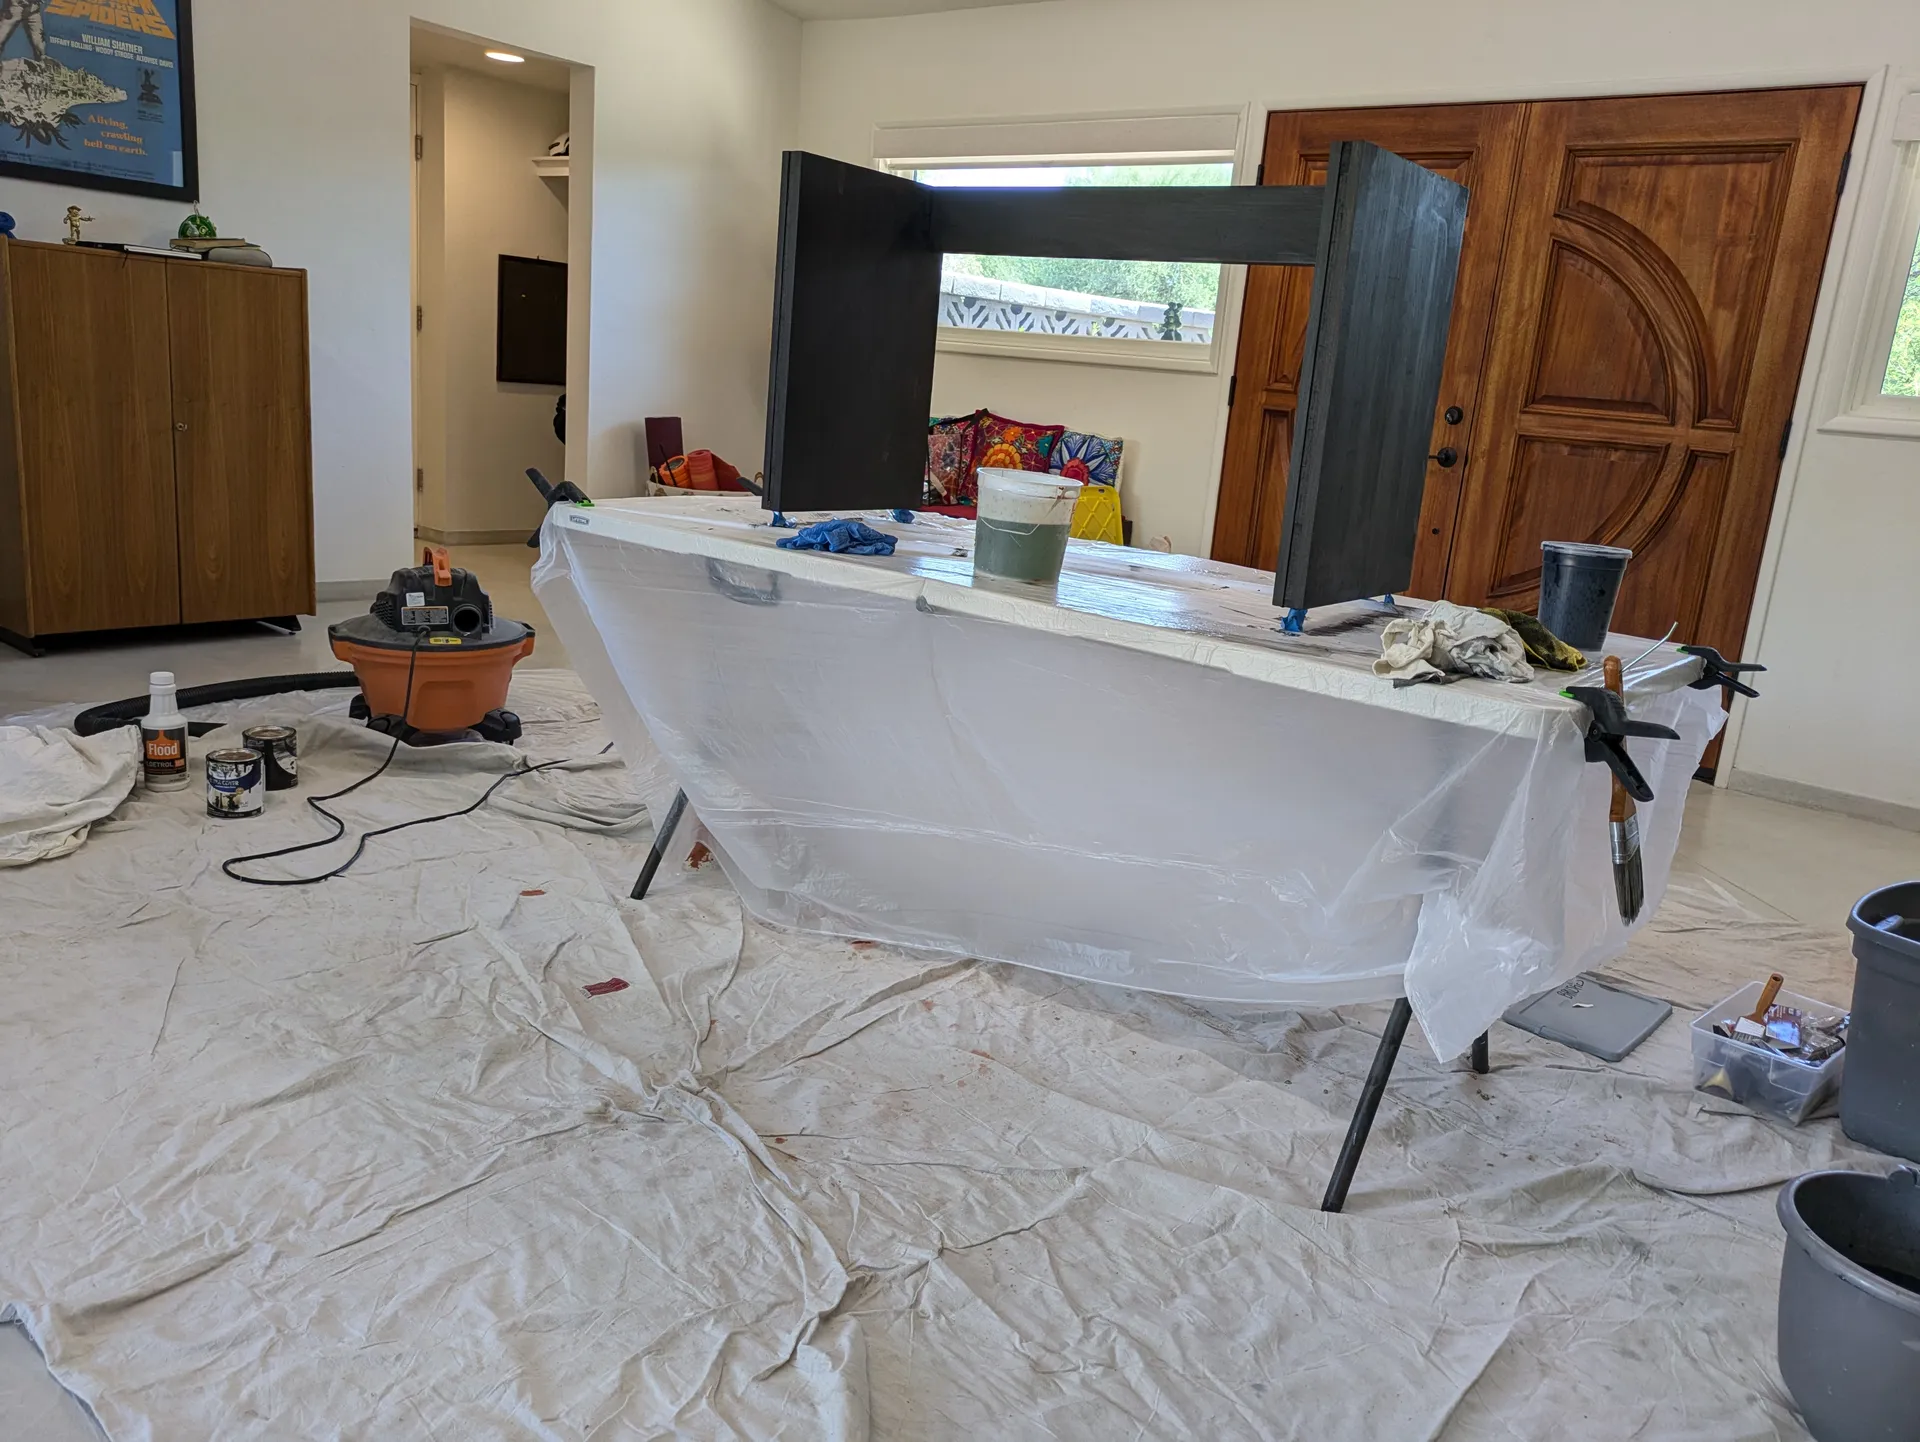
Due to the Arizona heat, I did all the painting indoors to ensure that I got the finish I wanted. I used a brush and put 5 light coats on, sanding between coats to ensure a uniform finish. Its a bit sad to hide such a nice wood, but I wanted to mimic the look of the original. I thought about using my sprayer but honestly for this amount of painting it didn’t seem worth it and I was right.
The aluminum bars I cut down from 3/8″ bar stock from Industrial Metal Supply, and went up to 2000 grit for a nice finish. I used 3M 5906 1/2″ VHB tape to attach the aluminum to the wood. This is similar to the tape you’ll find in cell phones to hold your display or battery in. Its thinner than other VHB tapes like their foam tapes and it has a similiarly permanent grip. I also used this in my phone keyboard stand.
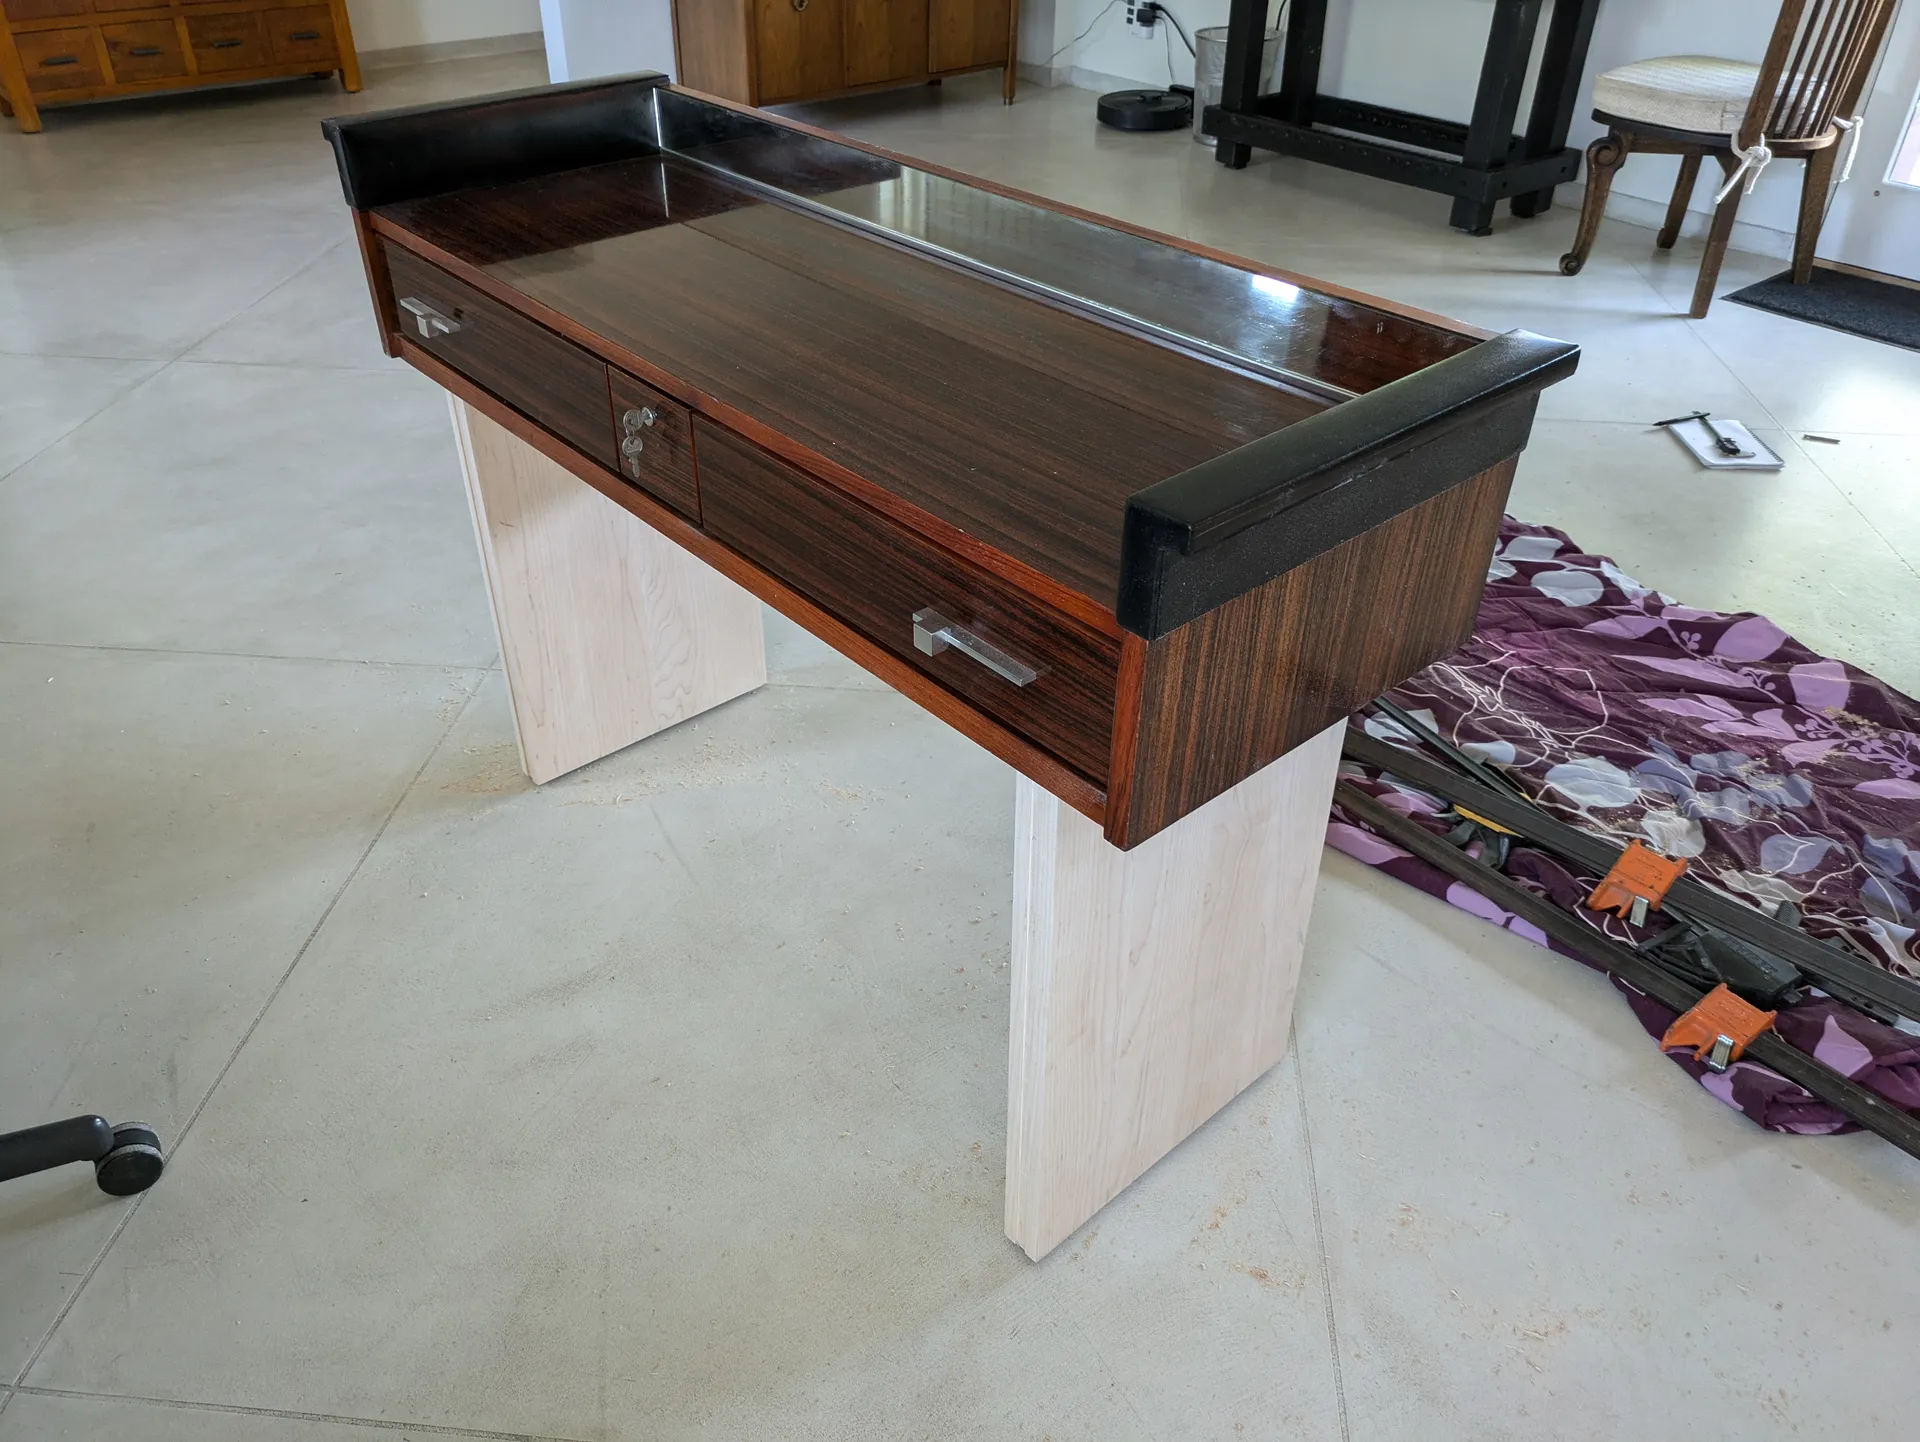
And with that…it is now possible to sit at the vanity at a normal height!
You might notice that…I’m not done yet. There is still more to do:
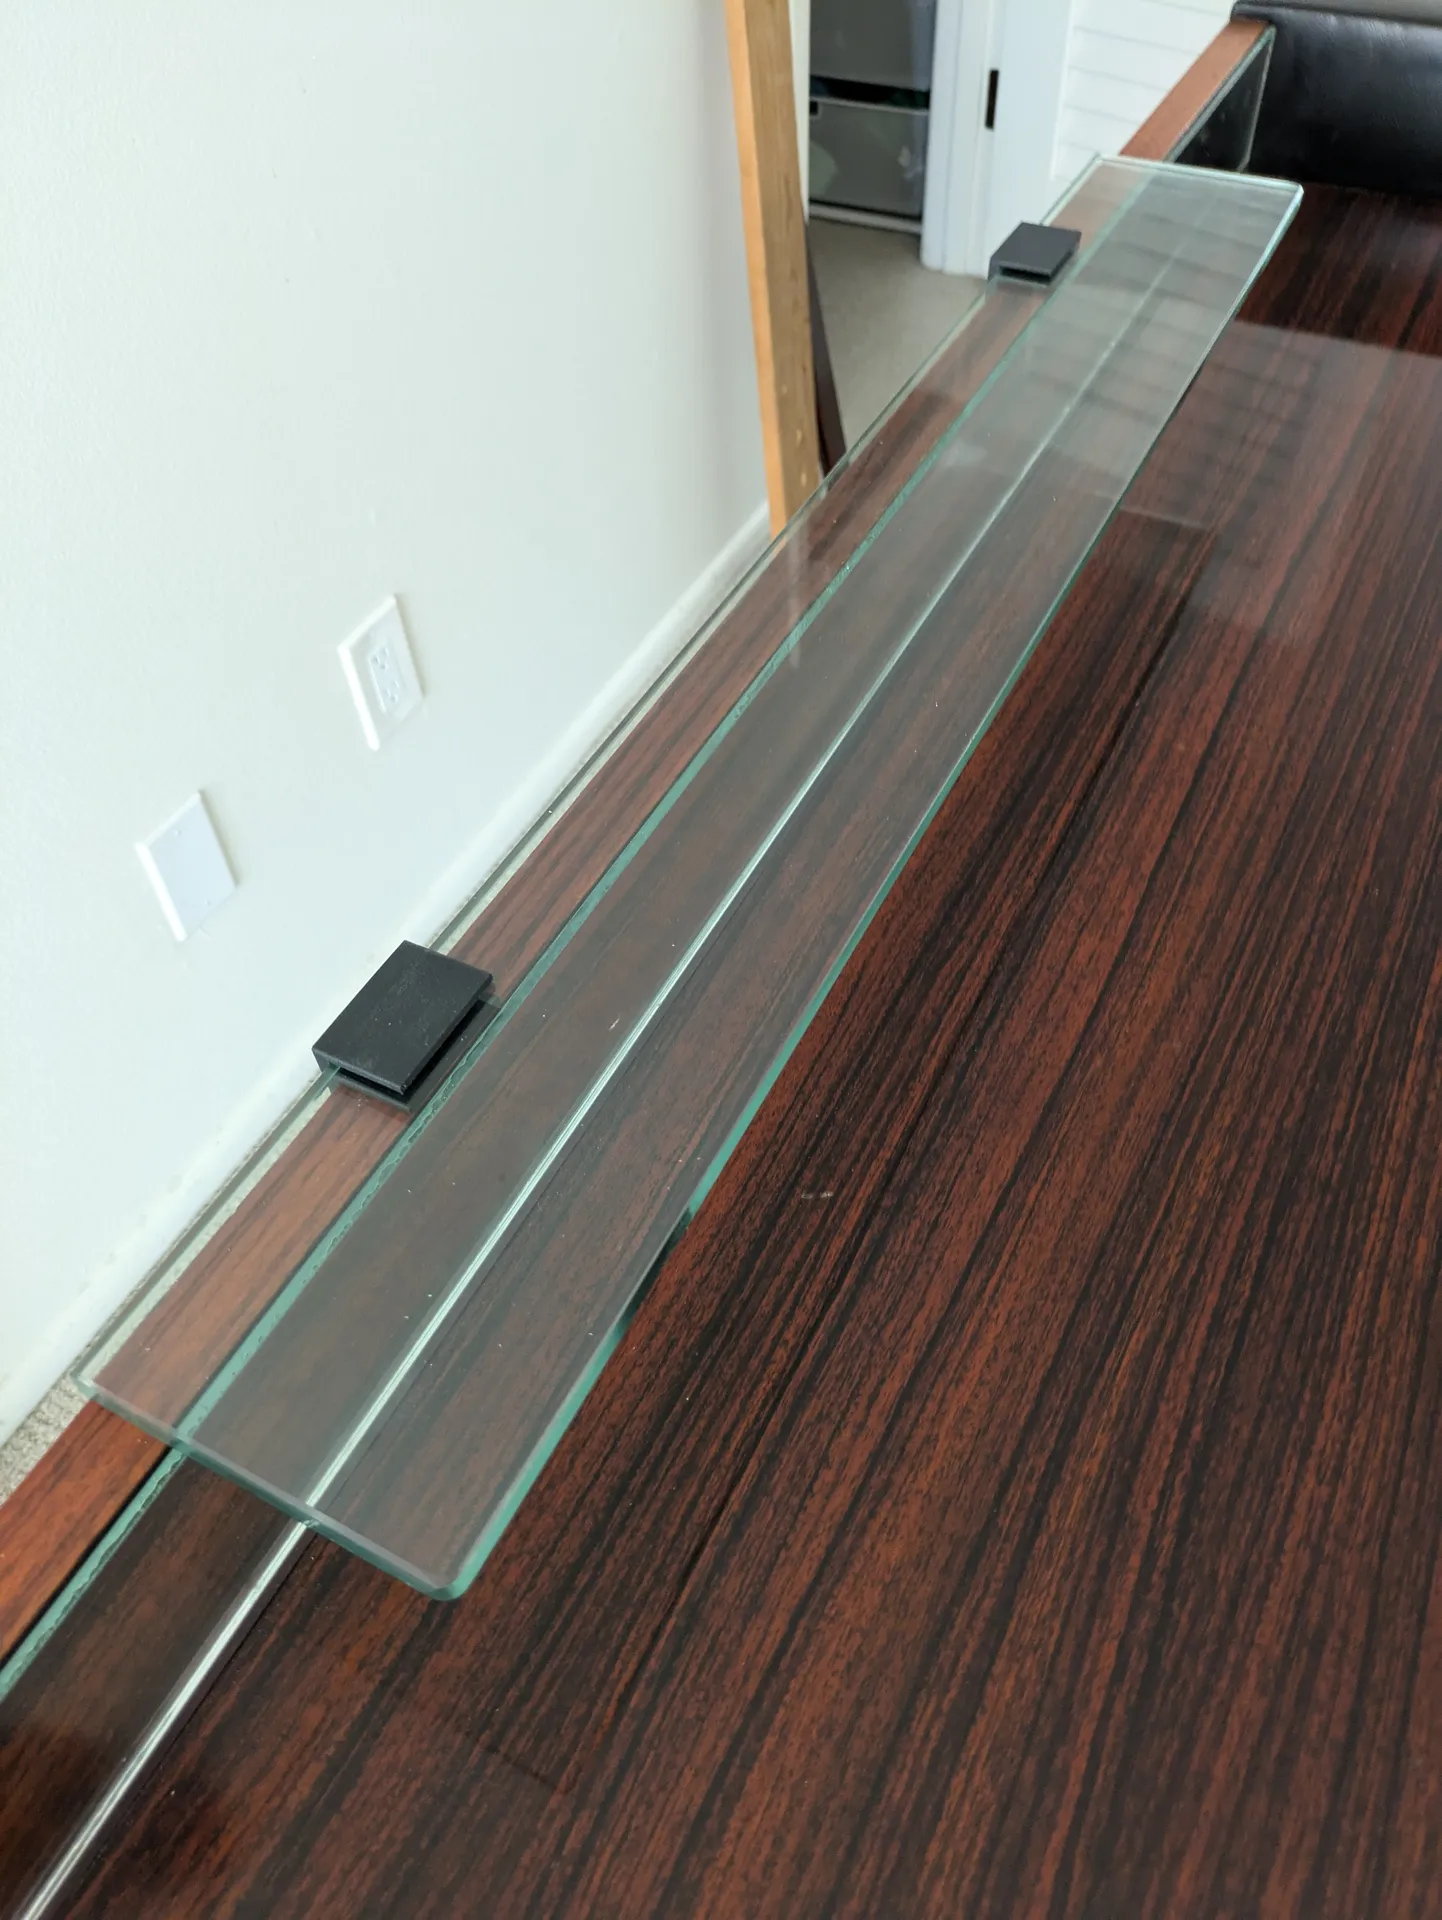
- The glass ‘shelf’ (literally just a piece of tempered glass shoved under the mirror with no bracket) needs to be attached.
- The horizontal slat needs to be remade as it is warped, likely water damage.
- Not easy to see but the mirror is actually also not centered. The slat is off to the side!
The Shelf & Brackets
After looking at options it seemed the best option would be to actually 3d-print brackets out of carbon-fiber reinforced nylon.
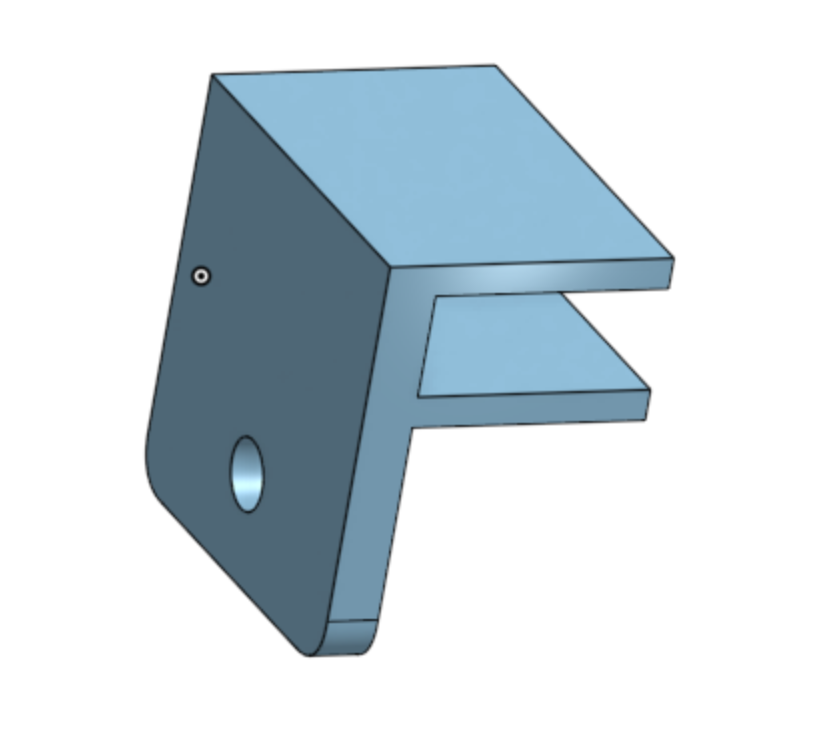
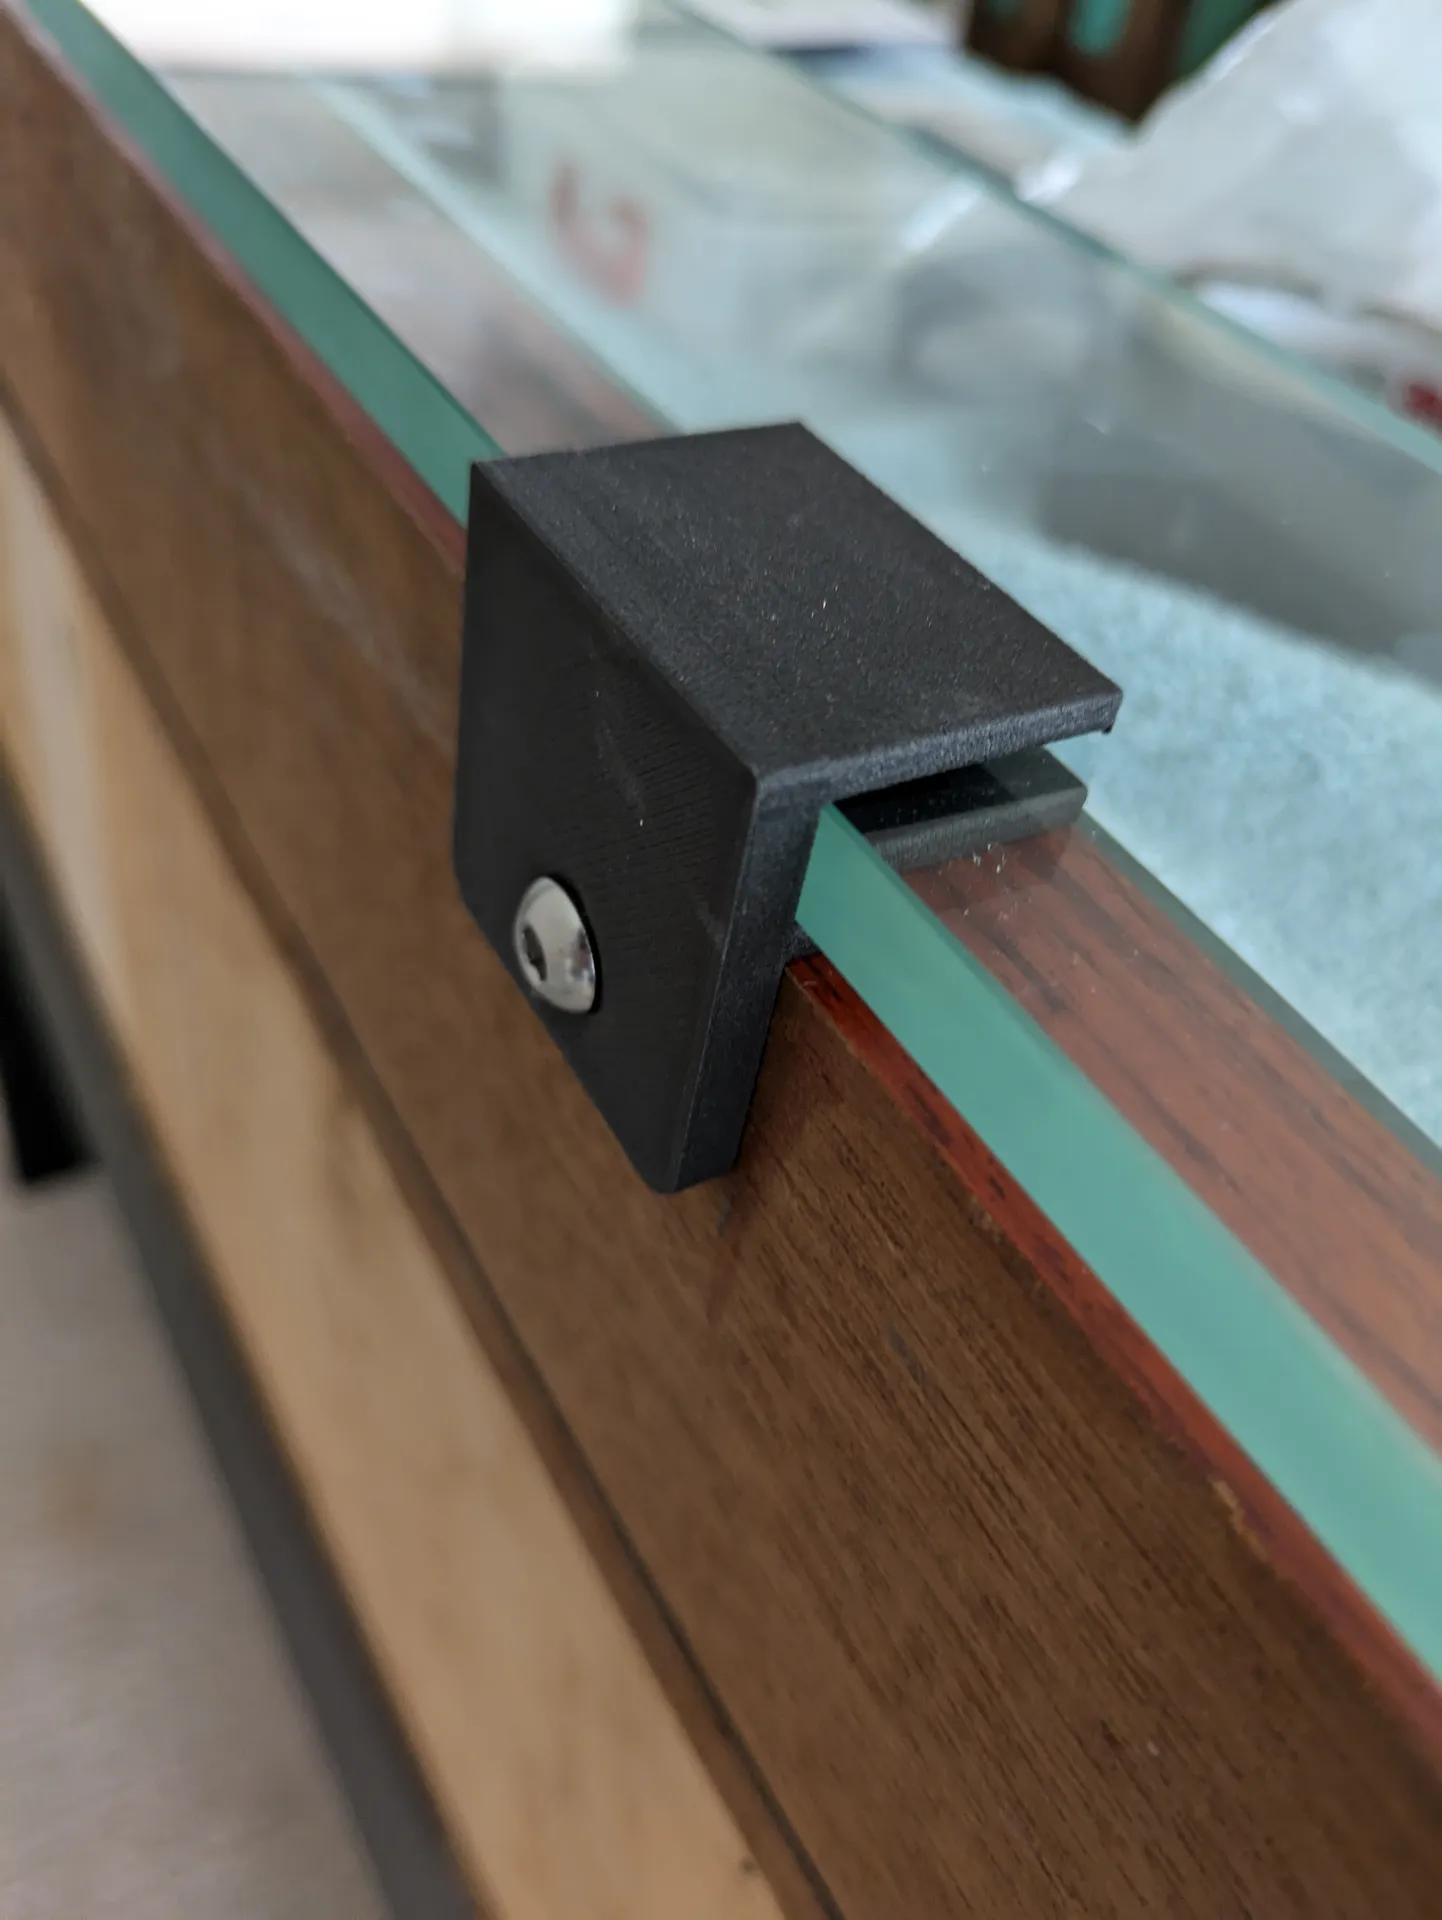
I also used 1/4-20 threaded inserts here, and 5906 tape inside to ensure the glass is well-attached. Due to the low surface energy of glass this does not result in a permanent bond such as with wood & aluminum, but provides sufficient stick that it won’t accidentally slide out.
Rebuilding the Mirror Assembly
I went ahead and remade the horizontal and vertical slats for the mirror. I used the same oak, dado-ed a slot like i did for the aluminum and put it about 1/4″ above the shelf:
I painted the slat, 3d-printed a plastic spacer and added some rubber splicing tape to the top metal bracket to ensure that it had some cushion against the glass.
While this was a lot of work, we are happy with the end result, and its ultimately what we thought we were purchasing. Its a fun, unique piece that is even more unique now. While I’d imagine this style isn’t everyone’s cup of tea, we dig it.
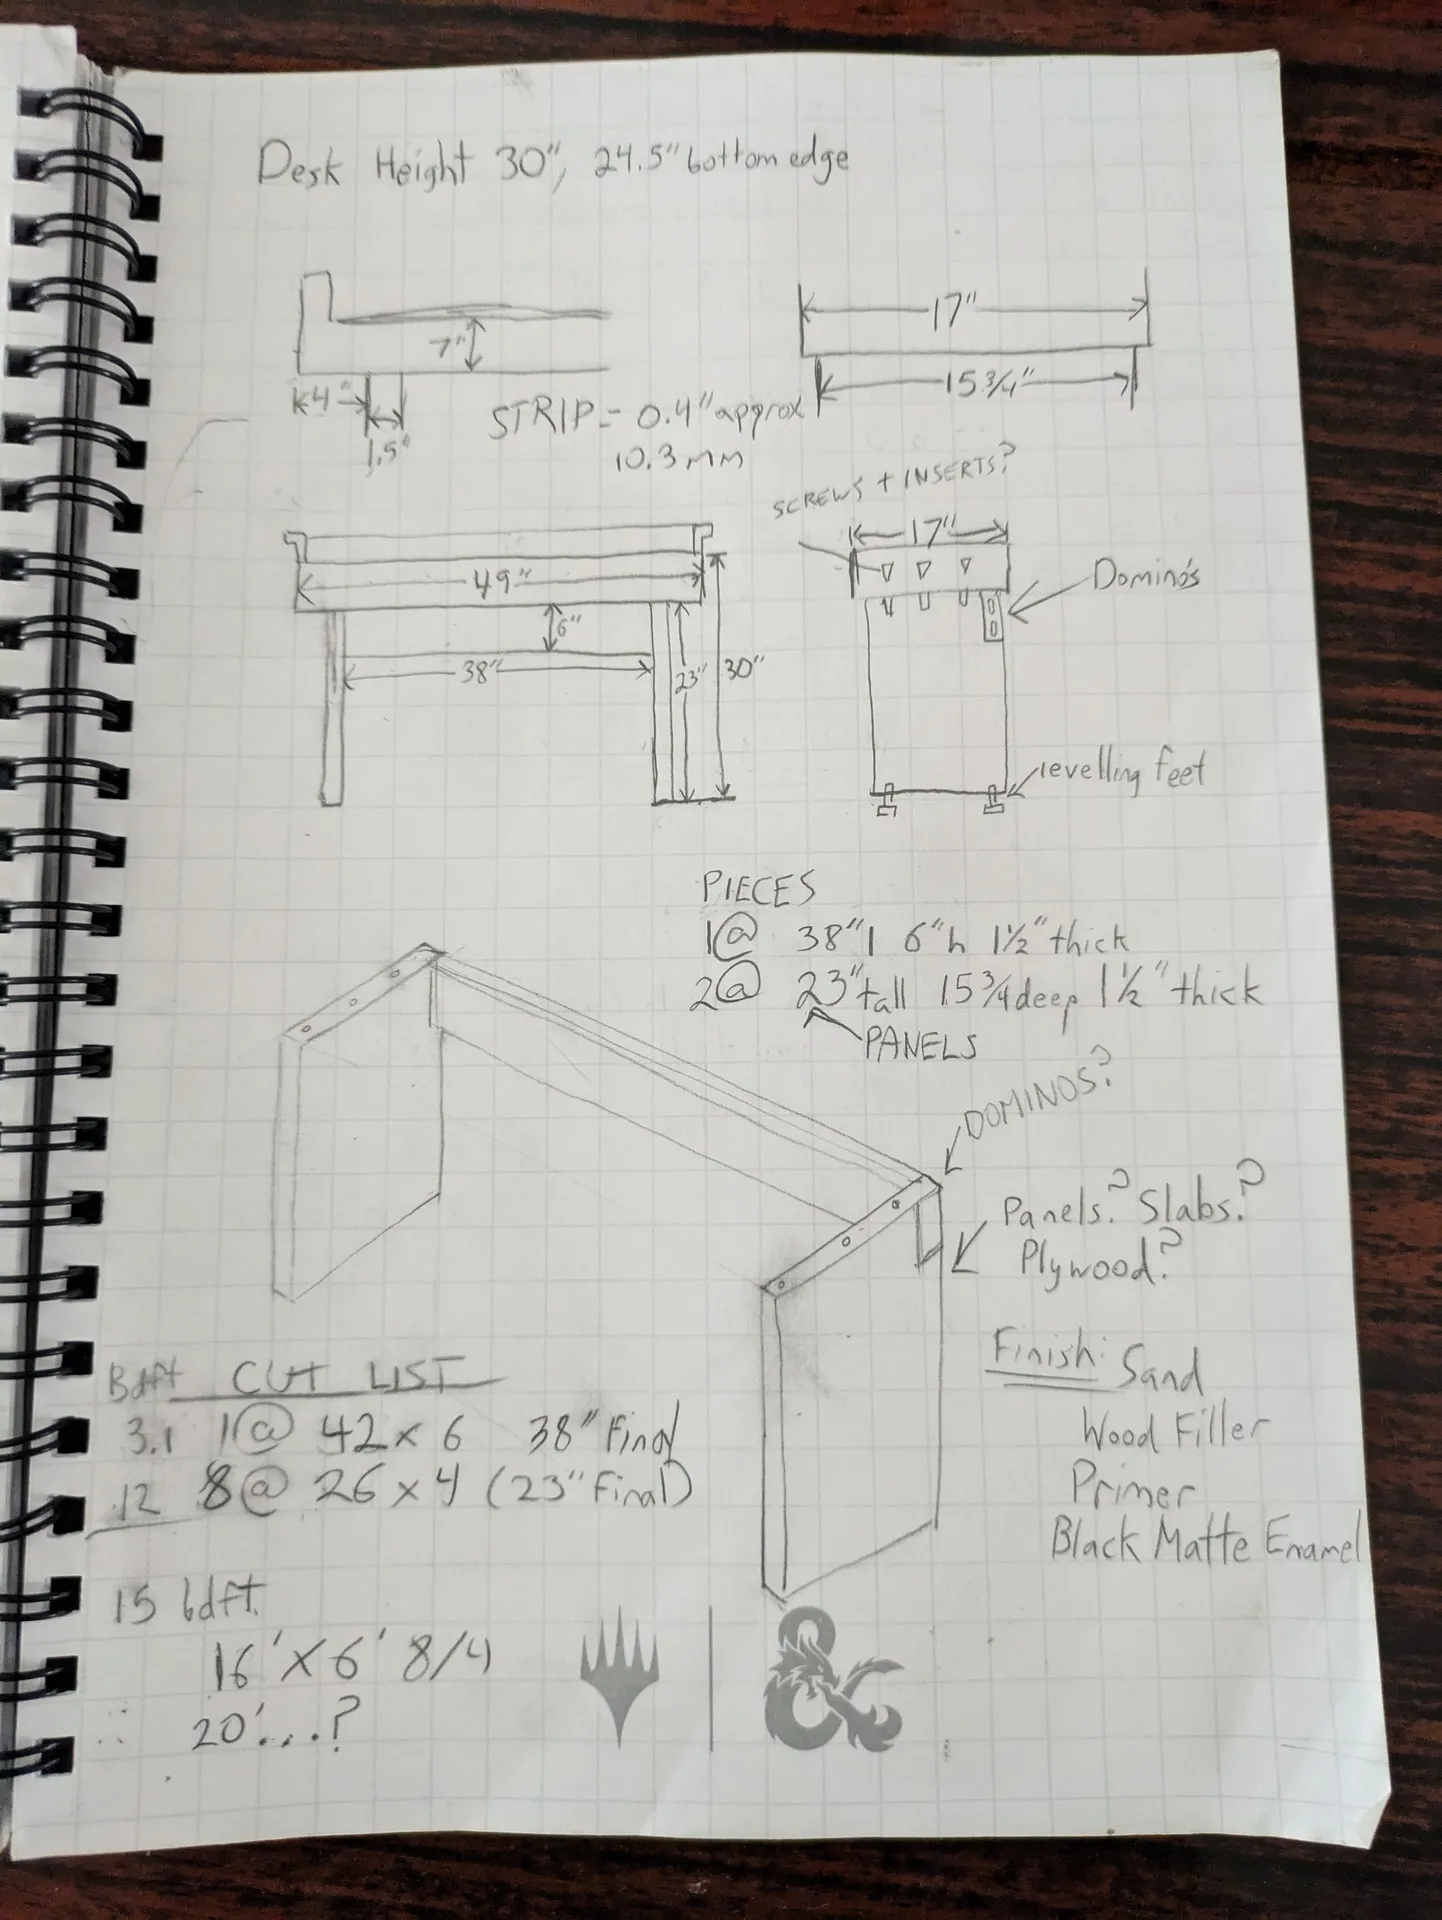
Notes
As part of the process I generally use my project notebook to keep track of measurements and outline some of the possible directions this might go. Sometimes I’m trying to figure out how to best handle attaching pieces together in the most structurally strong and durable way.
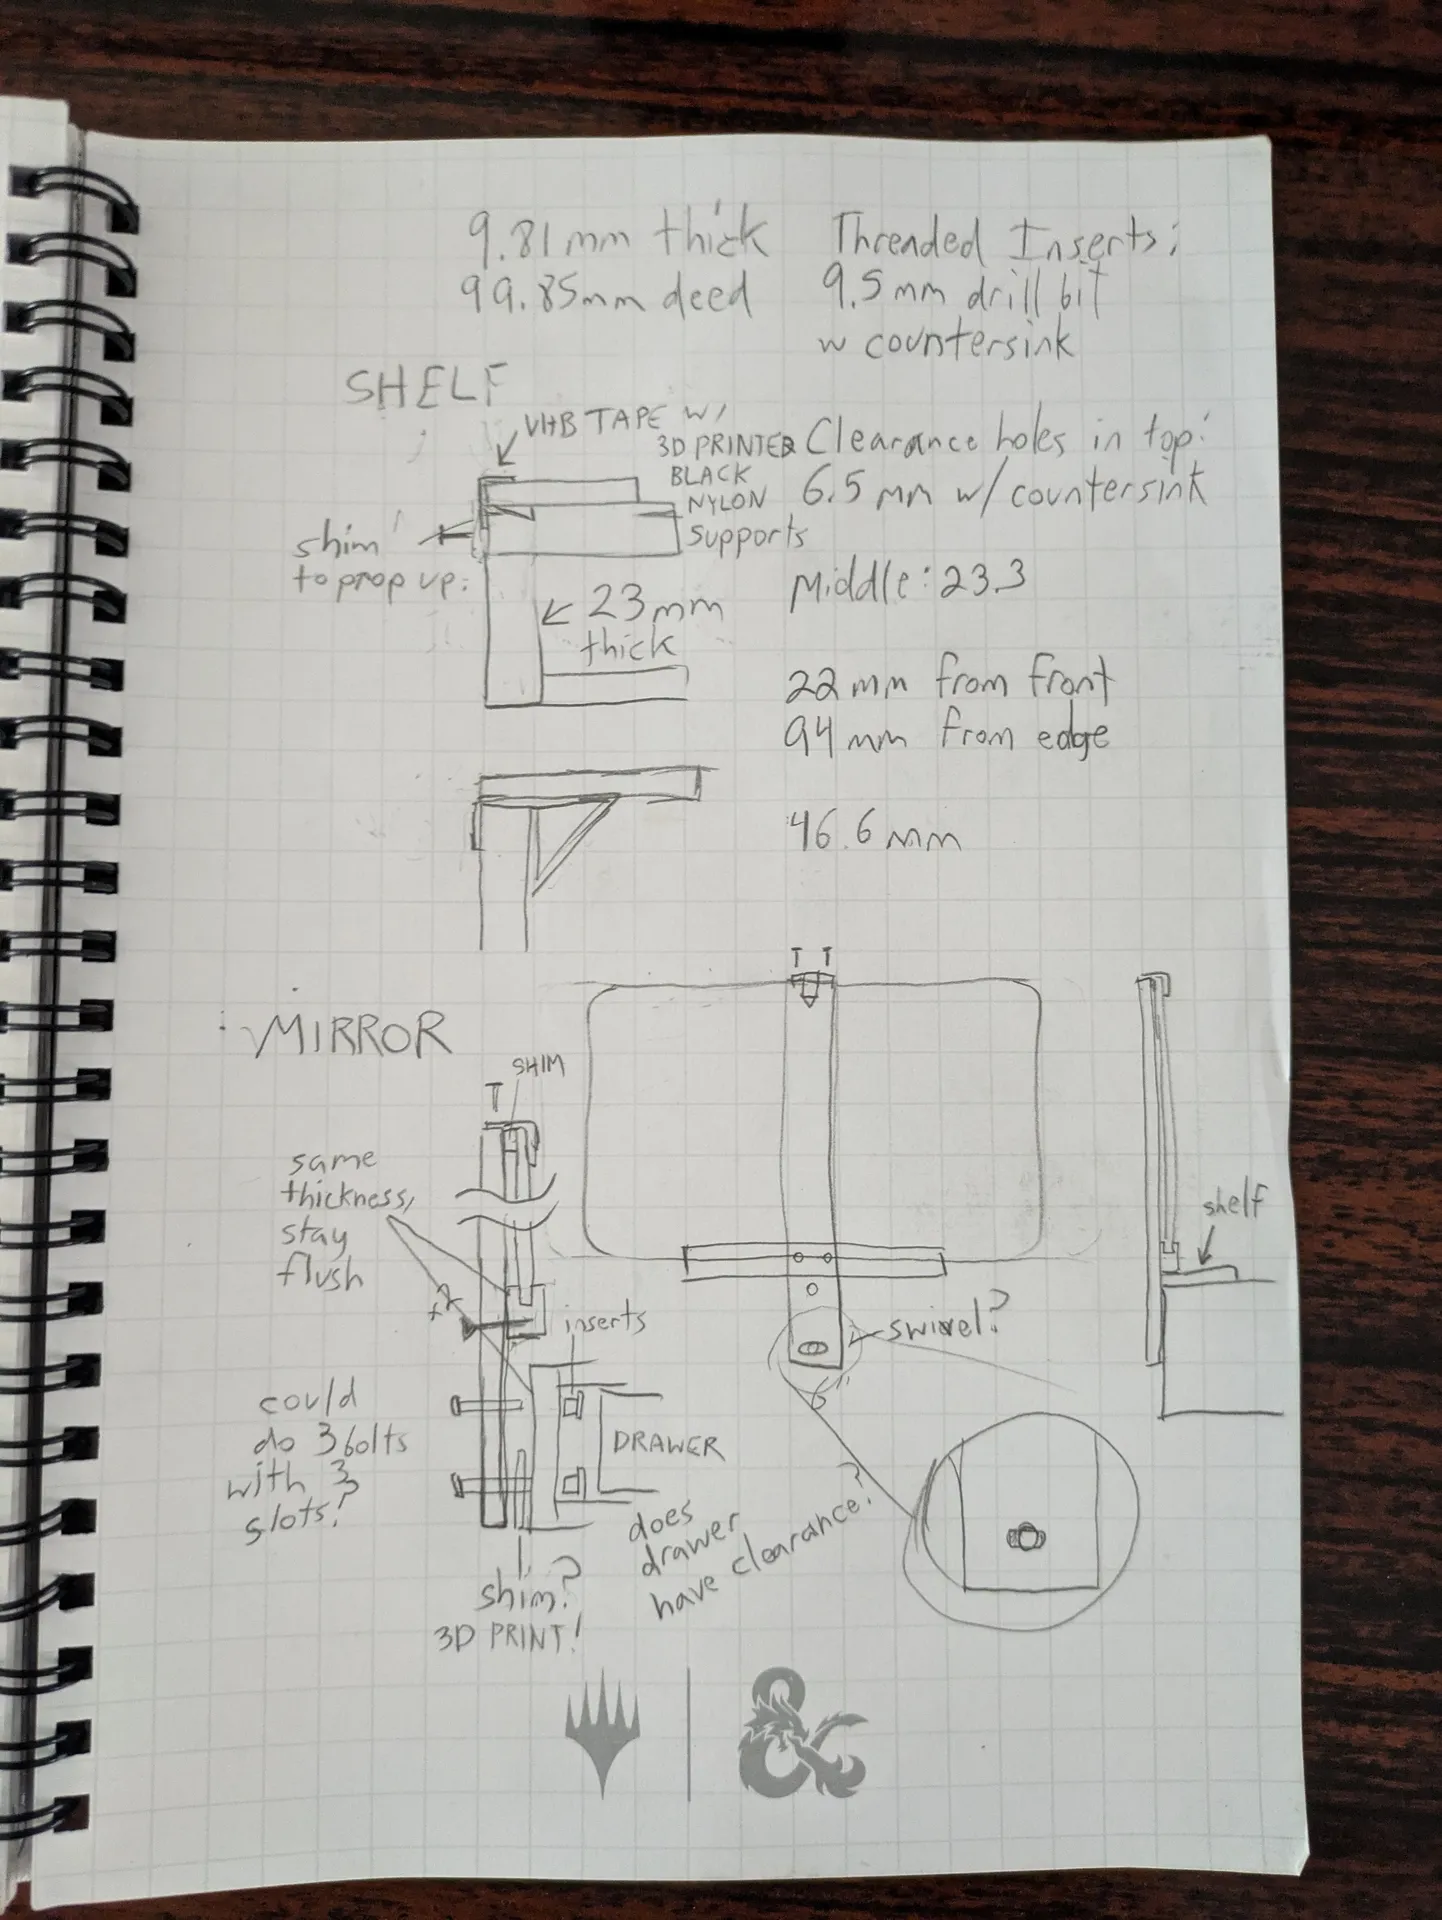
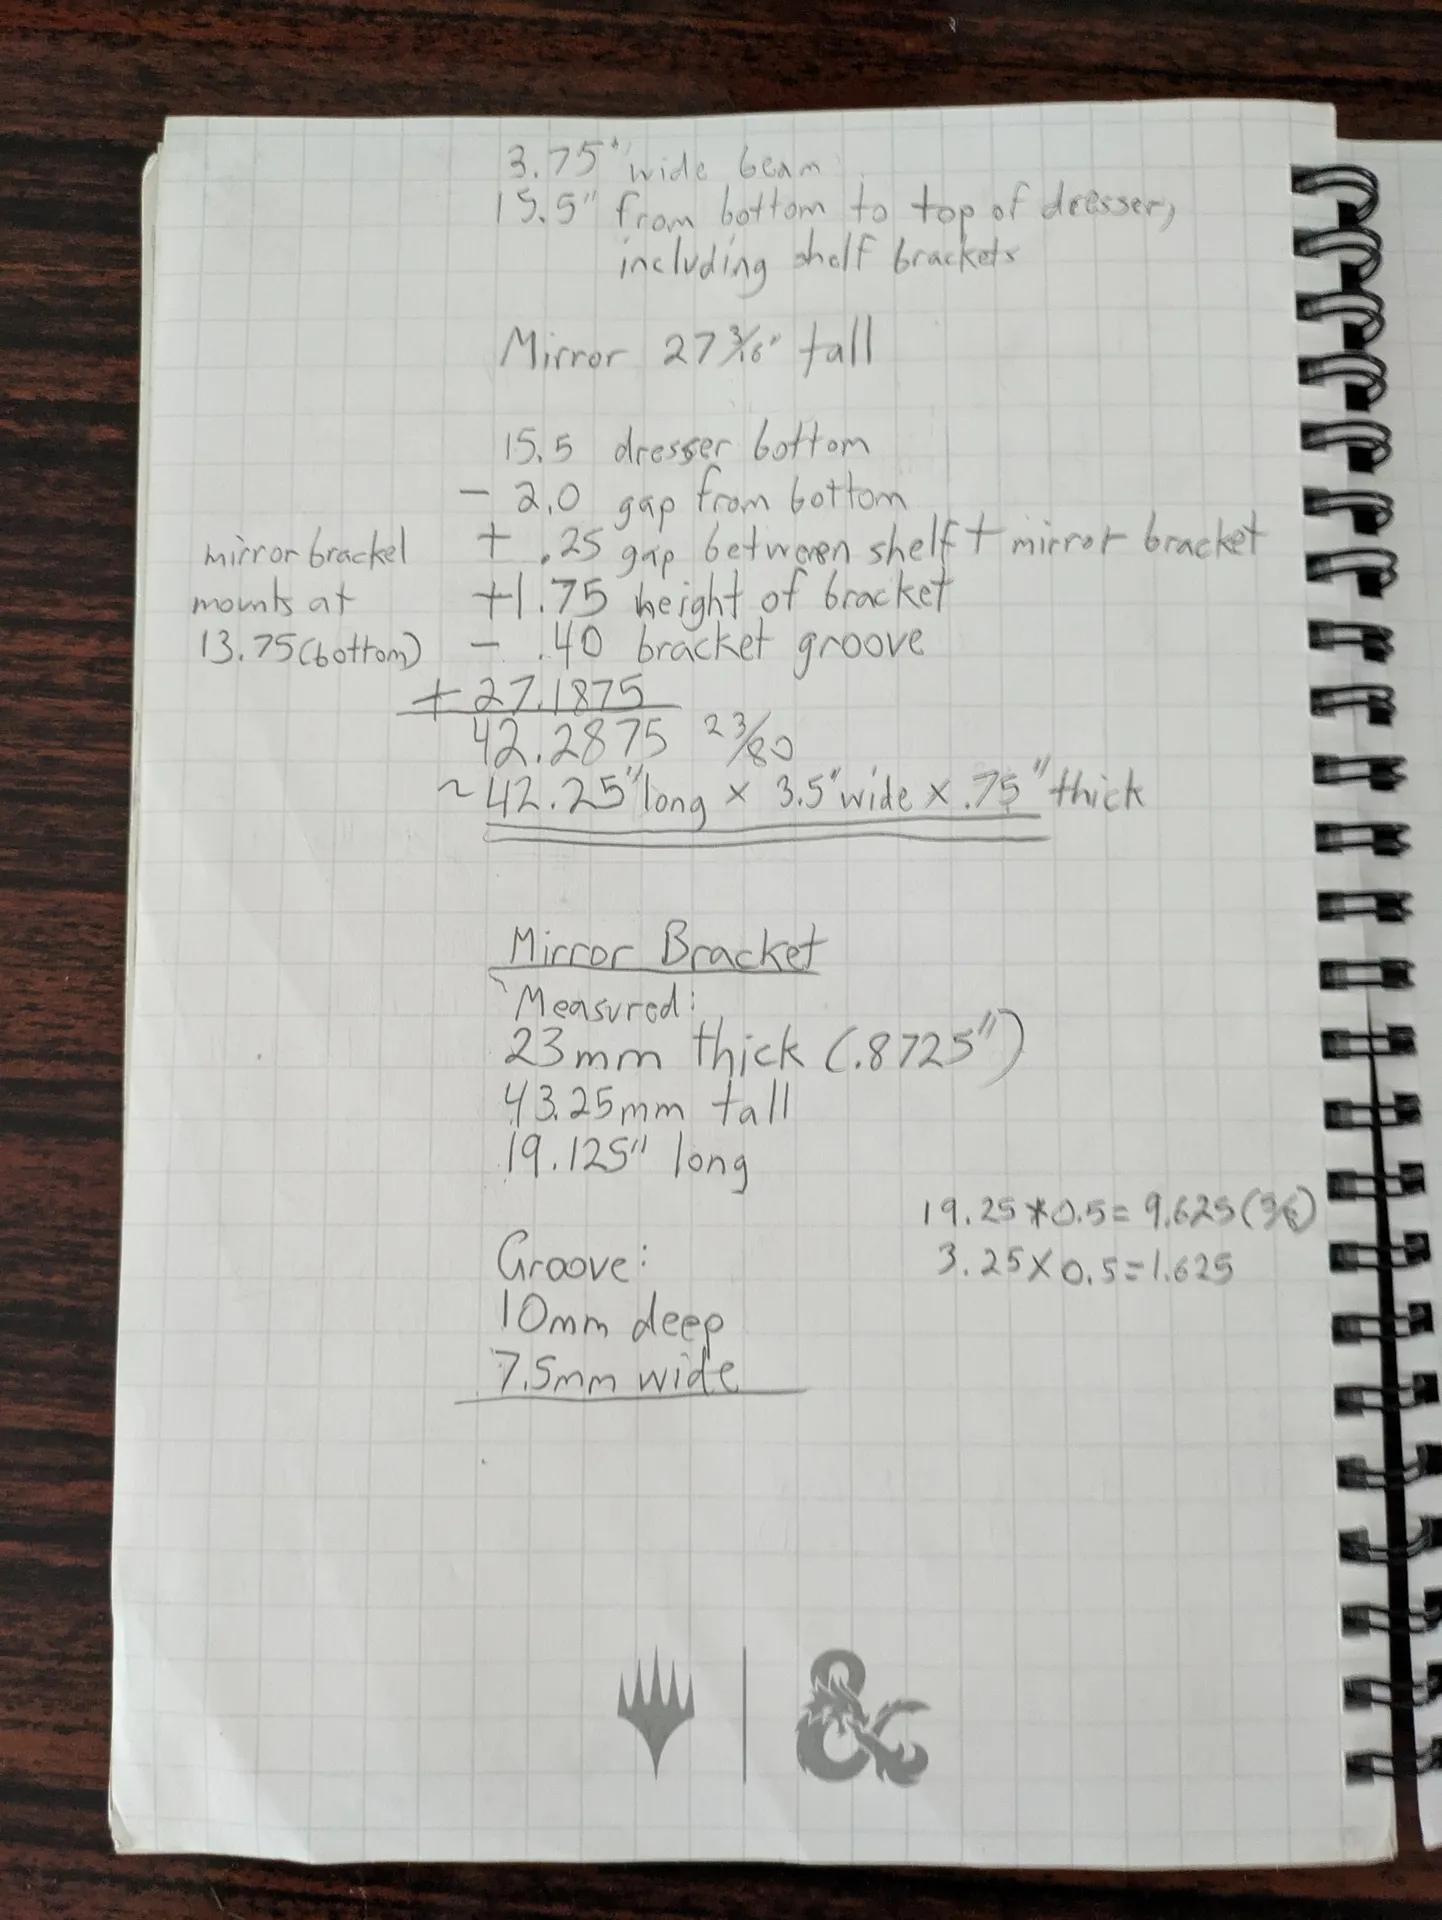
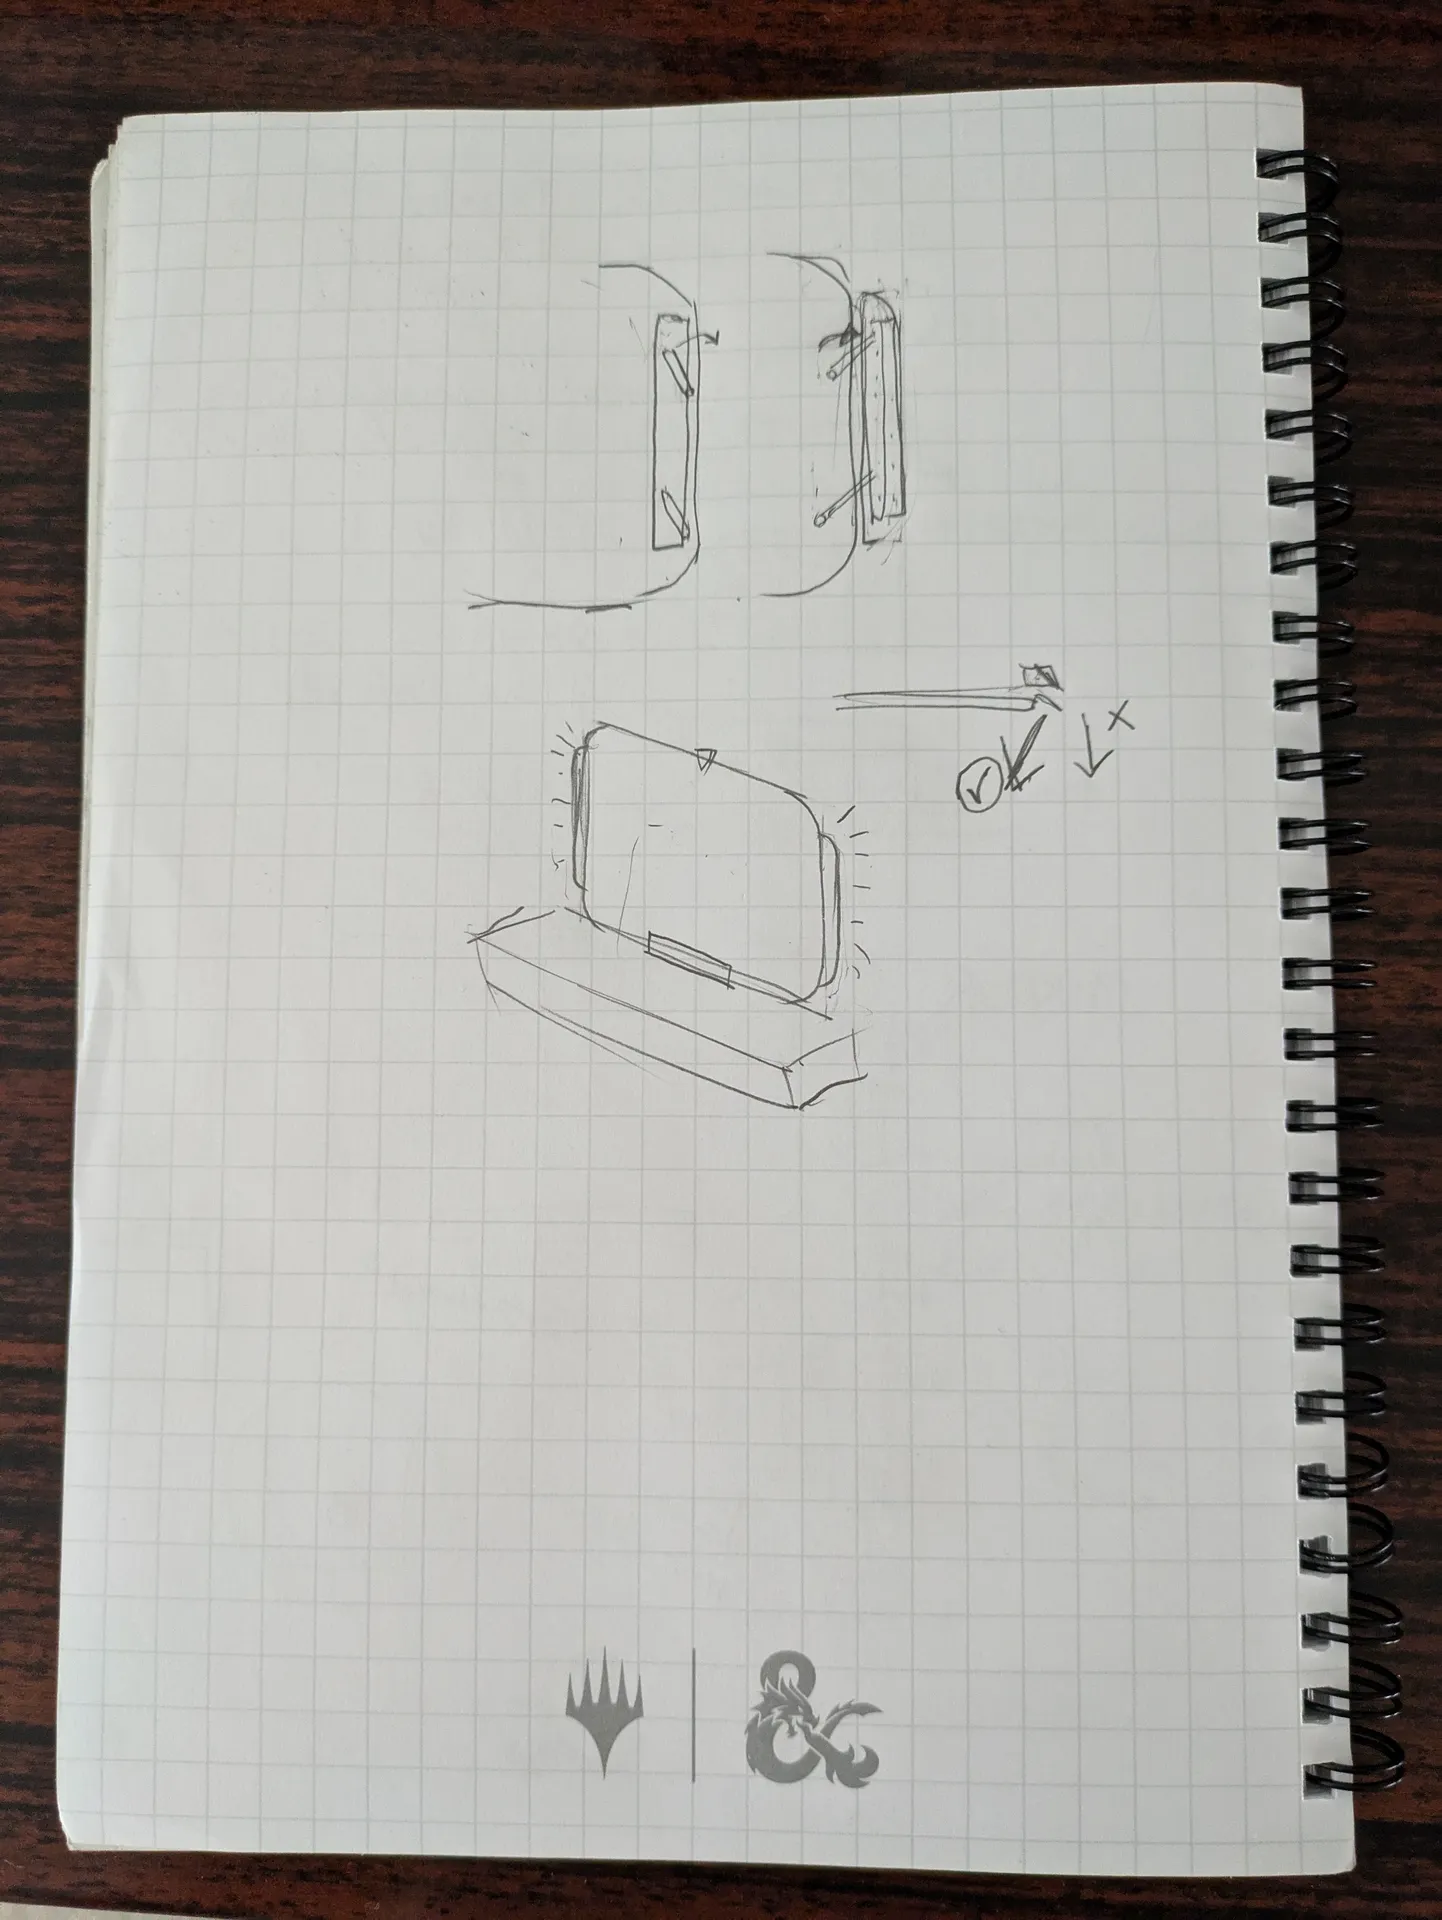
Next Steps
Even though I didn’t intend to purchase a project, I’m glad this had a happy ending. We have some ideas of what might come next. I’m thinking about adding additional lighting behind the mirror (see above sketch), that can be pulled out and automatically turned on. A matching bench might be a great option as well. But right now there are other projects to attend to. Til next time!